Testing Solidity Smart Contracts with Zombienet
In this tutorial, we will demonstrate how to deploy your parachain using Zombienet, and test the functionalities of your parachain.
Below are the main steps of this demo:
- Deploy our parachain against the locally simulated Paseo testnet by Zombienet.
- Deploy a Solidity smart contract on our parachain.
- Successfully invoke the Solidity smart contract deployed on our parachain.
Step 1: Deploy The Parachain
- git clone https://github.com/OpenZeppelin/polkadot-runtime-templates
- move to evm template directory
cd evm-template- replace the content of
zombinet-config/devnet.tomlwith:
[relaychain]
chain = "paseo-local"
default_command = "./bin-v1.6.0/polkadot"

[[relaychain.nodes]]
name = "alice"
validator = true

[[relaychain.nodes]]
name = "bob"
validator = true

[relaychain.genesis.runtimeGenesis.patch.configuration.config.scheduler]
scheduling_lookahead = 2

[relaychain.genesis.runtimeGenesis.patch.configuration.config.inclusion]
max_candidate_depth = 3
allowed_ancestry_len = 2- build the zombienet:
./scripts/zombienet.sh build- if you came across this error (click to expand):
Details
error[E0635]: unknown feature `stdsimd`
    --> /Users/ozgunozerk/.cargo/registry/src/index.crates.io-6f17d22bba15001f/ahash-0.7.6/src/lib.rs:33:42
    |
33 | #![cfg_attr(feature = "stdsimd", feature(stdsimd))]
Cd into the polkadot-sdk directory (the path should be visible on the error message), and run the below command to update ahash:
cargo update -p [email protected]- or if you came across this error (click to expand):
Details
assertion failed [block != nullptr]: BasicBlock requested for unrecognized addressjust re-run 🙂
-
run the zombinet:
./scripts/zombienet.sh devnet -
build it with
async-backingfeature:cargo build --release --features="async-backing" -
copy the
Direct LinkfromAlice'stab from Zombienet TUI:
-
Open the link with Chrome: PolkadotJS. As of 2024 July, it doesn't work on Safari and Brave, and it is buggy on Firefox.
-
Reserve a
ParaIdon Zombienet:- Go to
Network>Parachains - Go to
Parathreadstab - Click the
+ ParaIdbutton - Save a
parachain idfor the further usage. - Click
SubmitandSign and Submit(you can useAliceas the account).
- Go to
-
Preparing necessary files to become a Parachain:
-
Generate a plain chainspec:
./target/release/evm-template-node build-spec --disable-default-bootnode > plain-parachain-chainspec.json -
Edit the chainspec:
- Update
name,idandprotocolIdto unique values (optional). - Change
para_idandparachainInfo.parachainIdfrom1000to the previously saved parachain id (probably 2000 if that's your first time ;) ). - Edit the
evmChainId.chainIdto the value of your choice. Try to select a value that has no existing EVM chain assigned to it (should be ok to leave as is for the most cases).
- Update
-
Generate a raw chainspec:
./target/release/evm-template-node build-spec --chain plain-parachain-chainspec.json --disable-default-bootnode --raw > raw-parachain-chainspec.json -
Generate the genesis state:
./target/release/evm-template-node export-genesis-state --chain raw-parachain-chainspec.json > genesis-state -
Generate the validation code:
./target/release/evm-template-node export-genesis-wasm --chain raw-parachain-chainspec.json > genesis-wasm
-
-
Registering the Parachain:
-
Go back to
polkadot.js.org/apps(remember Chrome). Go toDeveloper/Sudo. -
select
pasasSudoWrapperandsudoScheduleParaInitialize(id, genesis) -
enter the reserved id (2000) to
idfield -
enable
file uploadfor bothgenesisHeadandvalidationCode→ because we will upload files for these. -
select
YesforparaKind→ meaning when we register our parachain, it will be a parachain rather than a parathread. -
drag&drop your
genesis-statefile generated in step10.dintogenesisHeadfield (good luck with the aiming) -
drag&drop your
genesis-wasmfile generated in10.eintovalidationCodefield -
It should look like below:
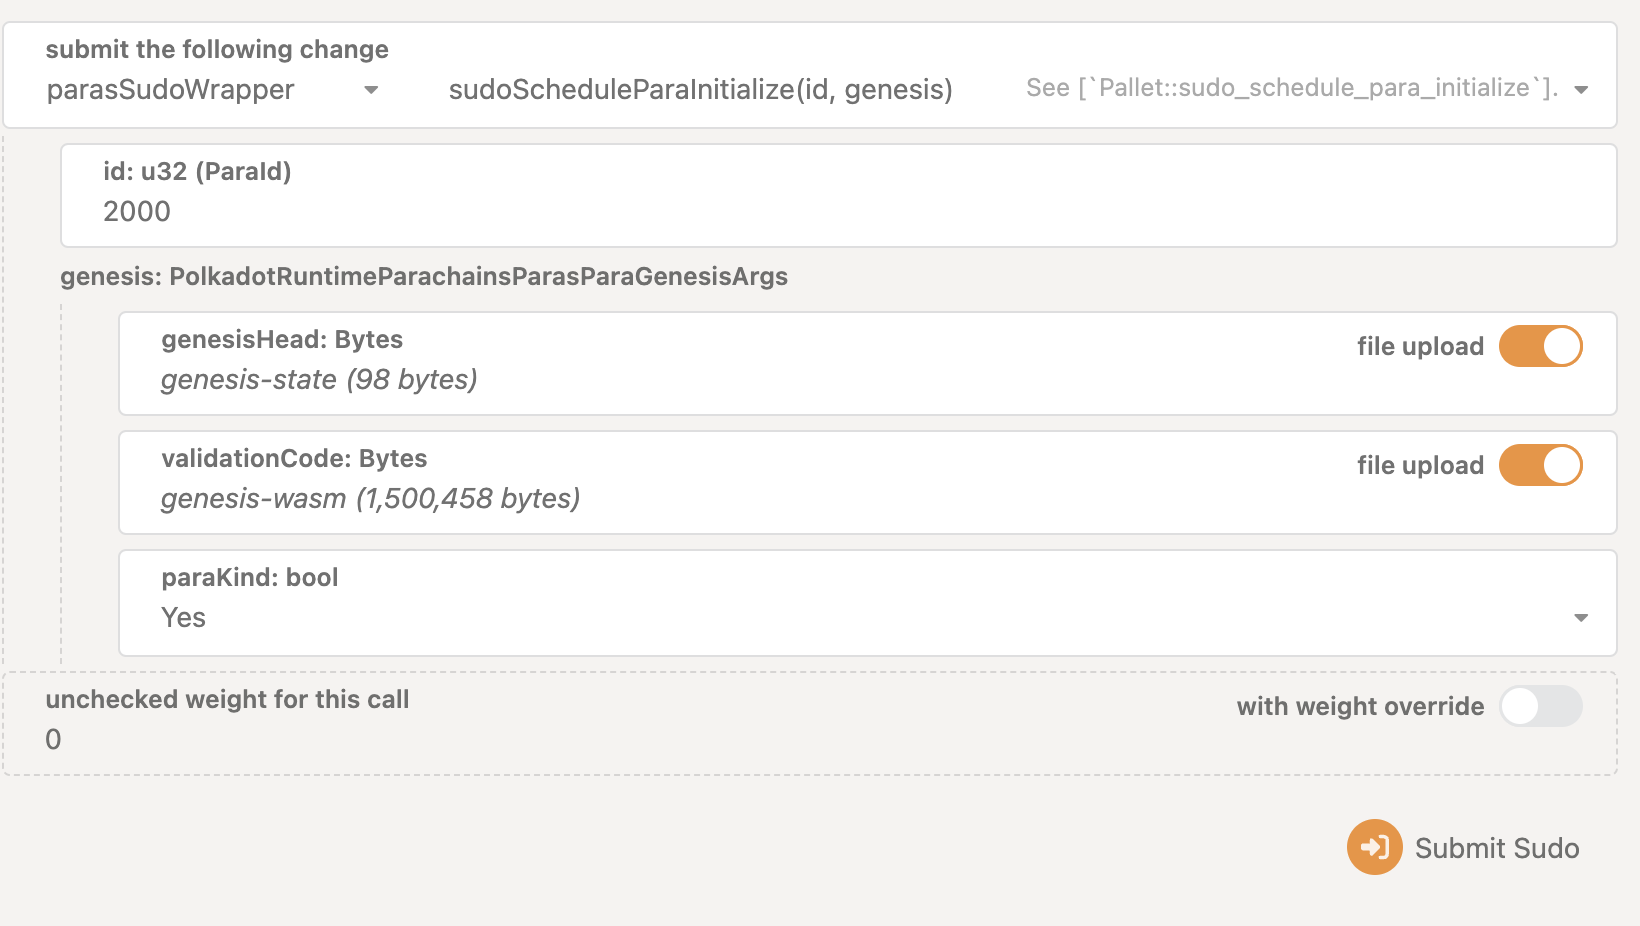
-
Submit Sudo!
-
-
copy the path to
chain-specfrom zombienet terminal fromBob(beware, this file is changing every time you spin up a new zombienet):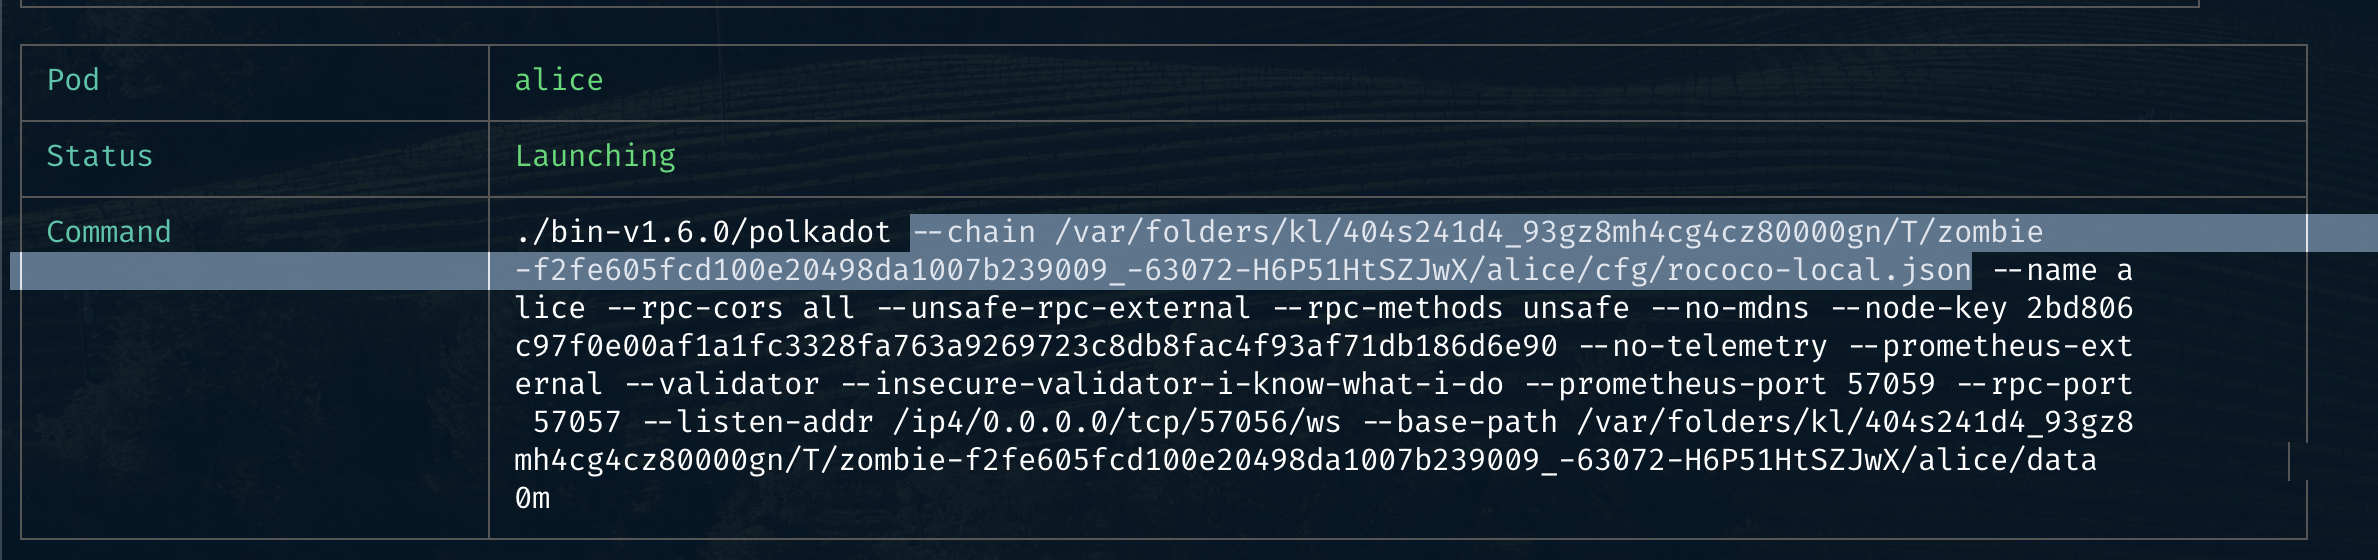
-
run the node, and provide the
chain-specyou copied from the last step into--chainpart:-
be sure to clear your storage if you were running a node before
./target/release/evm-template-node \
    --alice \
    --collator \
    --force-authoring \
    --chain raw-parachain-chainspec.json \
    --base-path storage/alice \
    --port 40333 \
    --rpc-port 8844 \
    -- \
    --execution wasm \
    --chain /var/folders/...redacted.../paseo-local.json \
    --port 30343 \
    --rpc-port 9977
-
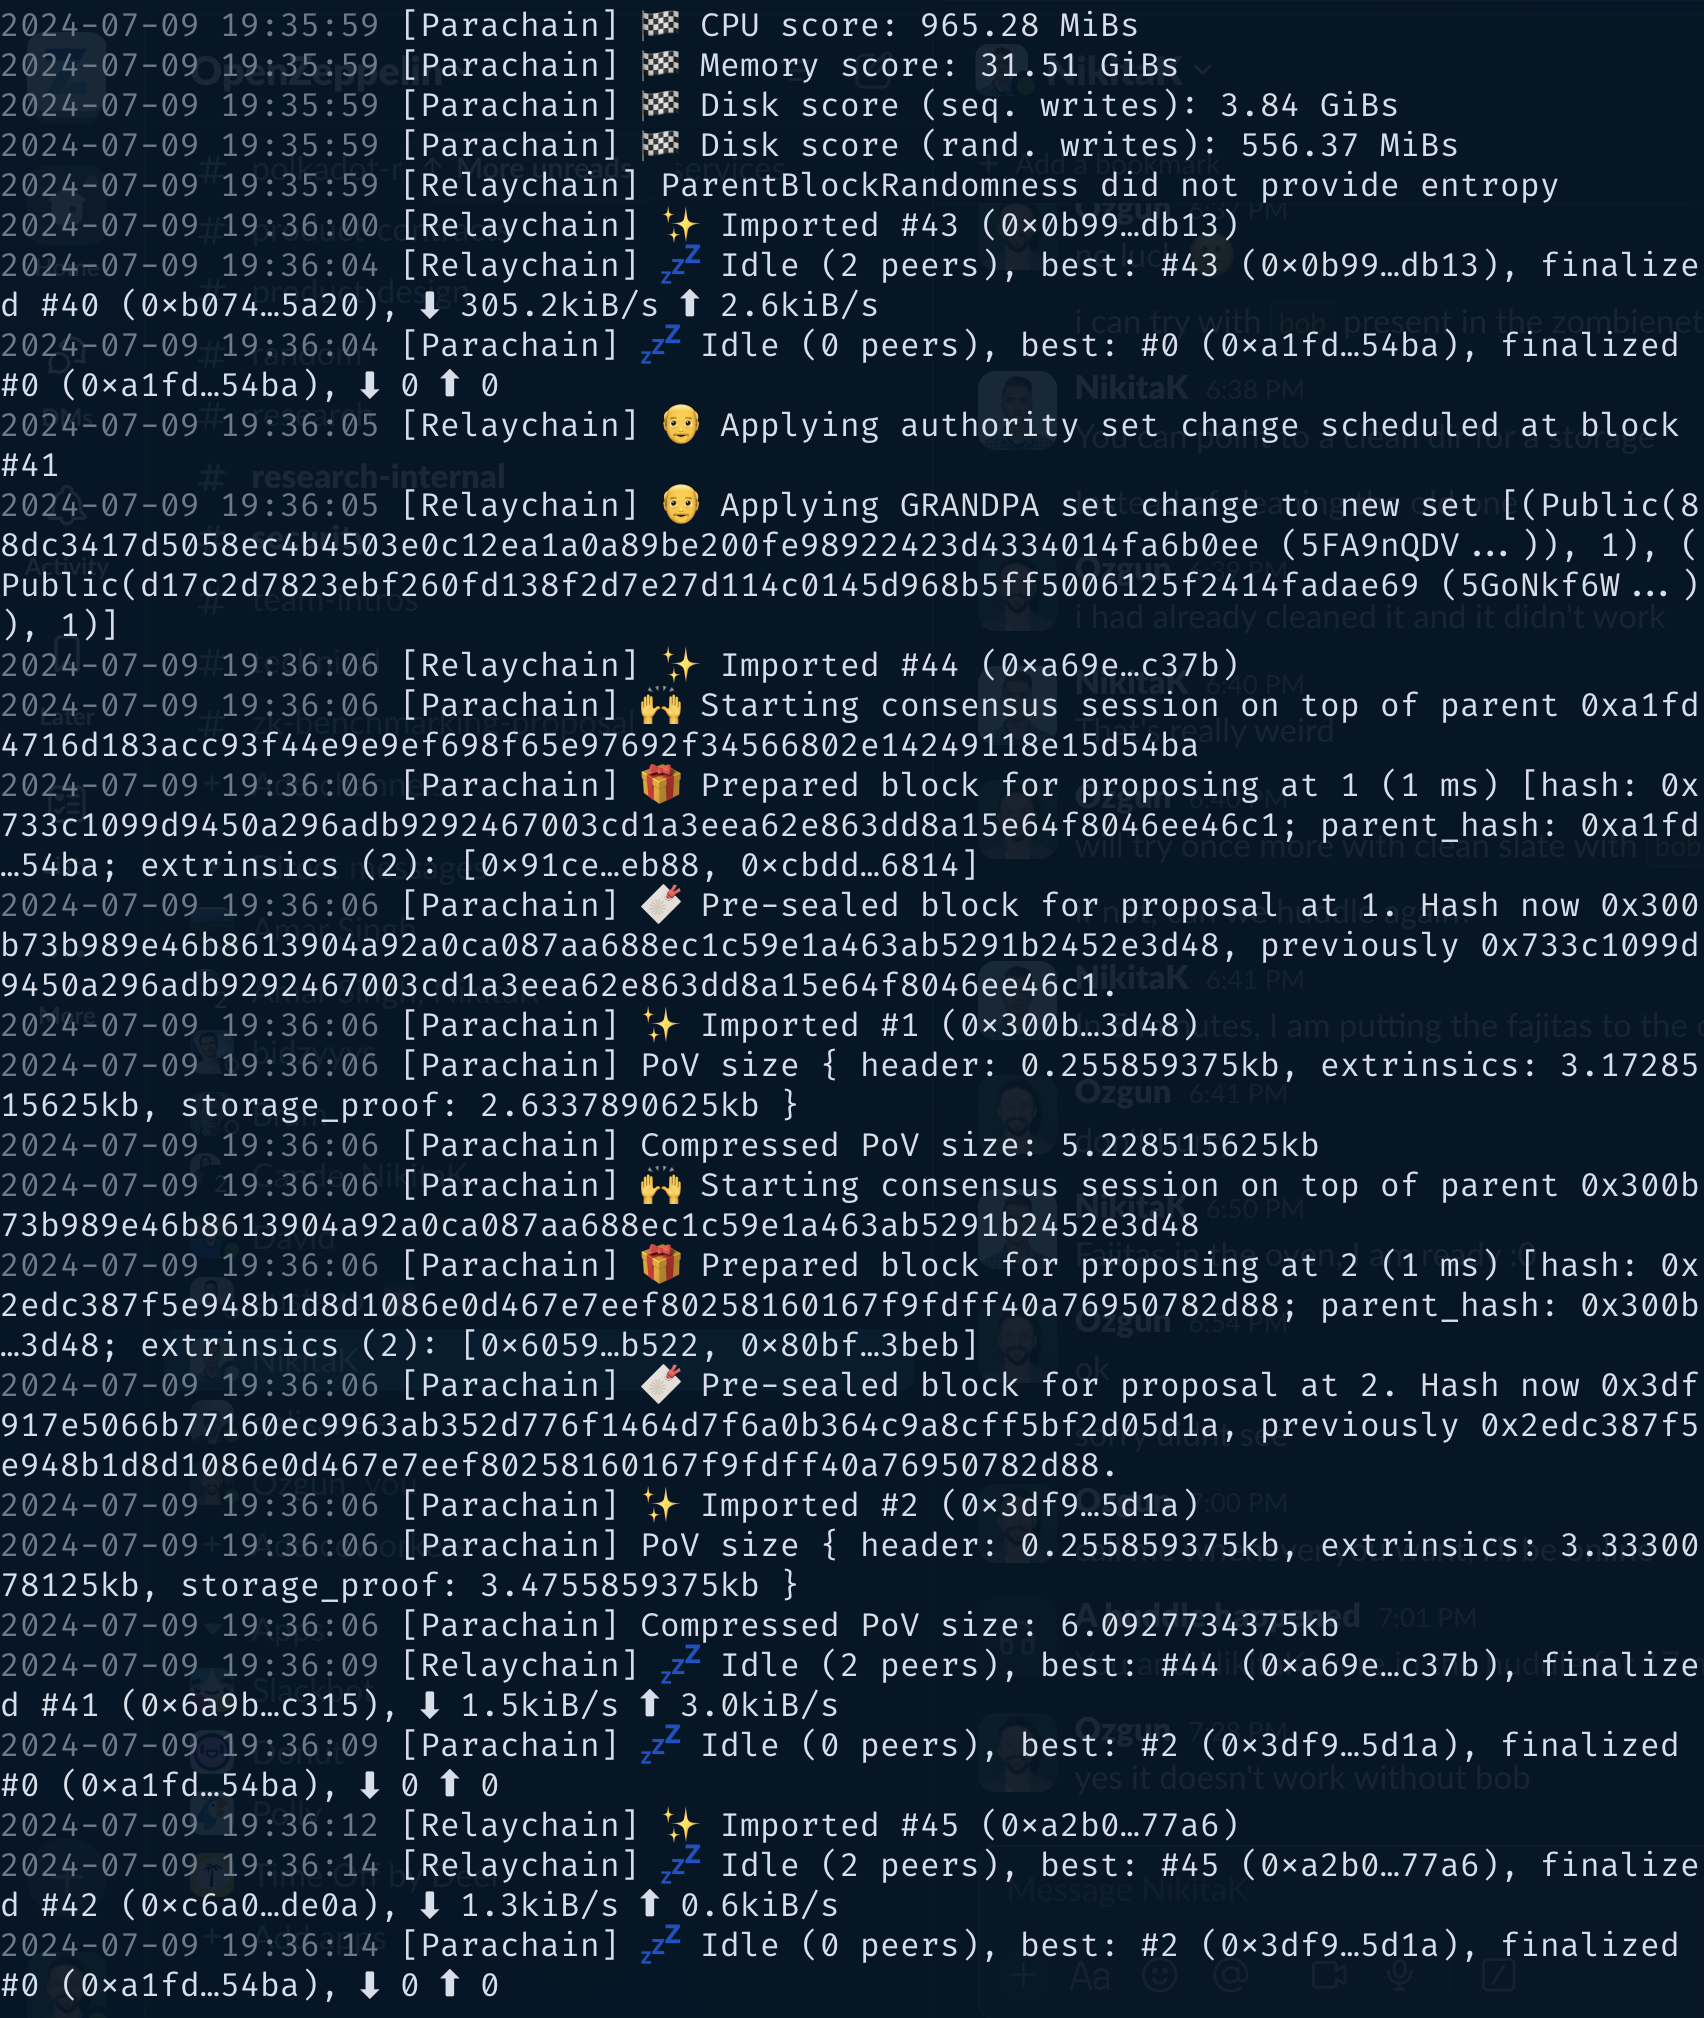
-
your node should be running without any problem, and should see block production in your node terminal!
Step 2: Deploy a Solidity Smart Contract
-
Install Foundry with:
curl -L https://foundry.paradigm.xyz | bash -
have a smart contract file ready, any smart contract of your choice! We will go with a cute
HelloWorld.solsmart contract for this tutorial:pragma solidity ^0.8.0; contract HelloWorld { string public greeting = "Hello, World!"; function getGreeting() public view returns (string memory) { return greeting; } } -
Create a new javascript project with the below files:
-
package.json:{ "name": "ts-wallet", "version": "1.0.0", "description": "", "main": "index.js", "type": "module", "scripts": { "exec": "node index.js", "test": "echo \"Error: no test specified\" && exit 1" }, "author": "", "license": "ISC", "dependencies": { "web3": "^4.8.0" } } -
sanity_check.js:import { Web3 } from "web3"; const web3 = new Web3("ws://127.0.0.1:8844"); console.log("Balance:"); web3.eth.getBalance("0xf24FF3a9CF04c71Dbc94D0b566f7A27B94566cac").then(console.log); let raw = await web3.eth.accounts.signTransaction({ gas: 21000, gasPrice: 10000000000, from: "0xf24FF3a9CF04c71Dbc94D0b566f7A27B94566cac", // Alith's address to: "0x7c98a1801f0B28dF559bCd828fc67Bd6ab558074", // Baltathar's address value: '100000000000000000' }, "0x5fb92d6e98884f76de468fa3f6278f8807c48bebc13595d45af5bdc4da702133"); // Alith's private key let res = await web3.eth.sendSignedTransaction(raw.rawTransaction); console.log("Transaction details:"); console.log(res); -
invoke_smart_contract.js:import { Web3 } from "web3"; import { MyAbi } from "./abi.js"; const web3 = new Web3("ws://127.0.0.1:8844"); let contract = new web3.eth.Contract(MyAbi, "0x4045F03B68919da2c440F023Fd7cE2982BfD3C03"); let s = await contract.methods.getGreeting().call(); console.log(s); -
abi.js:export var MyAbi = [ { "type": "function", "name": "getGreeting", "inputs": [], "outputs": [ { "name": "", "type": "string", "internalType": "string" } ], "stateMutability": "view" }, { "type": "function", "name": "greeting", "inputs": [], "outputs": [ { "name": "", "type": "string", "internalType": "string" } ], "stateMutability": "view" } ];
-
-
run the below command, and you should see the balance, and then the transaction details printed, proving everything works so far!
node sanity_check.js -
open a terminal instance where the current directory has the
HelloWorld.solfile, and run the below command to deploy the contract with Alith's private key:forge create --rpc-url http://localhost:9933 --private-key 0x5fb92d6e98884f76de468fa3f6278f8807c48bebc13595d45af5bdc4da702133 HelloWorld.sol:HelloWorld- don't forget to copy the address this contract deployed to (shown in the output of the command)!
Step 3: Invoke The Solidity Smart Contract
-
replace the contract address in
invoke_smart_contract.jswith the address you copied! -
build the
abiof the smart contract with:forge build --silent && jq '.abi' ./out/HelloWorld.sol/HelloWorld.json -
Surprise! We already give you the abi of this in
abi.jsfile in step 2. If you used another contract thanHelloWorld, replace thatabi.jsfile's content with your contractsabi. -
run the below command, and you should see your smart contract in action:
node invoke_smart_contract.js