Fireblocks integration within Defender
You can directly submit transactions to Fireblocks from Defender. Fireblocks is a robust asset management solution that utilizes multi-party computation to secure all treasury operations, ensuring enhanced security and efficiency.
Pre-requisites
- If you want leverage Fireblocks within Defender you can contact the OZ team to enable to Fireblocks integration for your account.
1. Generate CSR file
-
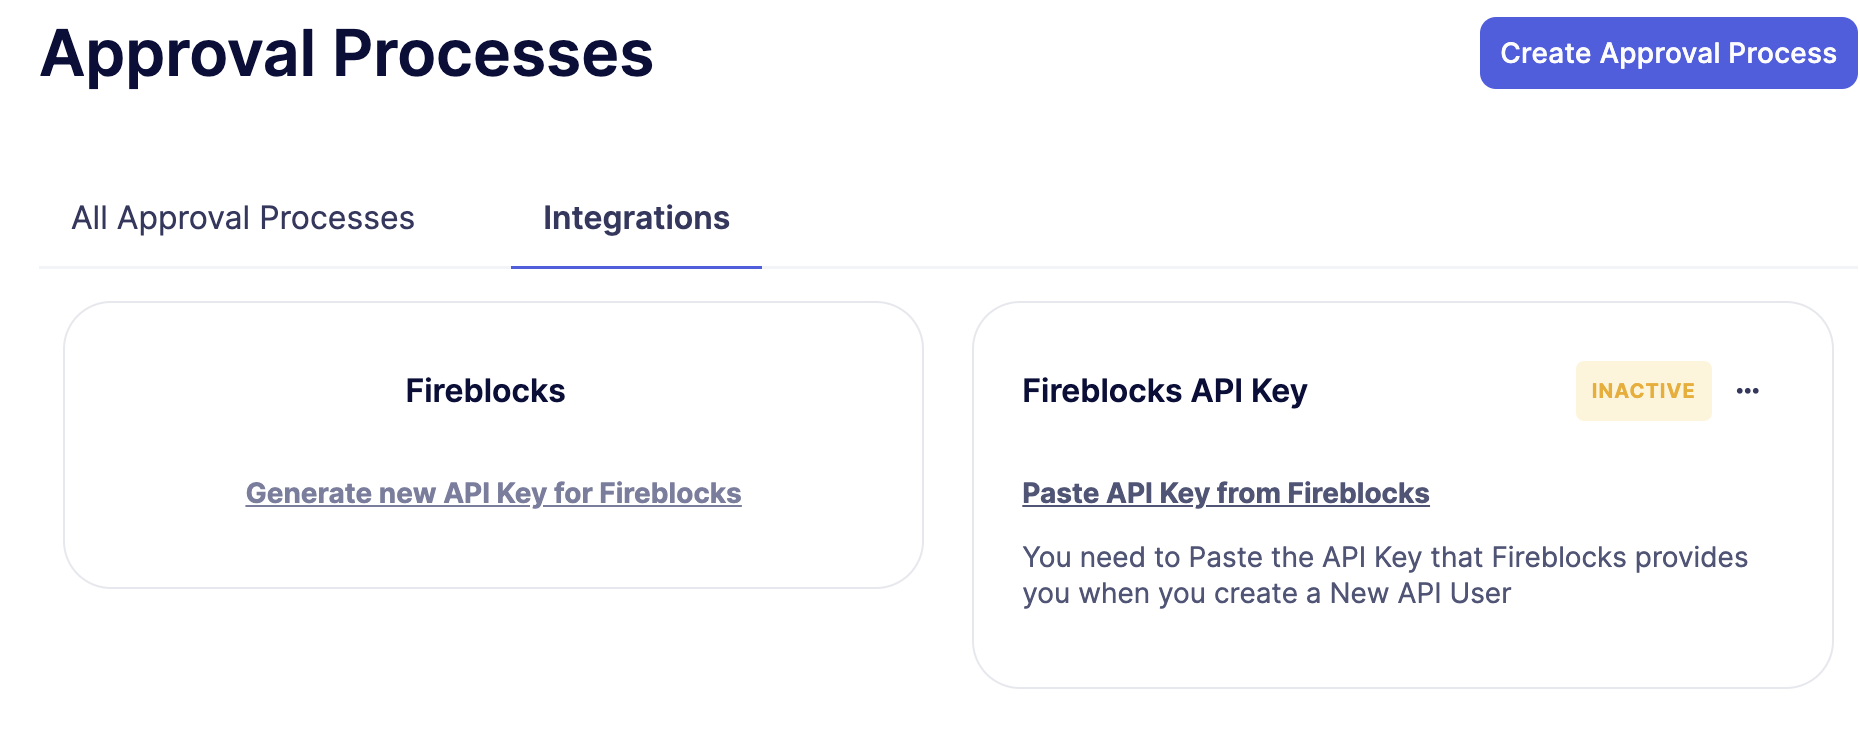
To use this feature, navigate to the Settings page and click on Approval Process in the sidebar. If the Fireblocks integration is enabled for your account, go to the Integrations tab, which is located next to the All Approval Process tab.

-
Click on Generate new API Key for Fireblocks. Here, you will need to generate a Certificate Signing Request (CSR), which will be used within the Fireblocks platform to enable this feature and create API keys.
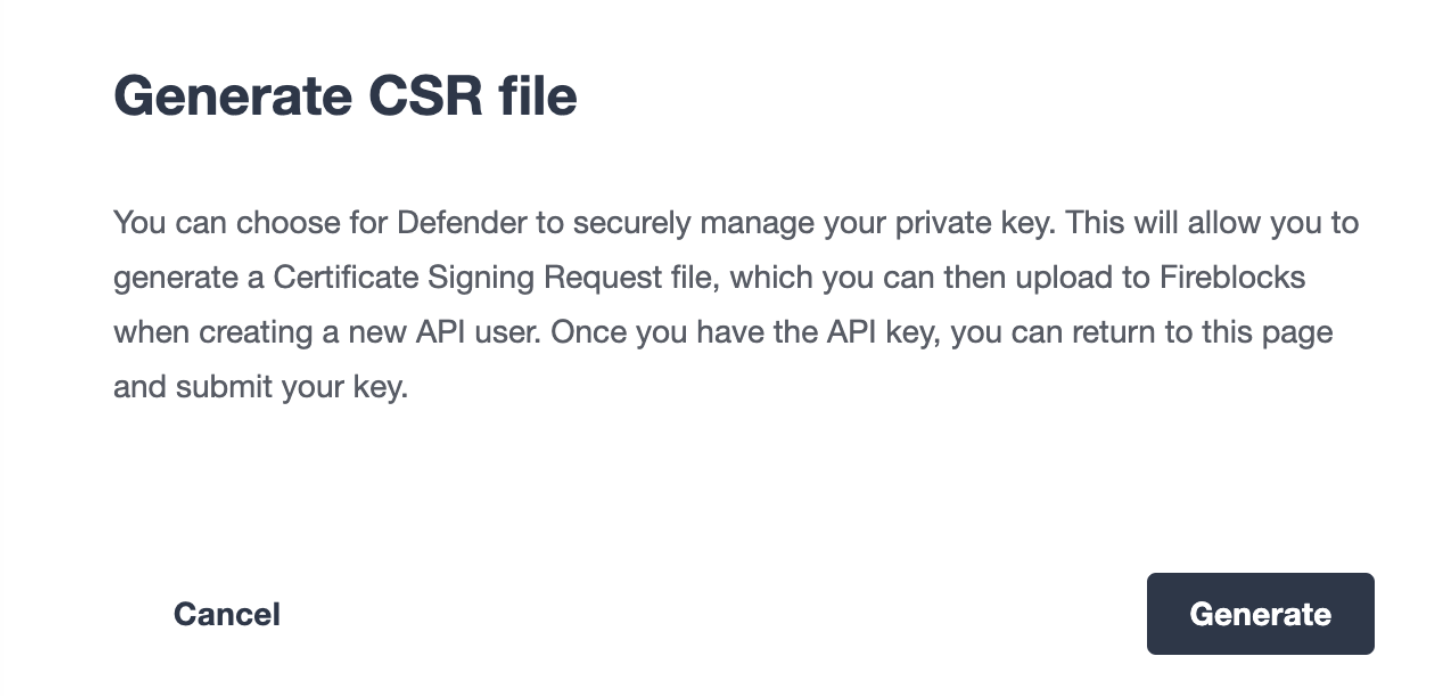 This will trigger Defender to generate a public/private key-pair. The CSR is then generated and signed with the private key and securely stored to prevent leakage.
2. Create Fireblocks API user
-
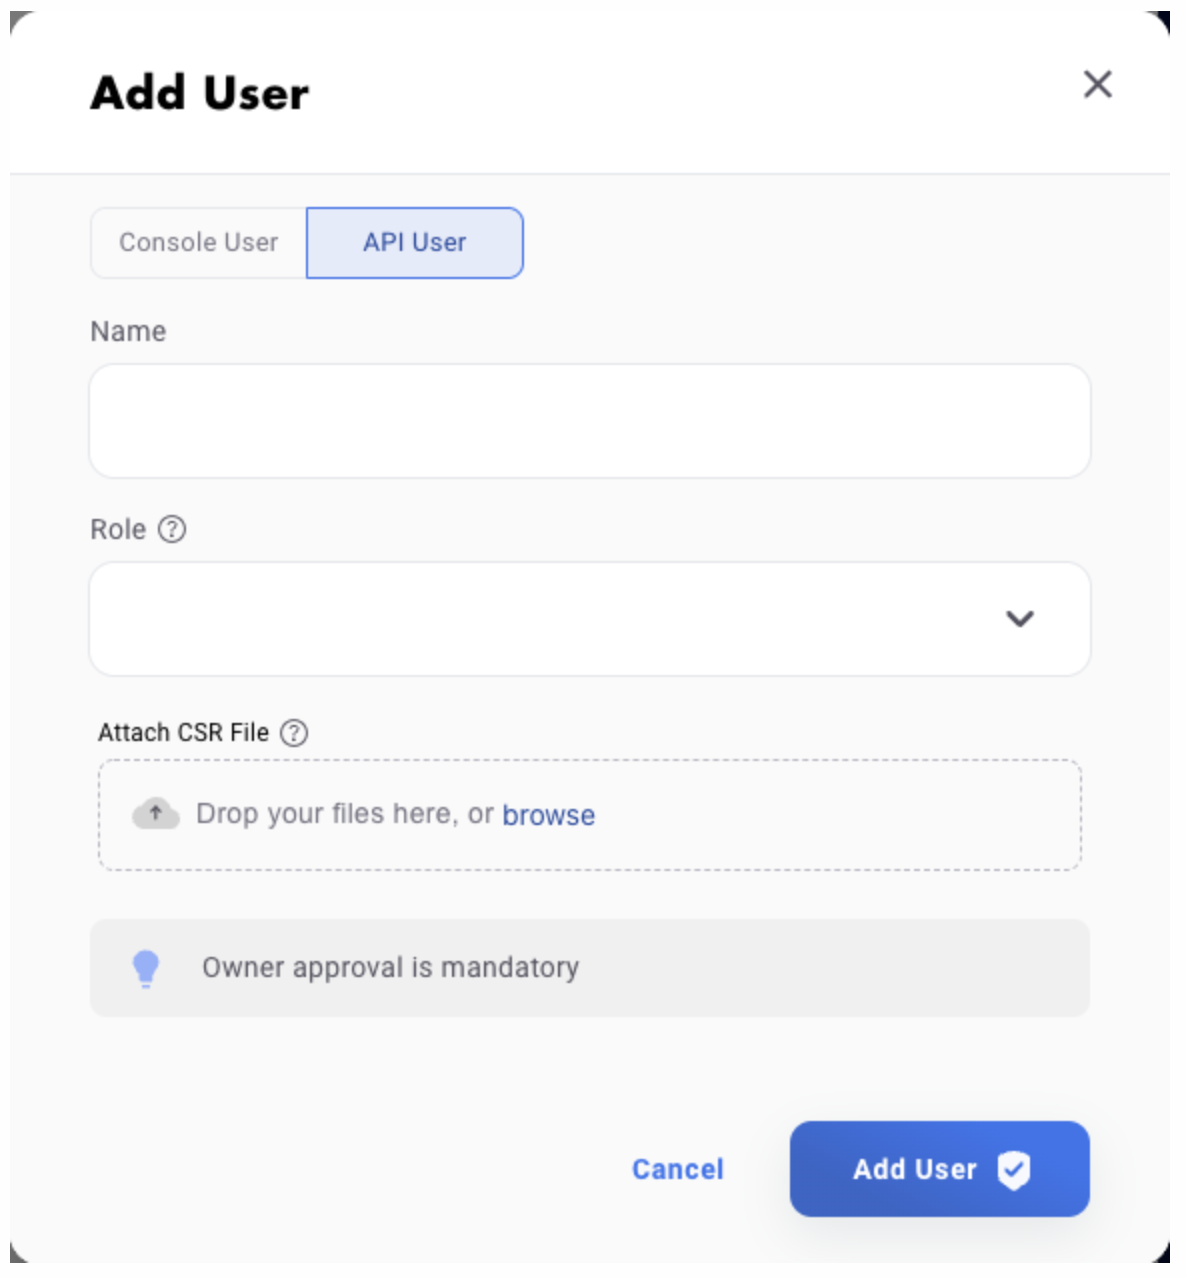
First, you will need to import the CSR within the Fireblocks UI when creating a new API user. Note that the API user will require any role that can at least initiate transactions, e.g. Signer.
-
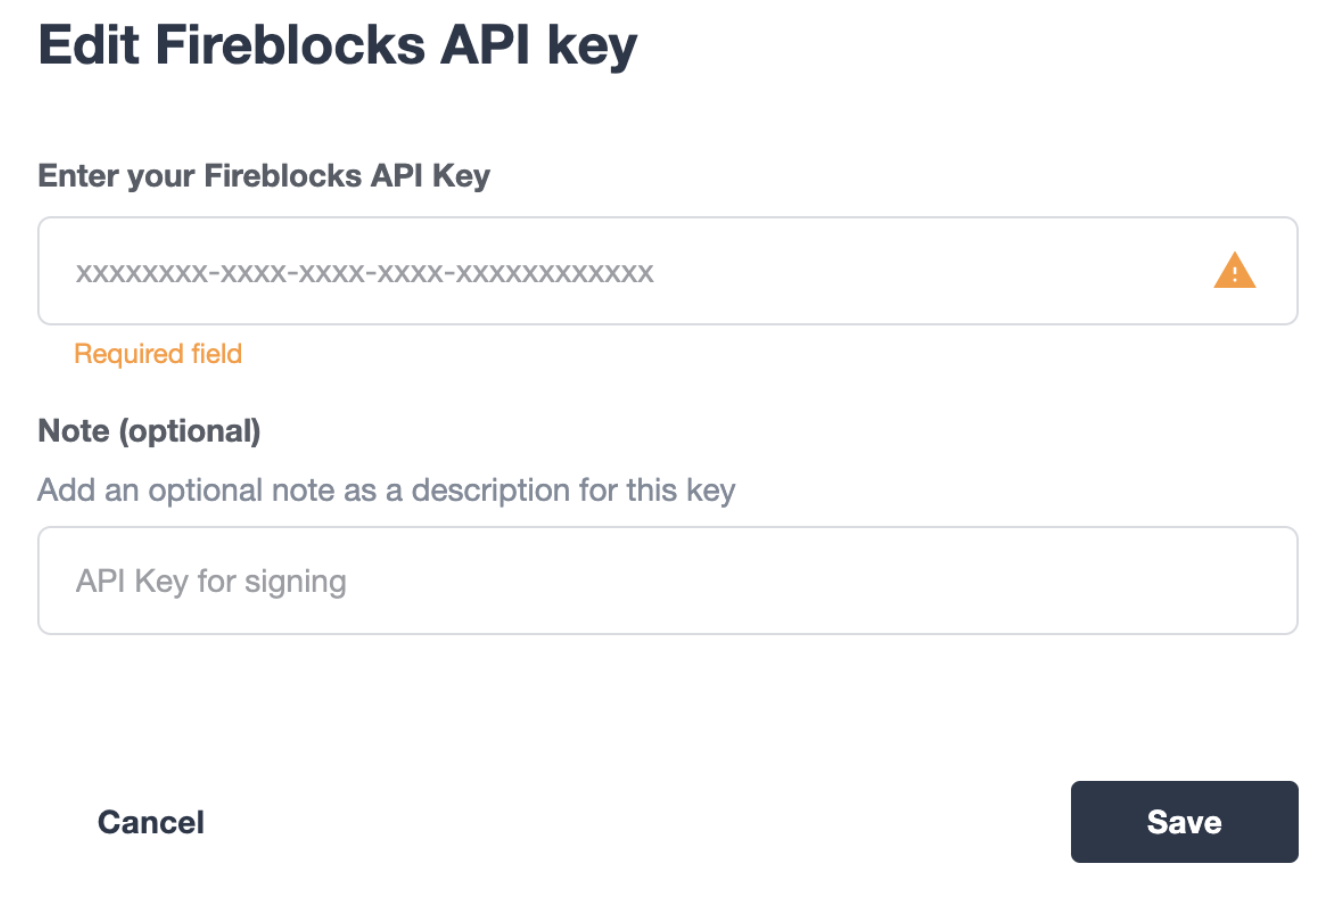
Once the API user has been created and approved by the Fireblocks workspace owner, copy the Fireblocks API key and navigate to the Fireblocks API Keys page. You should see an incomplete API key setup, which you can then edit and complete with the Fireblocks API key. Note that you will not be able to generate a new CSR file unless you complete the setup or delete the previous incomplete one.

3. Connect Fireblocks with Defender
-
First, navigate to the Settings page subsequently click Approval Process in the sidebar, the navigate to the Integrations tab. Over here click on the Paste API Key from Fireblocks.
-
Insert the Fireblocks API key.
To submit a transaction to Fireblocks via Defender, ensure the correct permissions are set in Fireblocks, such as the relevant whitelisted addresses and the Transaction Access Policy (TAP). For example, you might need to whitelist the contract address you wish to interact with, as well as ensure that the newly created API user is allowed to interact with the relevant account and vaults (defined in the TAP).
4. Create Approval Process
Pick a Fireblocks Wallet from the List
You can pick a Fireblocks wallet from the list of available wallets by just providing the Fireblocks API key. We will attempt to fetch the list of available vaults and wallets from Fireblocks.

Manually Add a Fireblocks Wallet
In some rare cases you might not see your wallets in the list that is automatically fetched from Fireblocks. In that case you can select the Manual option and type in the required information manually.
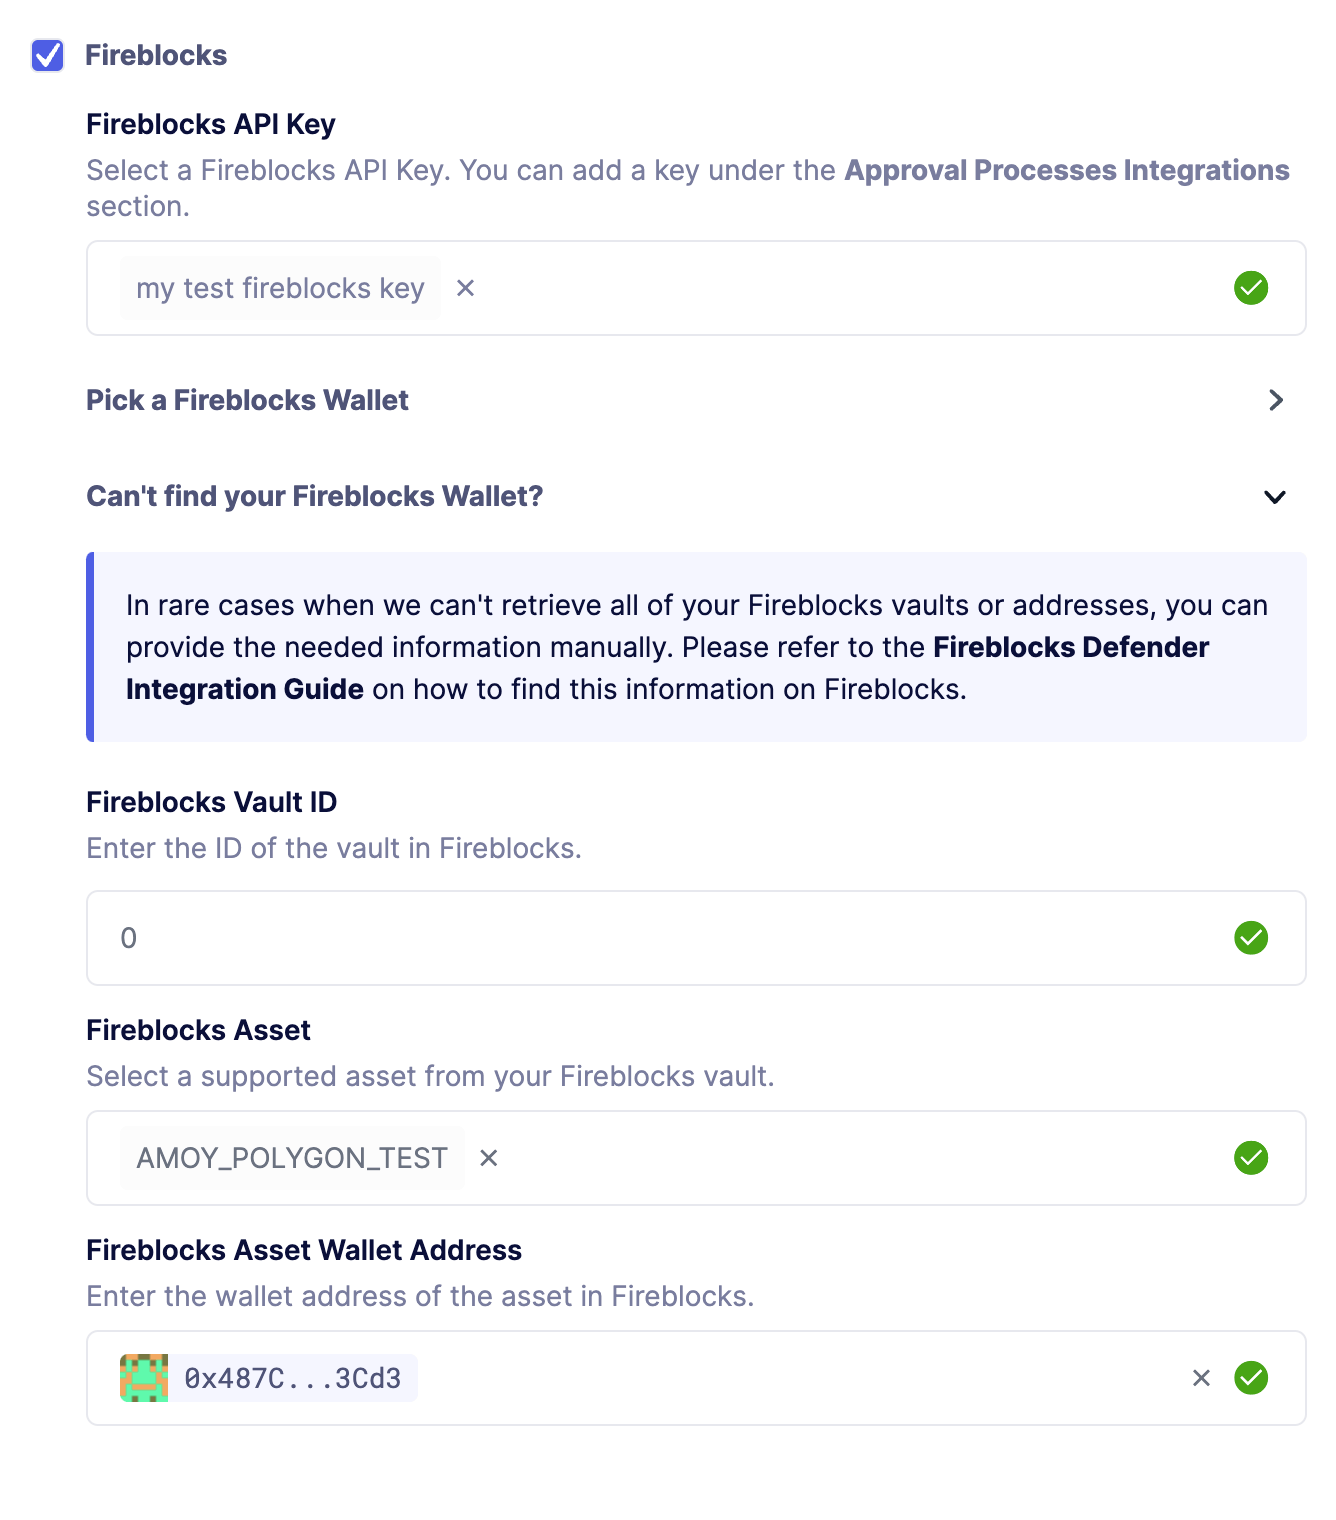
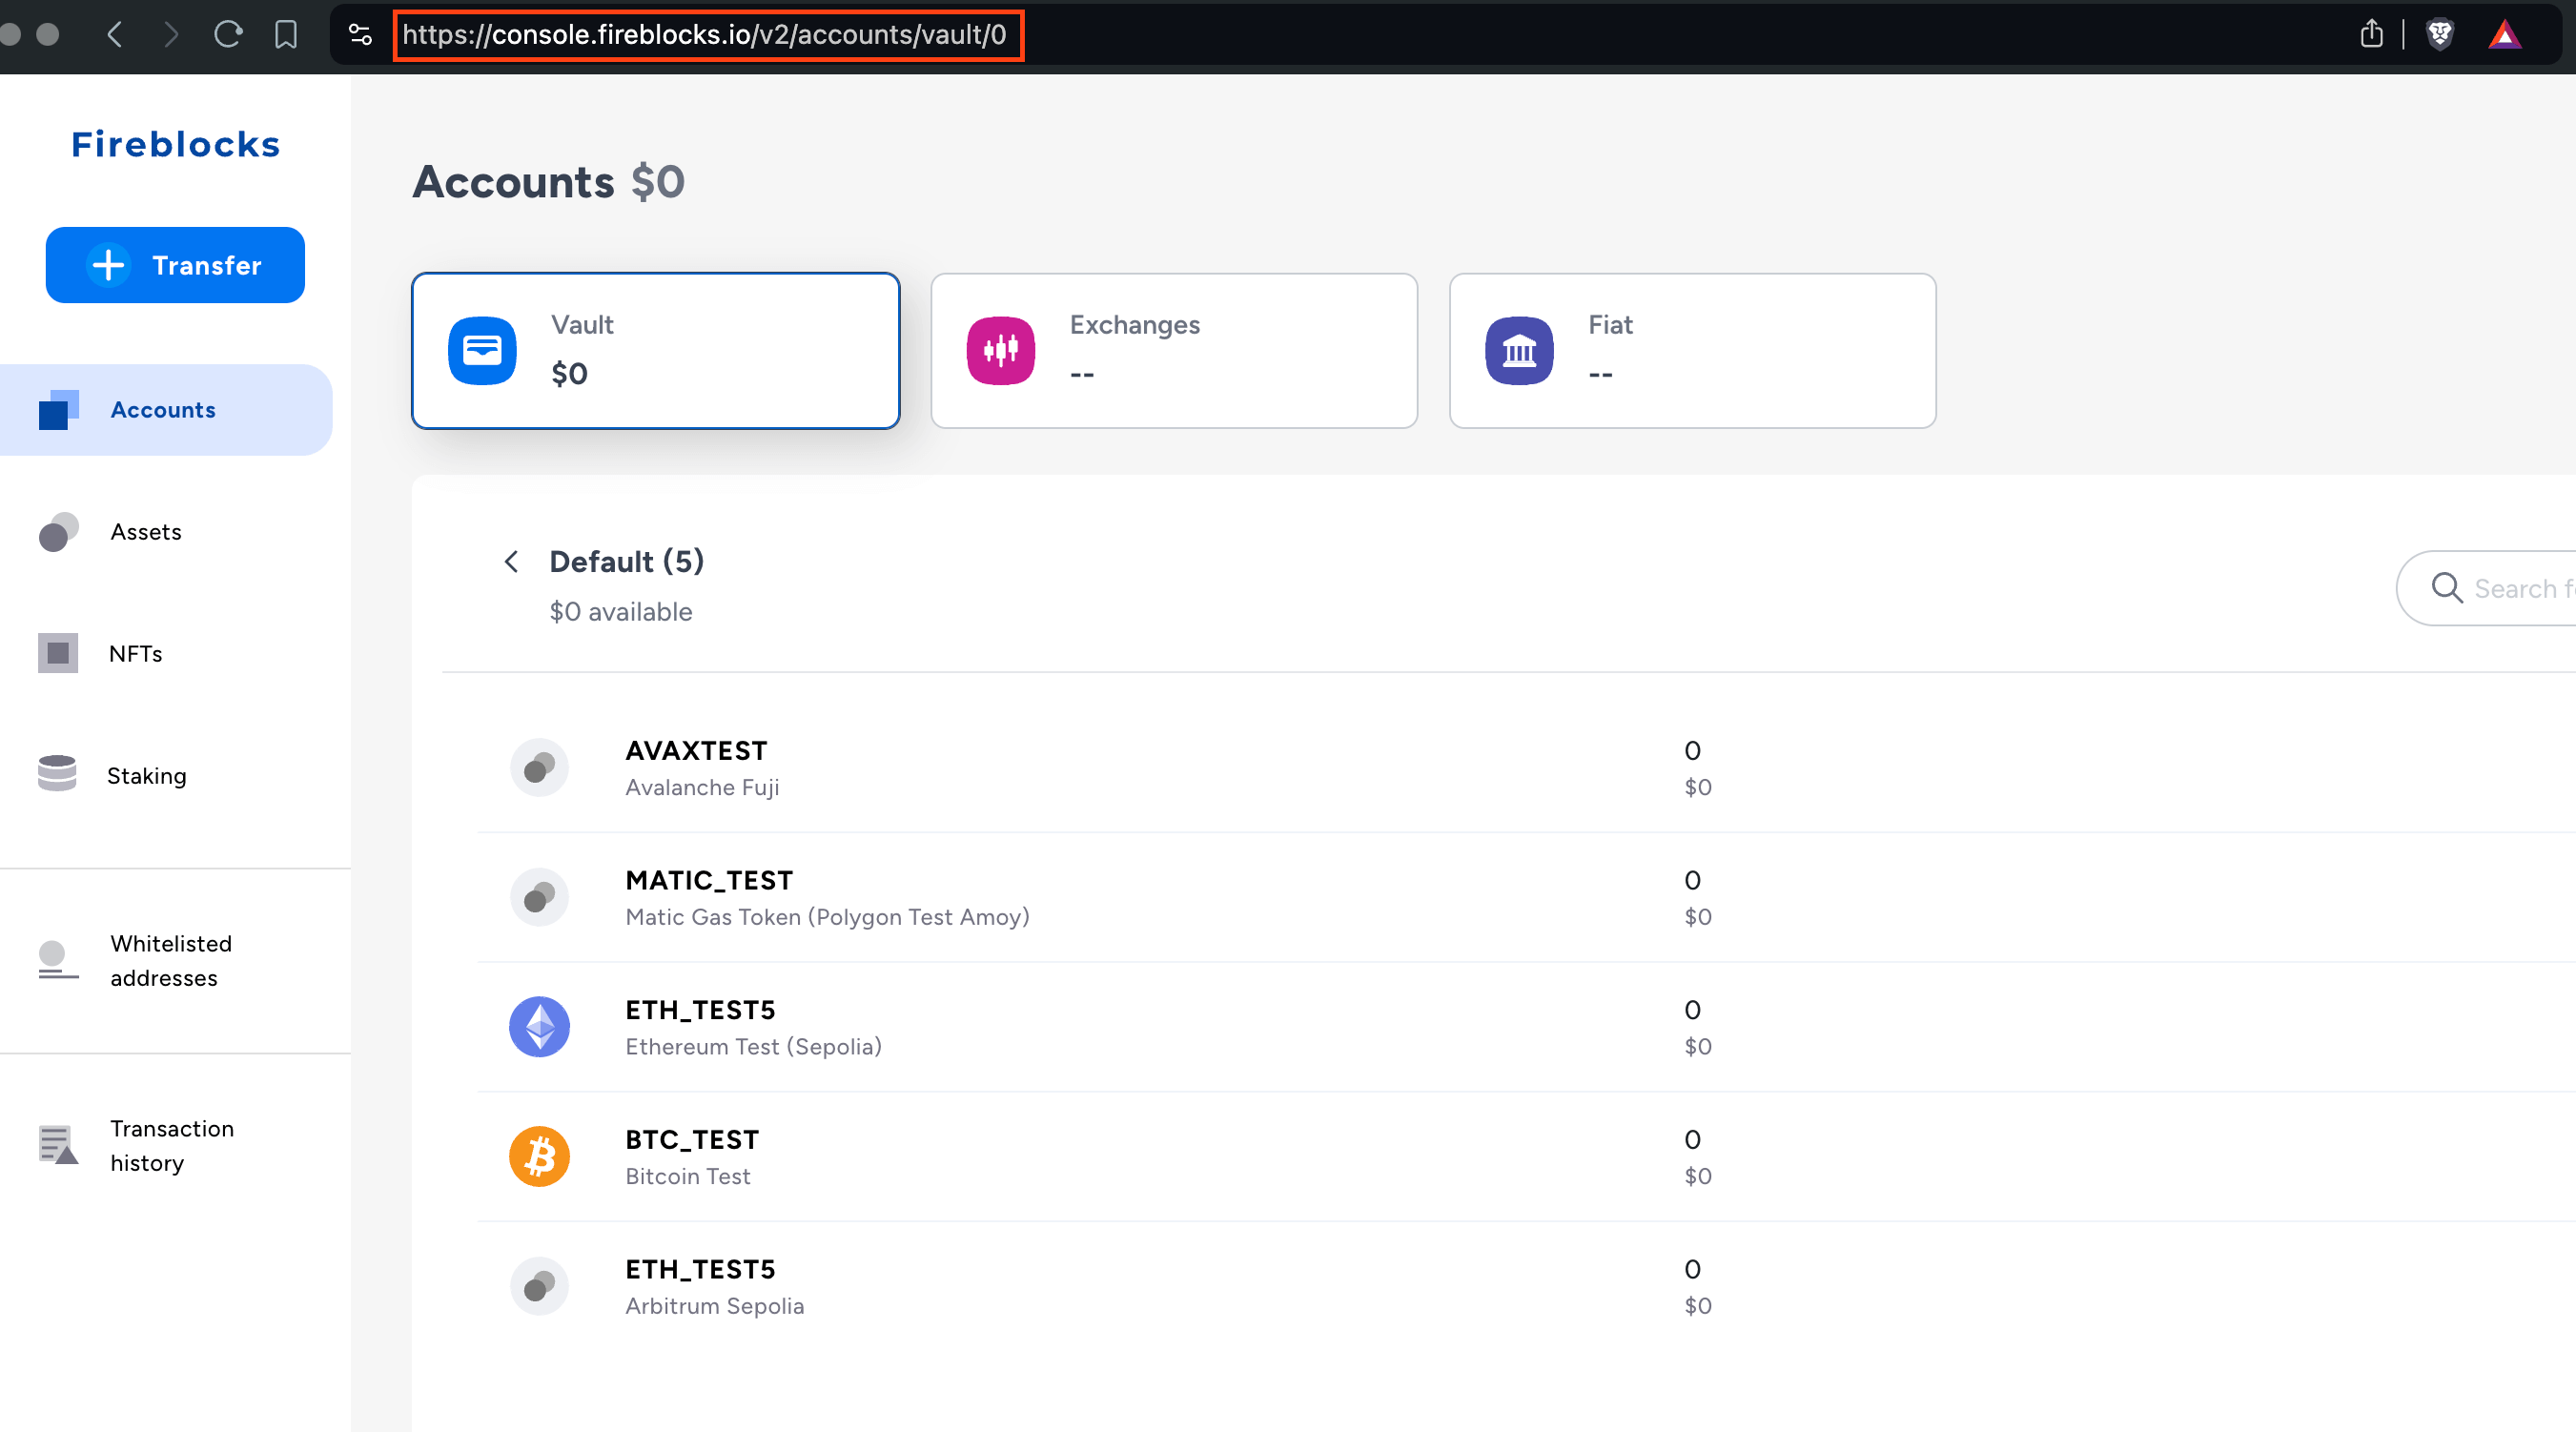
To get your Vault ID, head to Fireblocks console, click on the vault you are interested in and copy the ID (last number) from the URL.
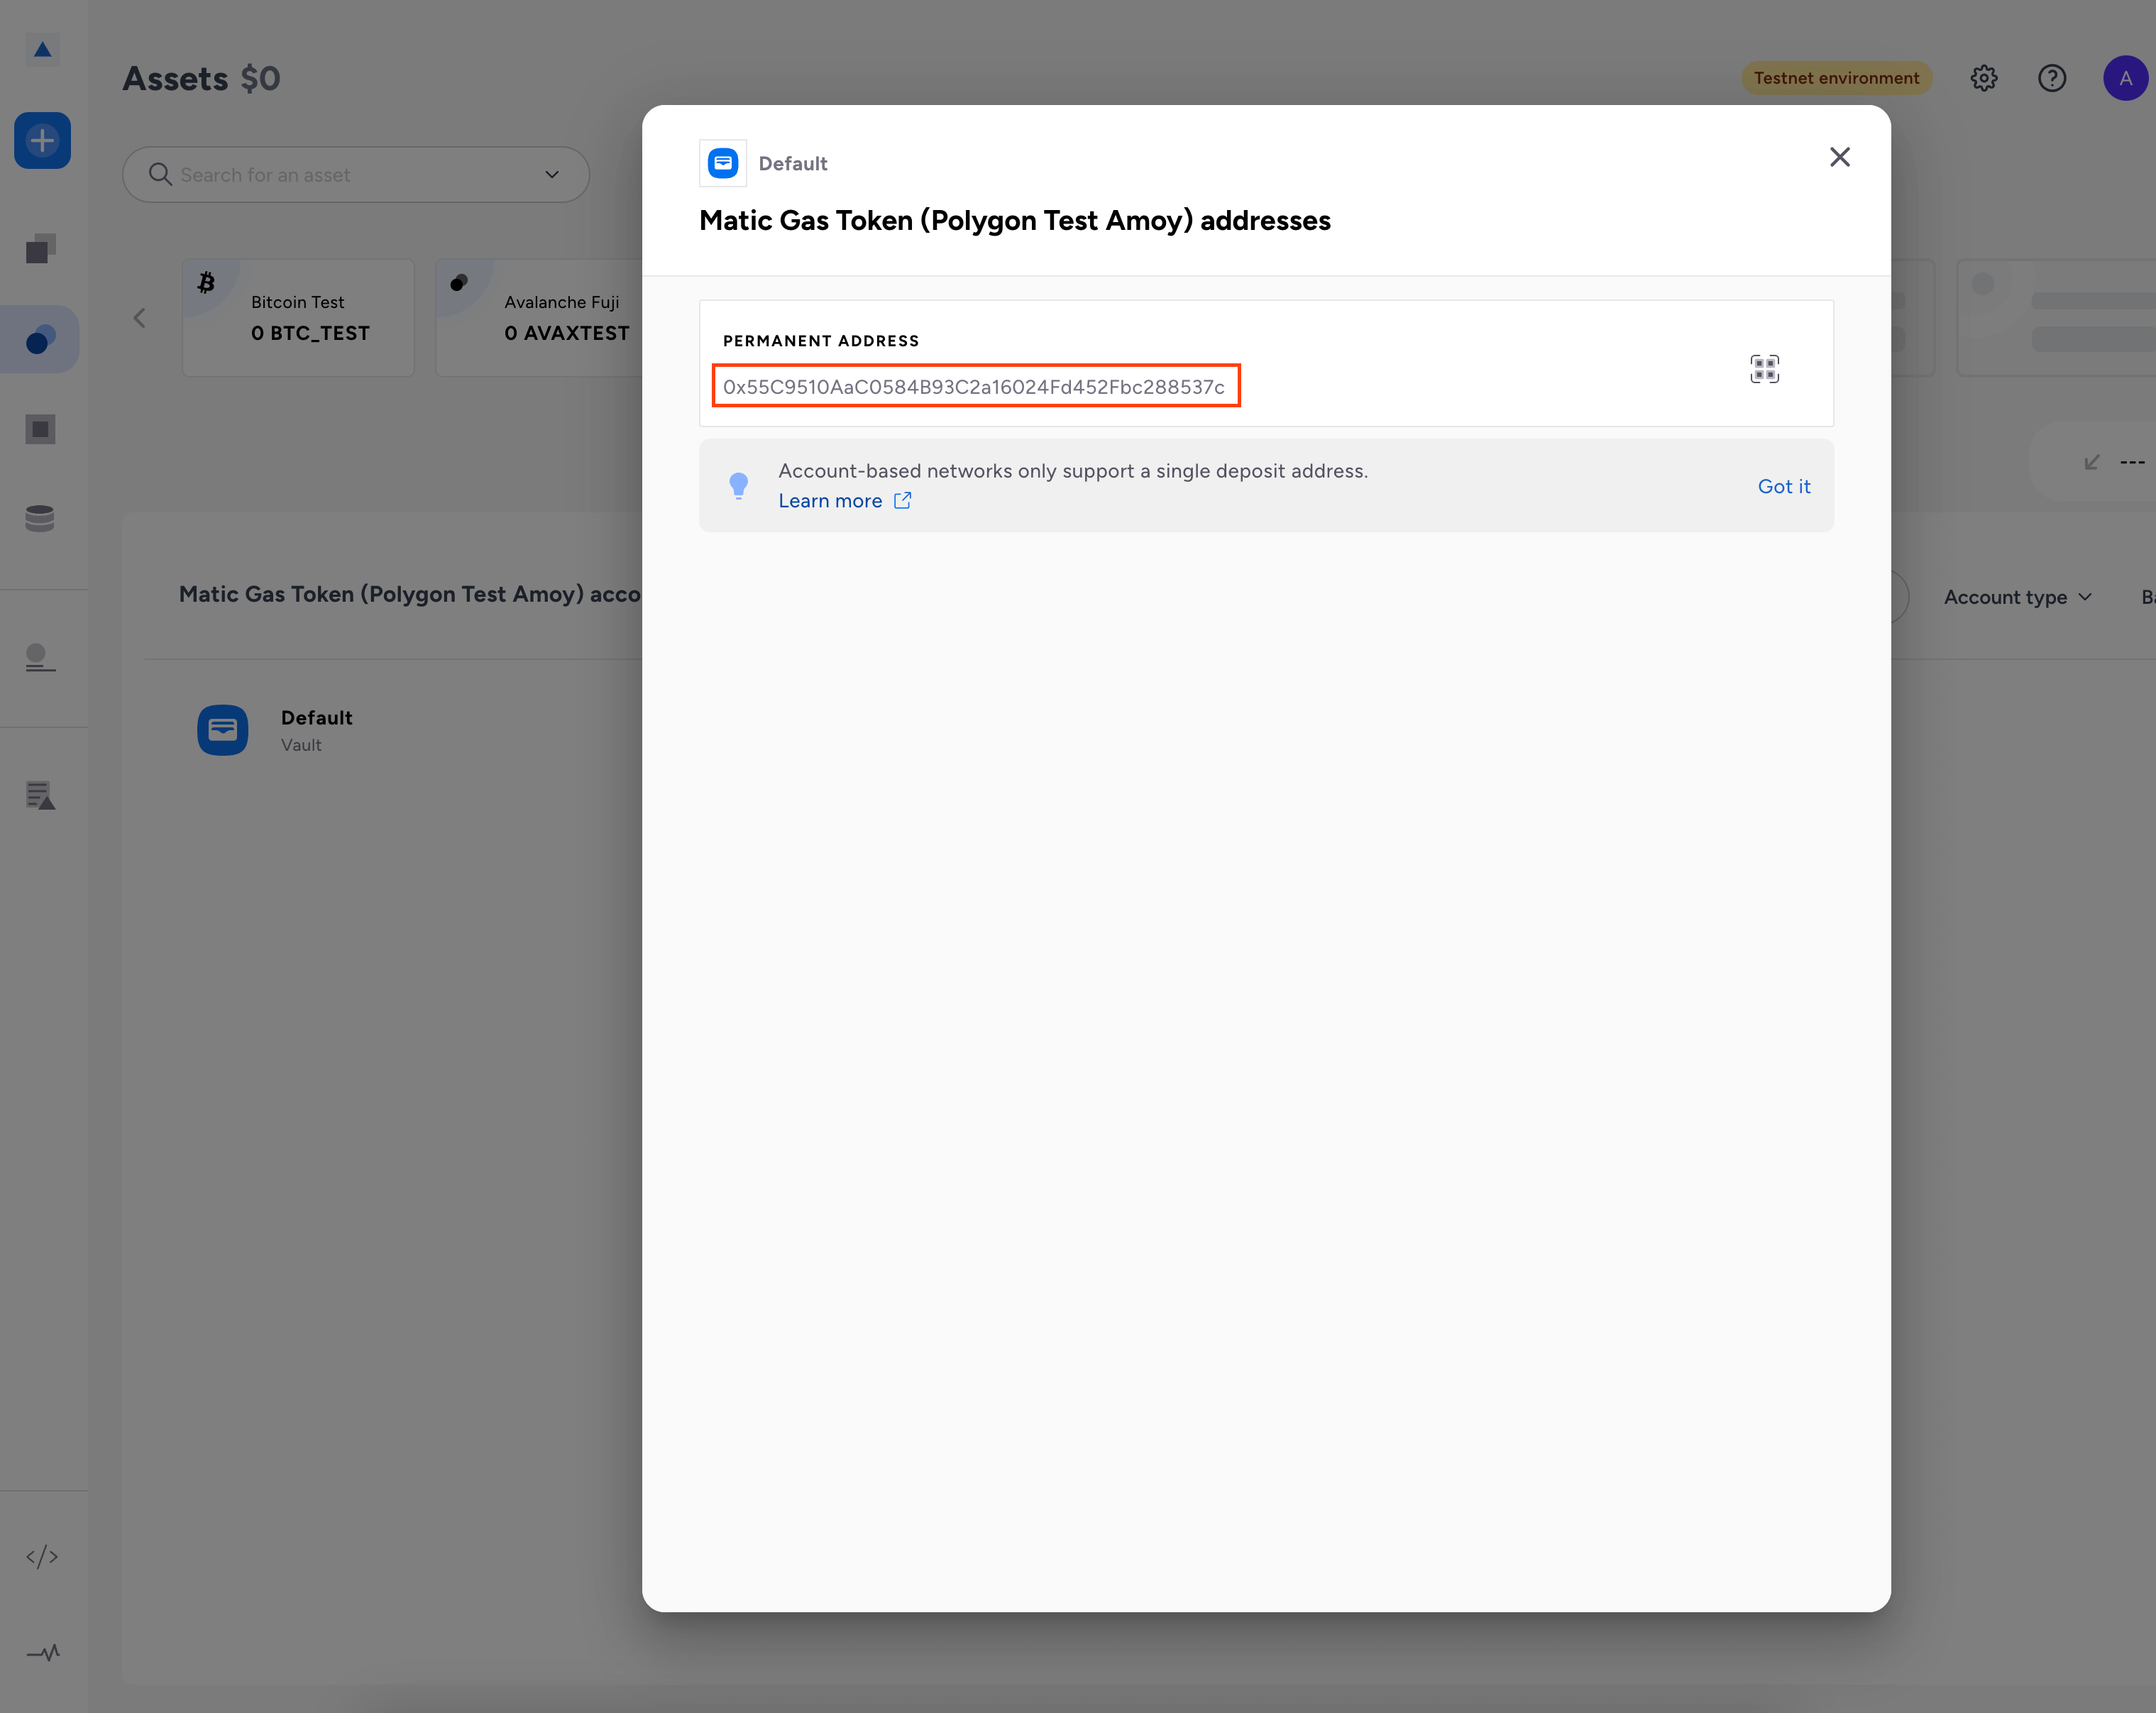
To get your Asset Wallet Address, head to Fireblocks console, click on the asset you are interested in and copy the address (starts with 0x).
5. Approve or Reject a Transaction
Note, Defender will not allow you to approve or reject a transaction from the UI. This is only possible via the Fireblocks mobile app or console.