How to manage roles of a TimelockController
Defender allows you to oversee and command contract permissions of any smart contract that uses AccessControl from OpenZeppelin Contracts. This guide will lead you through the steps of importing a TimelockController contract, creating a proposal, and managing its roles. A TimelockController is a smart contract that enforces a delay between when an operation is queued and when it can be executed. This mechanism is commonly used in decentralized governance to increase security and provide transparency, allowing stakeholders to observe and react to changes before they are executed. TimelockController uses the following `AccessControl`` setup:
- The Proposer role is in charge of queueing operations: this is the role the Governor instance should be granted, and it should likely be the only proposer in the system.
- The Executor role is in charge of executing already available operations: we can assign this role to the special zero address to allow anyone to execute (if operations can be particularly time sensitive, the Governor should be made Executor instead).
- Lastly, there is the Admin role, which can grant and revoke the two previous roles: this is a very sensitive role that will be granted automatically to the timelock itself, and optionally to a second account, which can be used for ease of setup but should promptly renounce the role.
Pre-requisites
- OpenZeppelin Defender account.
1. Creating TimelockController
First, you need to deploy a contract that implements TimelockController. For example, using OpenZeppelin Contracts 5.0:
//SPDX-License-Identifier: Unlicense
pragma solidity ^0.8.18;

import "@openzeppelin/contracts/governance/TimelockController.sol";

contract Timelock is TimelockController
    constructor(uint256 minDelay, address[] memory proposers, address[] memory executors) TimelockController(minDelay, proposers, executors, msg.sender) {
}
This contract will grant the Admin role to the deployer, and the Proposer and Executor roles to the accounts passed as arguments. If you want to grant the Proposer and Executor roles to the same account, you can pass the same address twice. After deploying the contract, copy its address and proceed to the next step.
2. Importing to Defender
Navigate to the Address Book on Defender and add your contract with its address and network. If the contract is verified, Defender will automatically pick up the ABI. Otherwise, you need to paste the ABI manually.
3. Creating a proposal
Defender Transaction Proposals allows you to create and manage proposals. Proposals in turn can directly execute actions on schedule delayed execution of functions through the TimelockController contract. In order to create a new proposal, navigate to the Transaction Proposal creation page and select your imported TimelockController.
Then, select the schedule function from the functions dropdown and fill the information about the proposal you want to execute. For example:

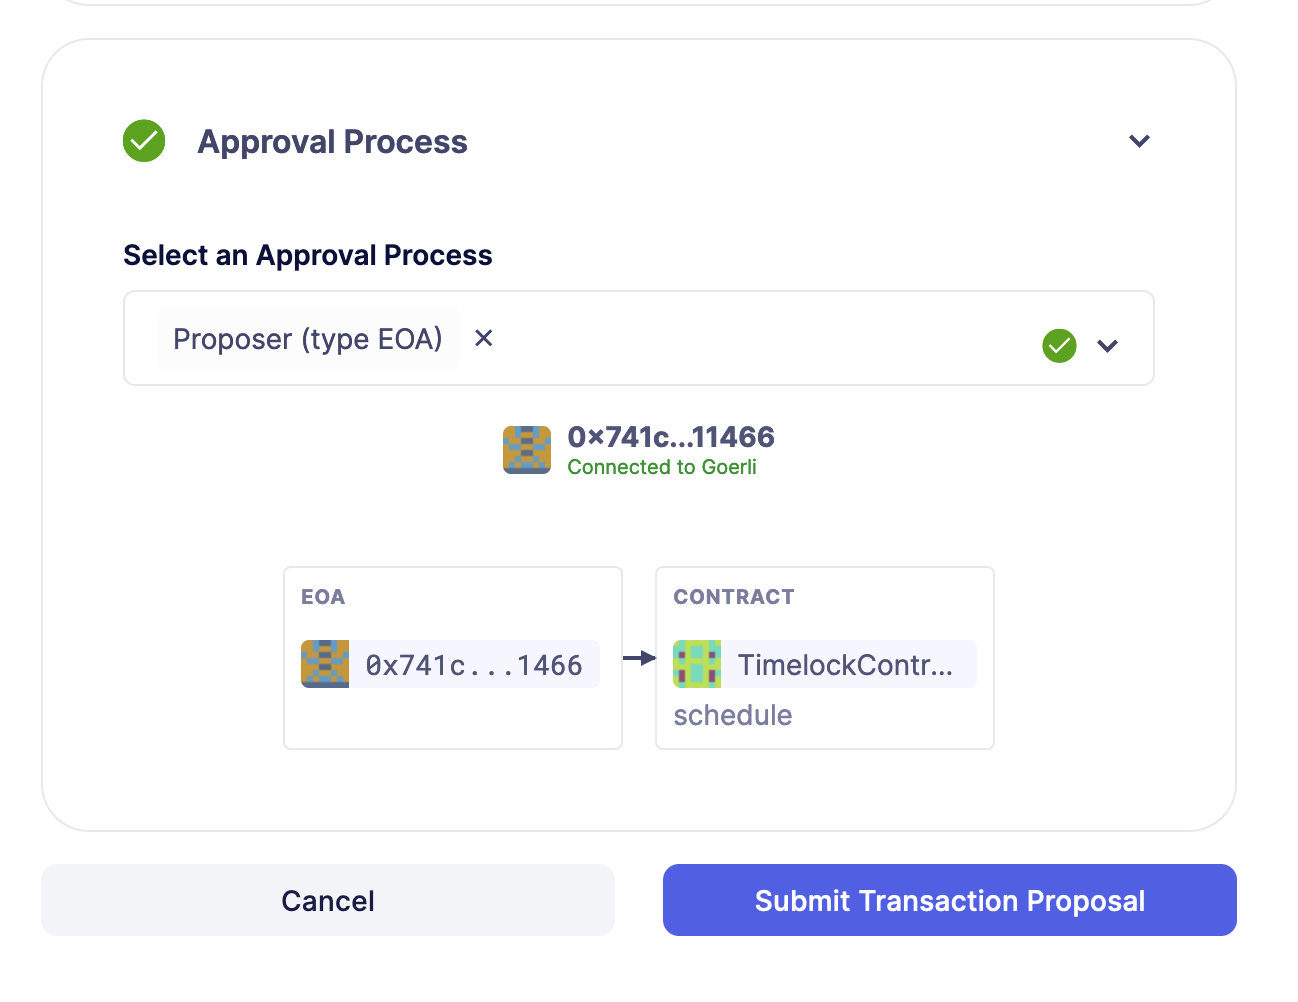
Finally, select the approval process to send this proposal. This depends on who is the proposal of your TimelockController contract. For this guide, the proposer is an EOA wallet. With Defender, you can create an approval process that is connected to your EOA and send this proposal with it.
You can then execute the proposal by creating another Transaction Proposal and selecting the execute function with the previous proposal data.
4. Granting a role
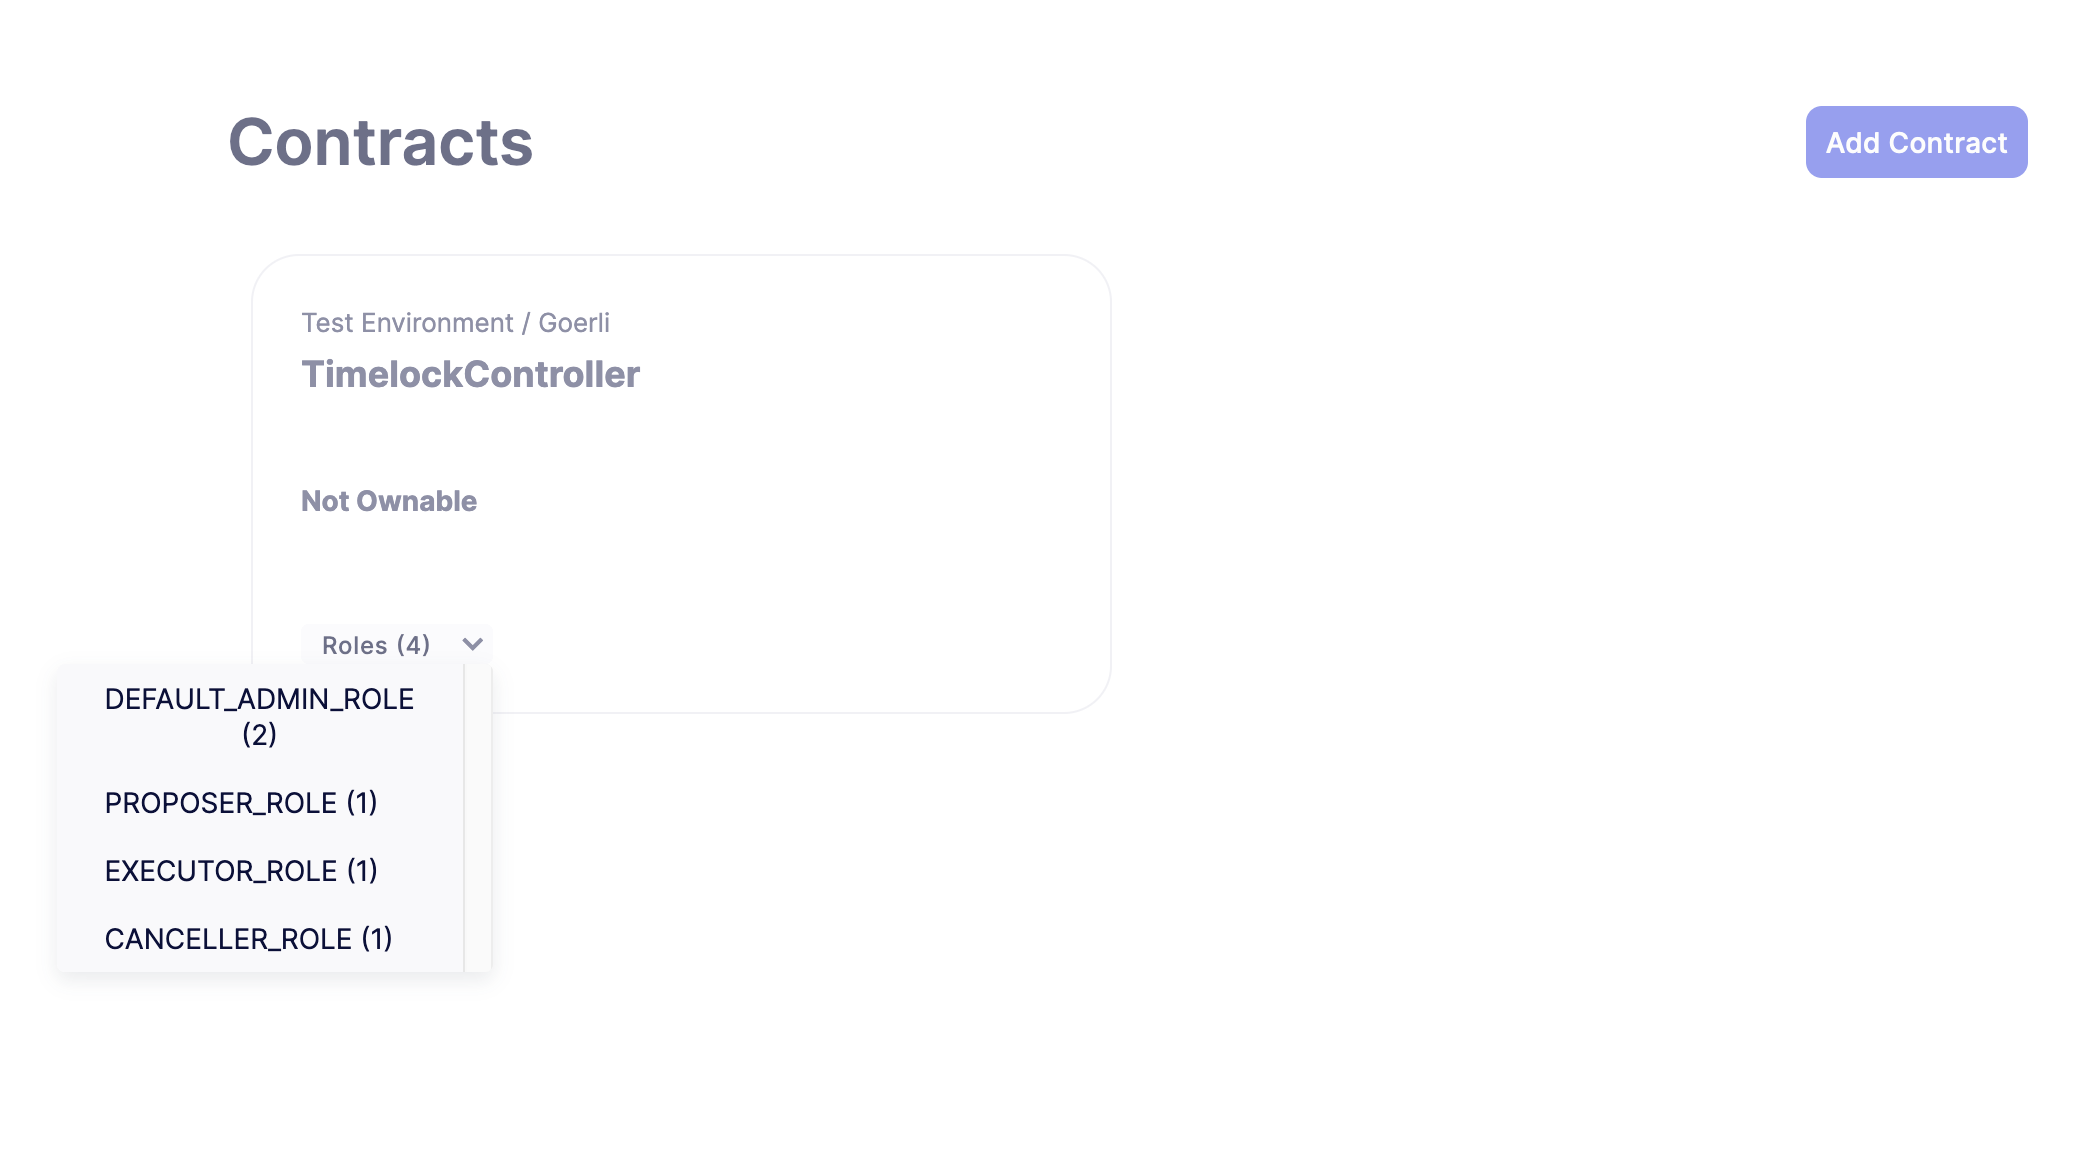
Now, you can use Defender Access Control to grant or revoke roles of your TimelockController contract. Navigate to Access Control and select your imported TimelockController contract.
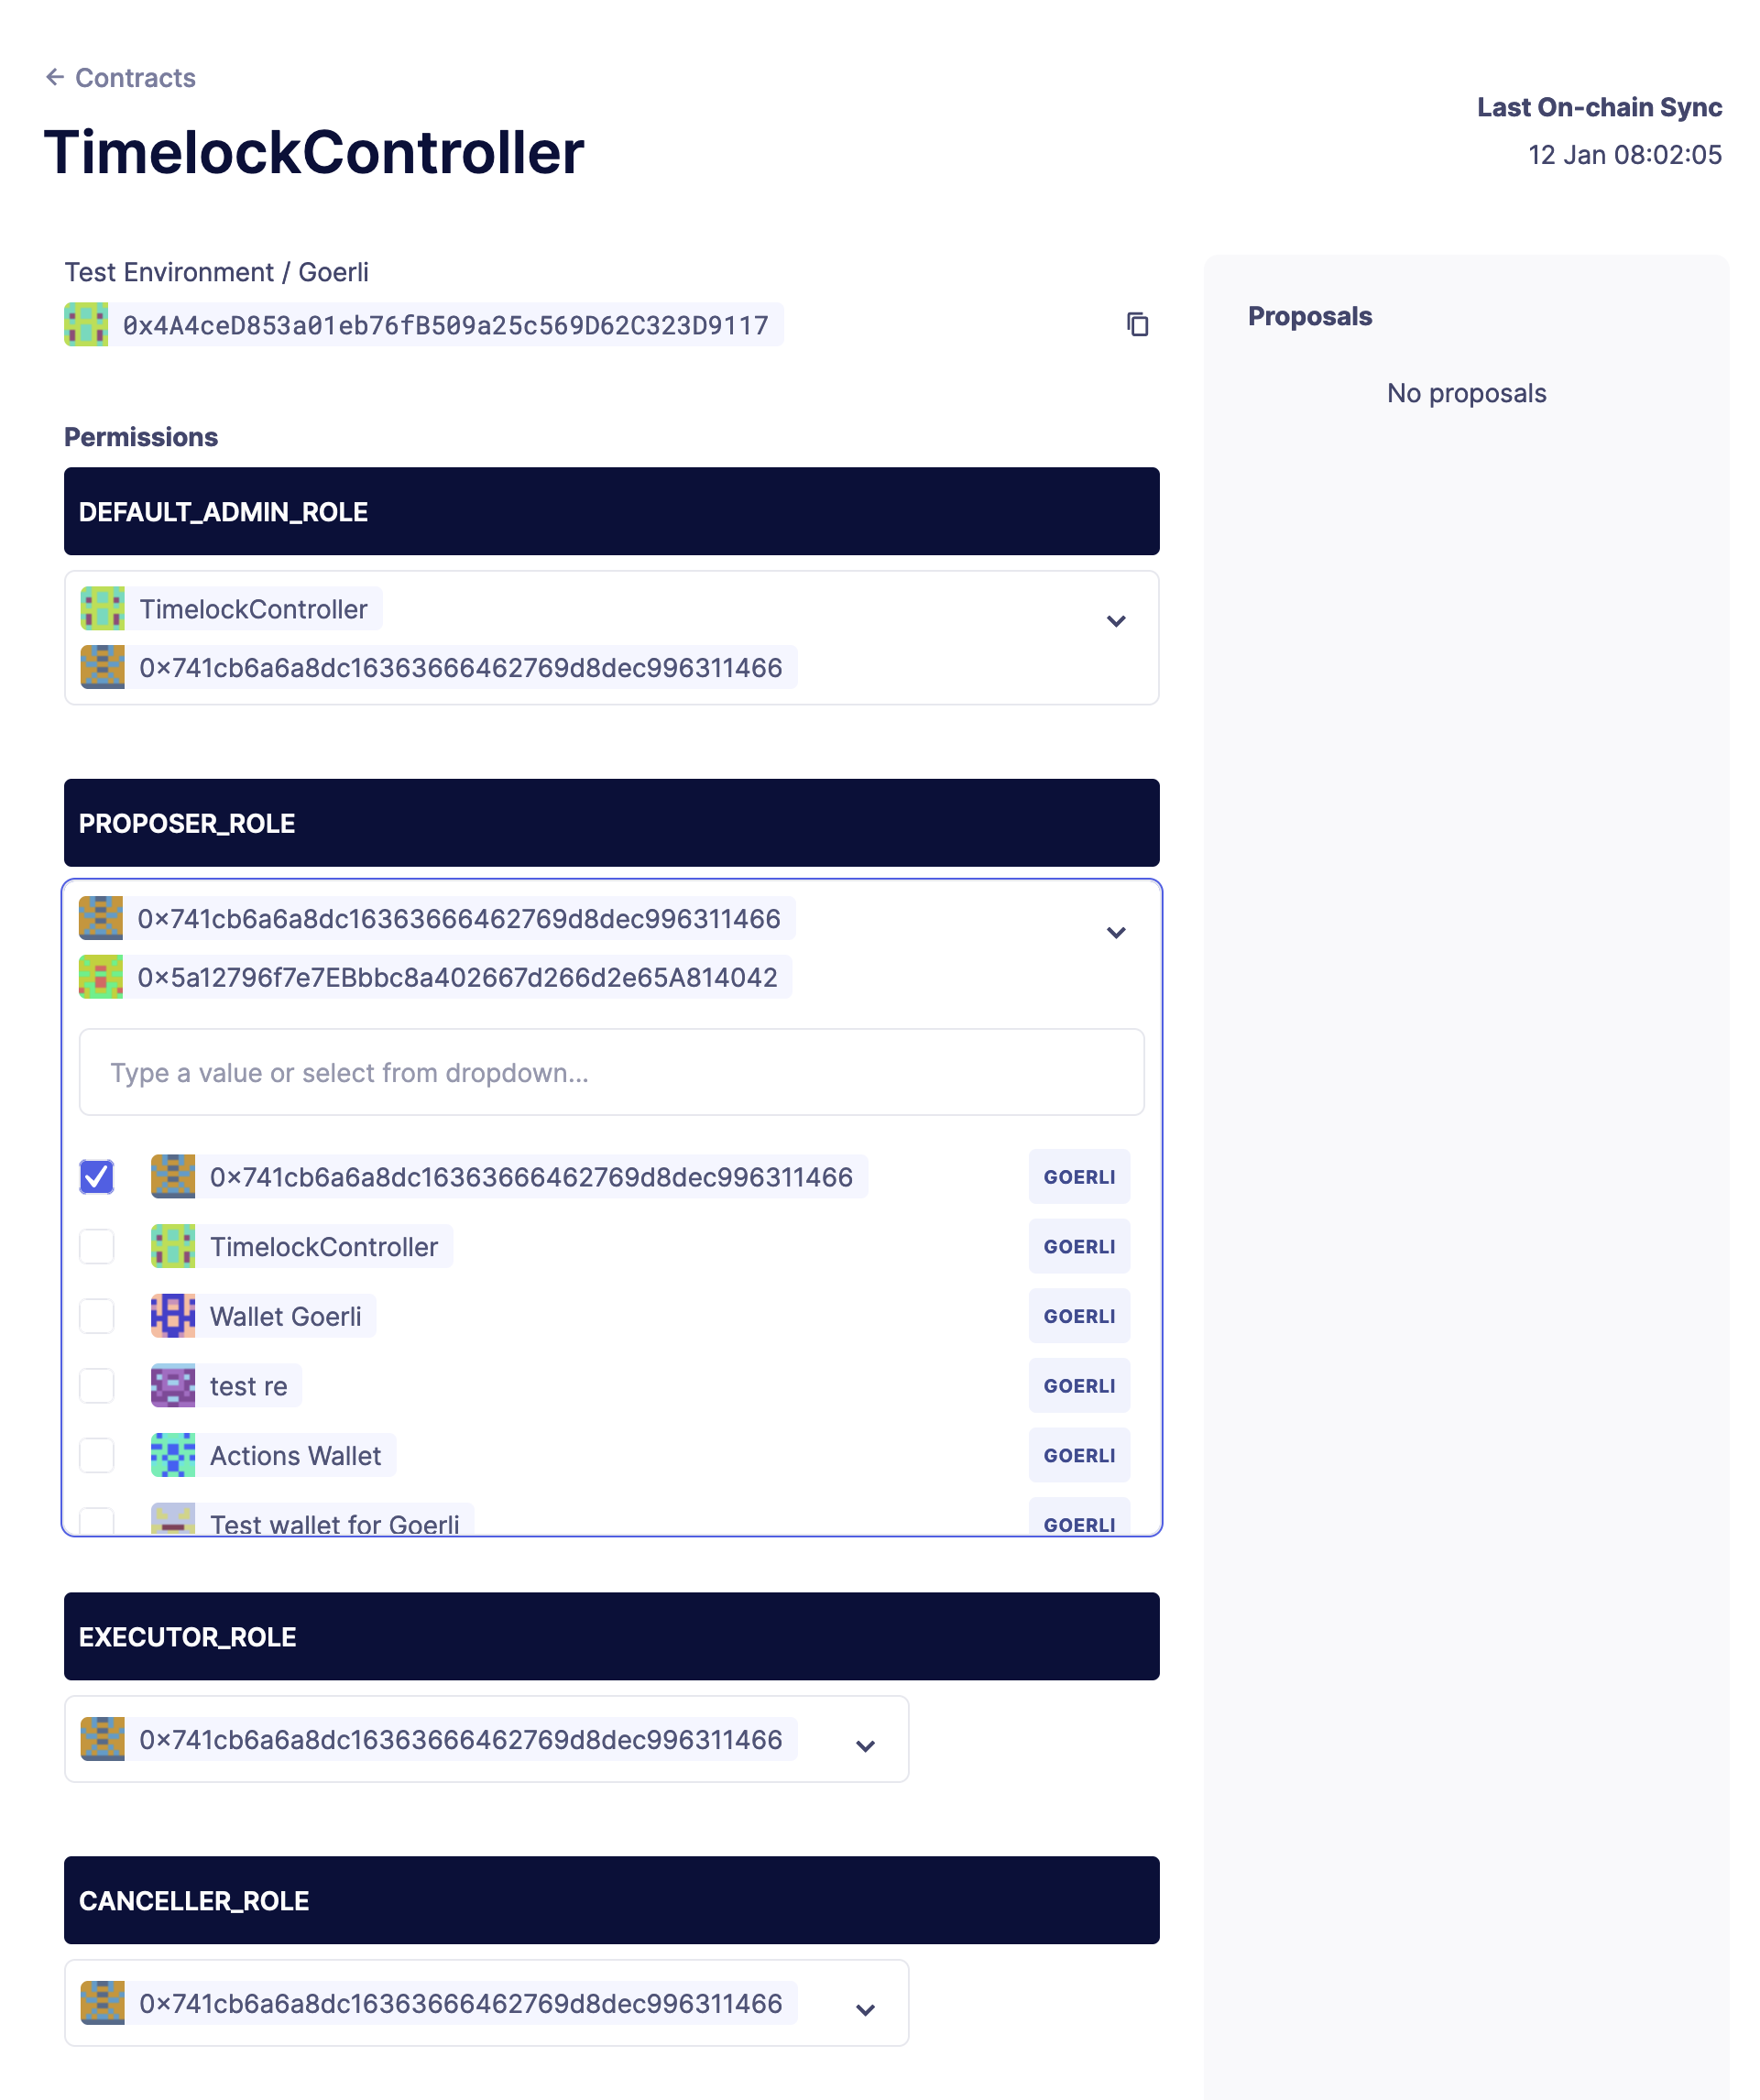
In order to grant someone a role, you need to have access to the address that holds admin power over the role. For example, with the DEFAULT_ADMIN_ROLE, you can grant or revoke any role. In this case, you can use an EOA that holds the DEFAULT_ADMIN_ROLE to grant the PROPOSER_ROLE to another address.
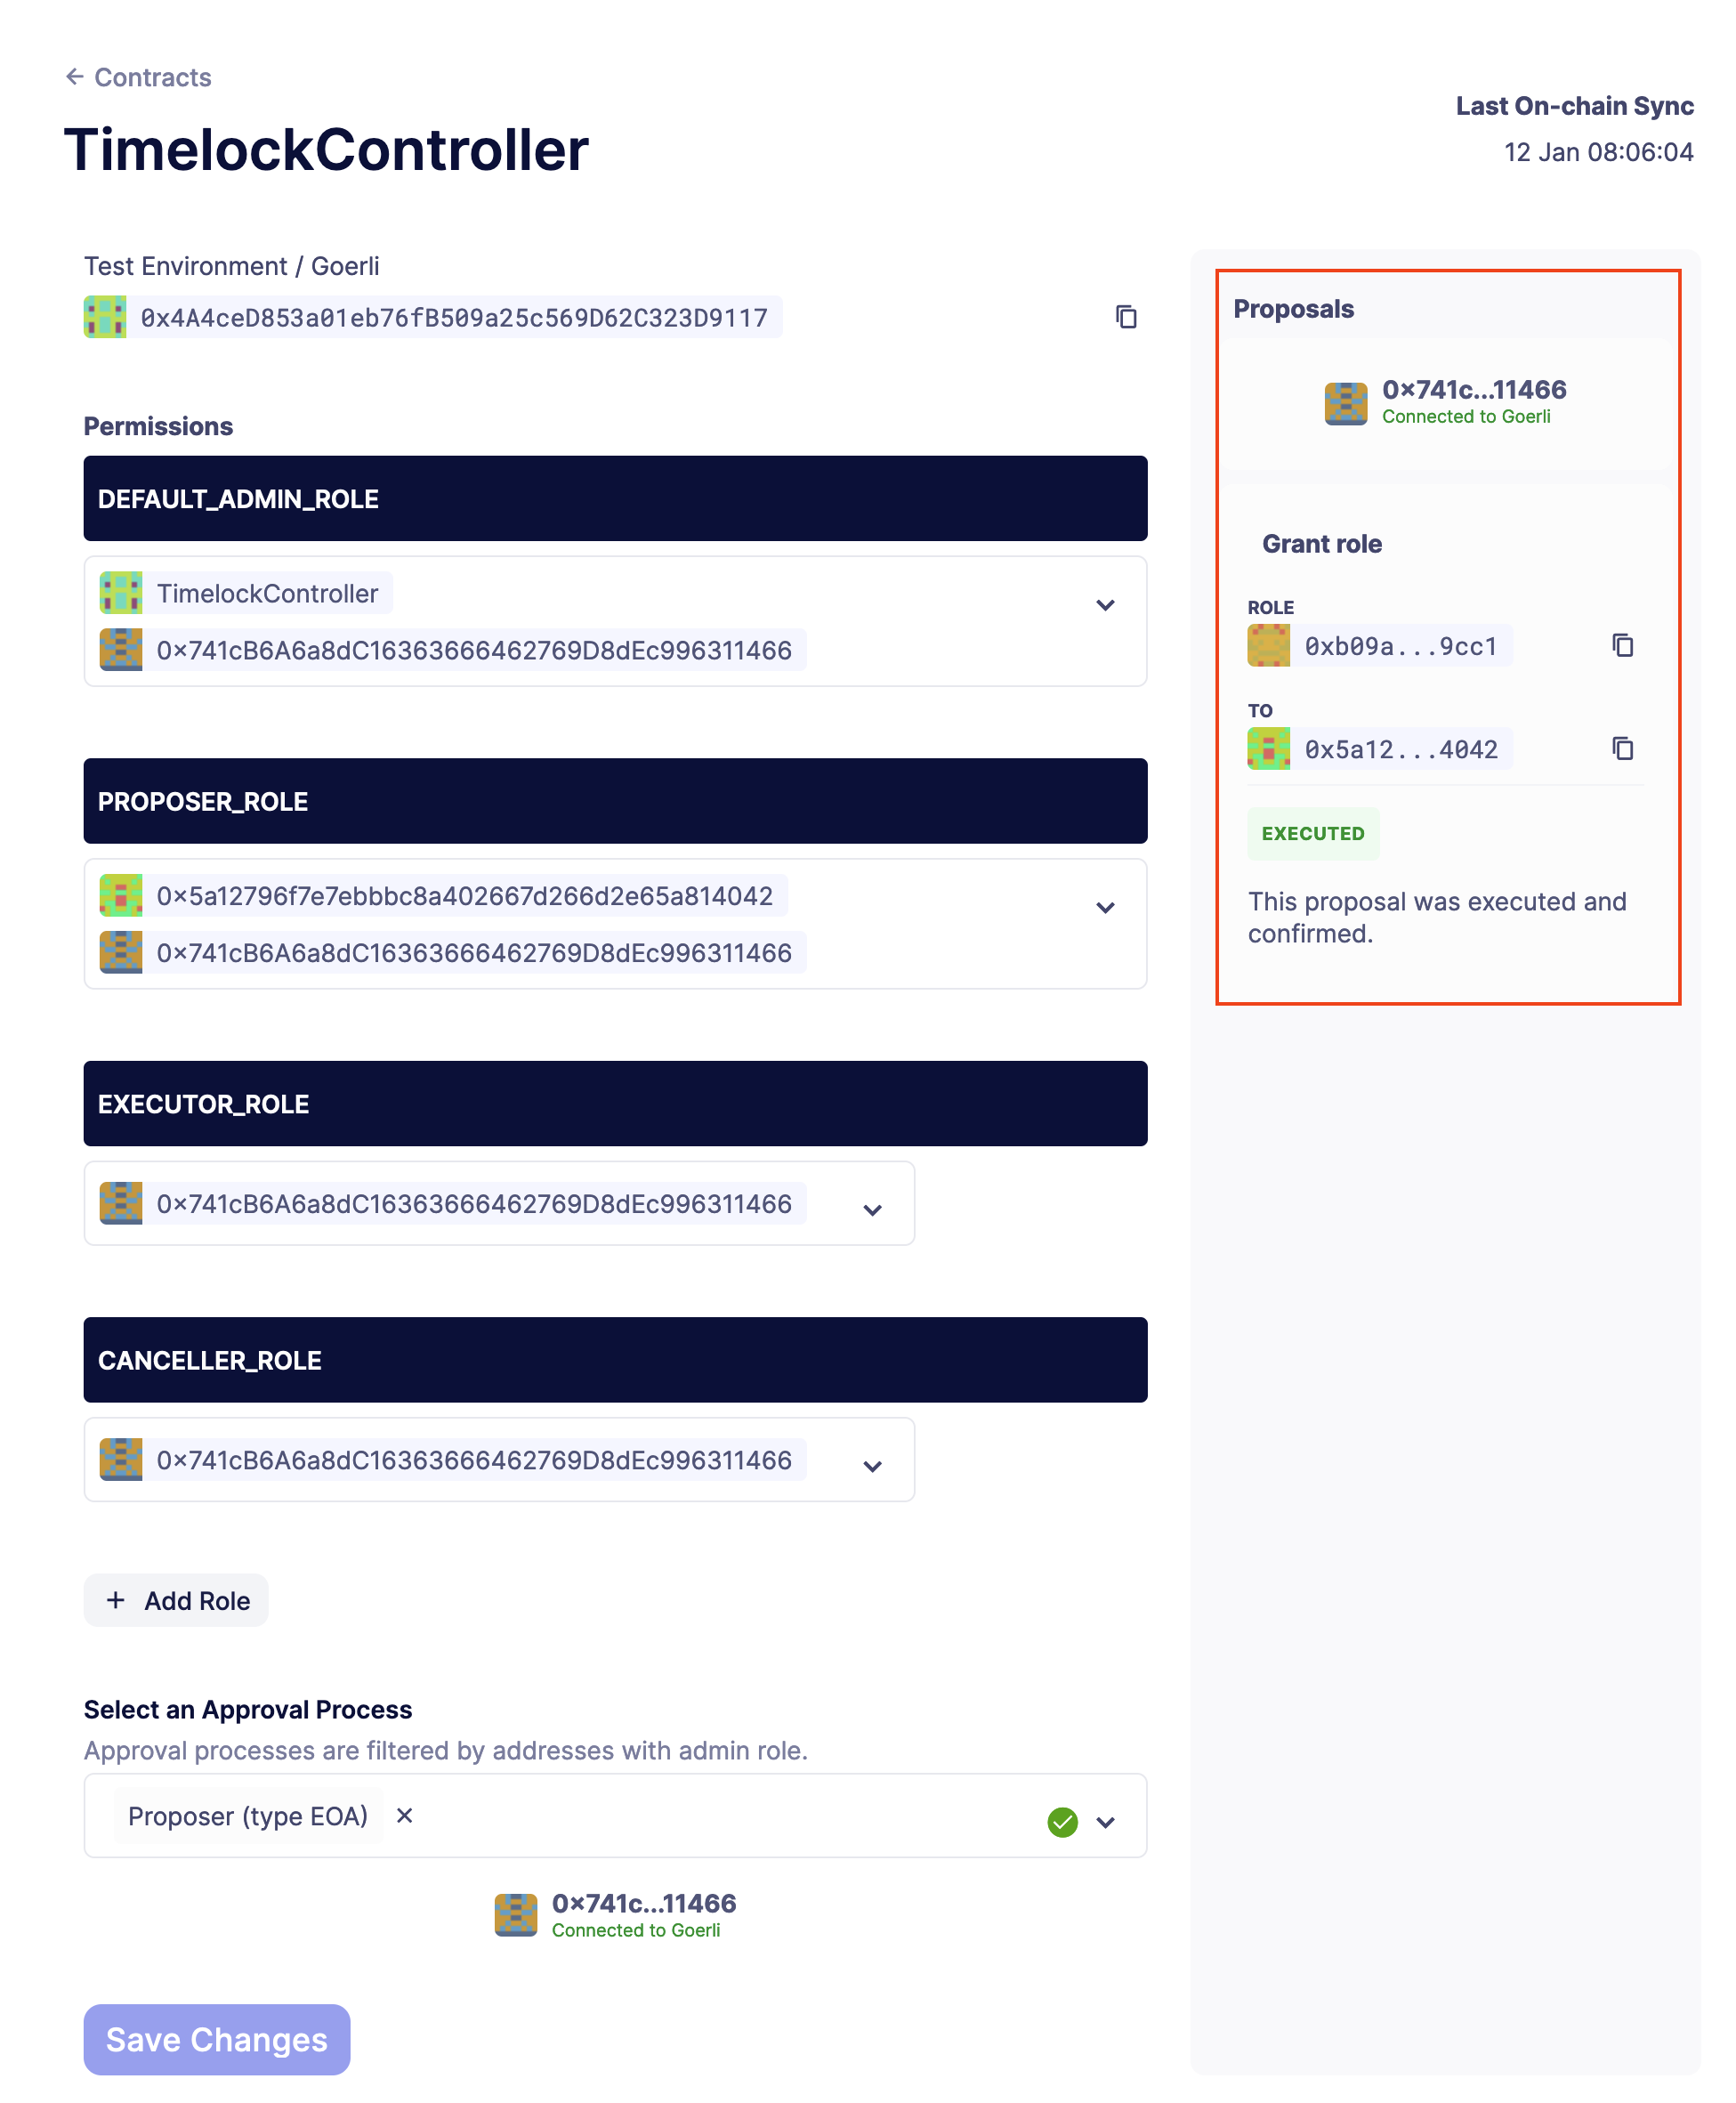
First, expand the dropdown of PROPOSER_ROLE and paste the address to grant the role to.
Then, scroll down and use an approval process that holds the DEFAULT_ADMIN_ROLE to send the transaction, like an EOA wallet. Click on Save Changes, which will send the transaction to your wallet.
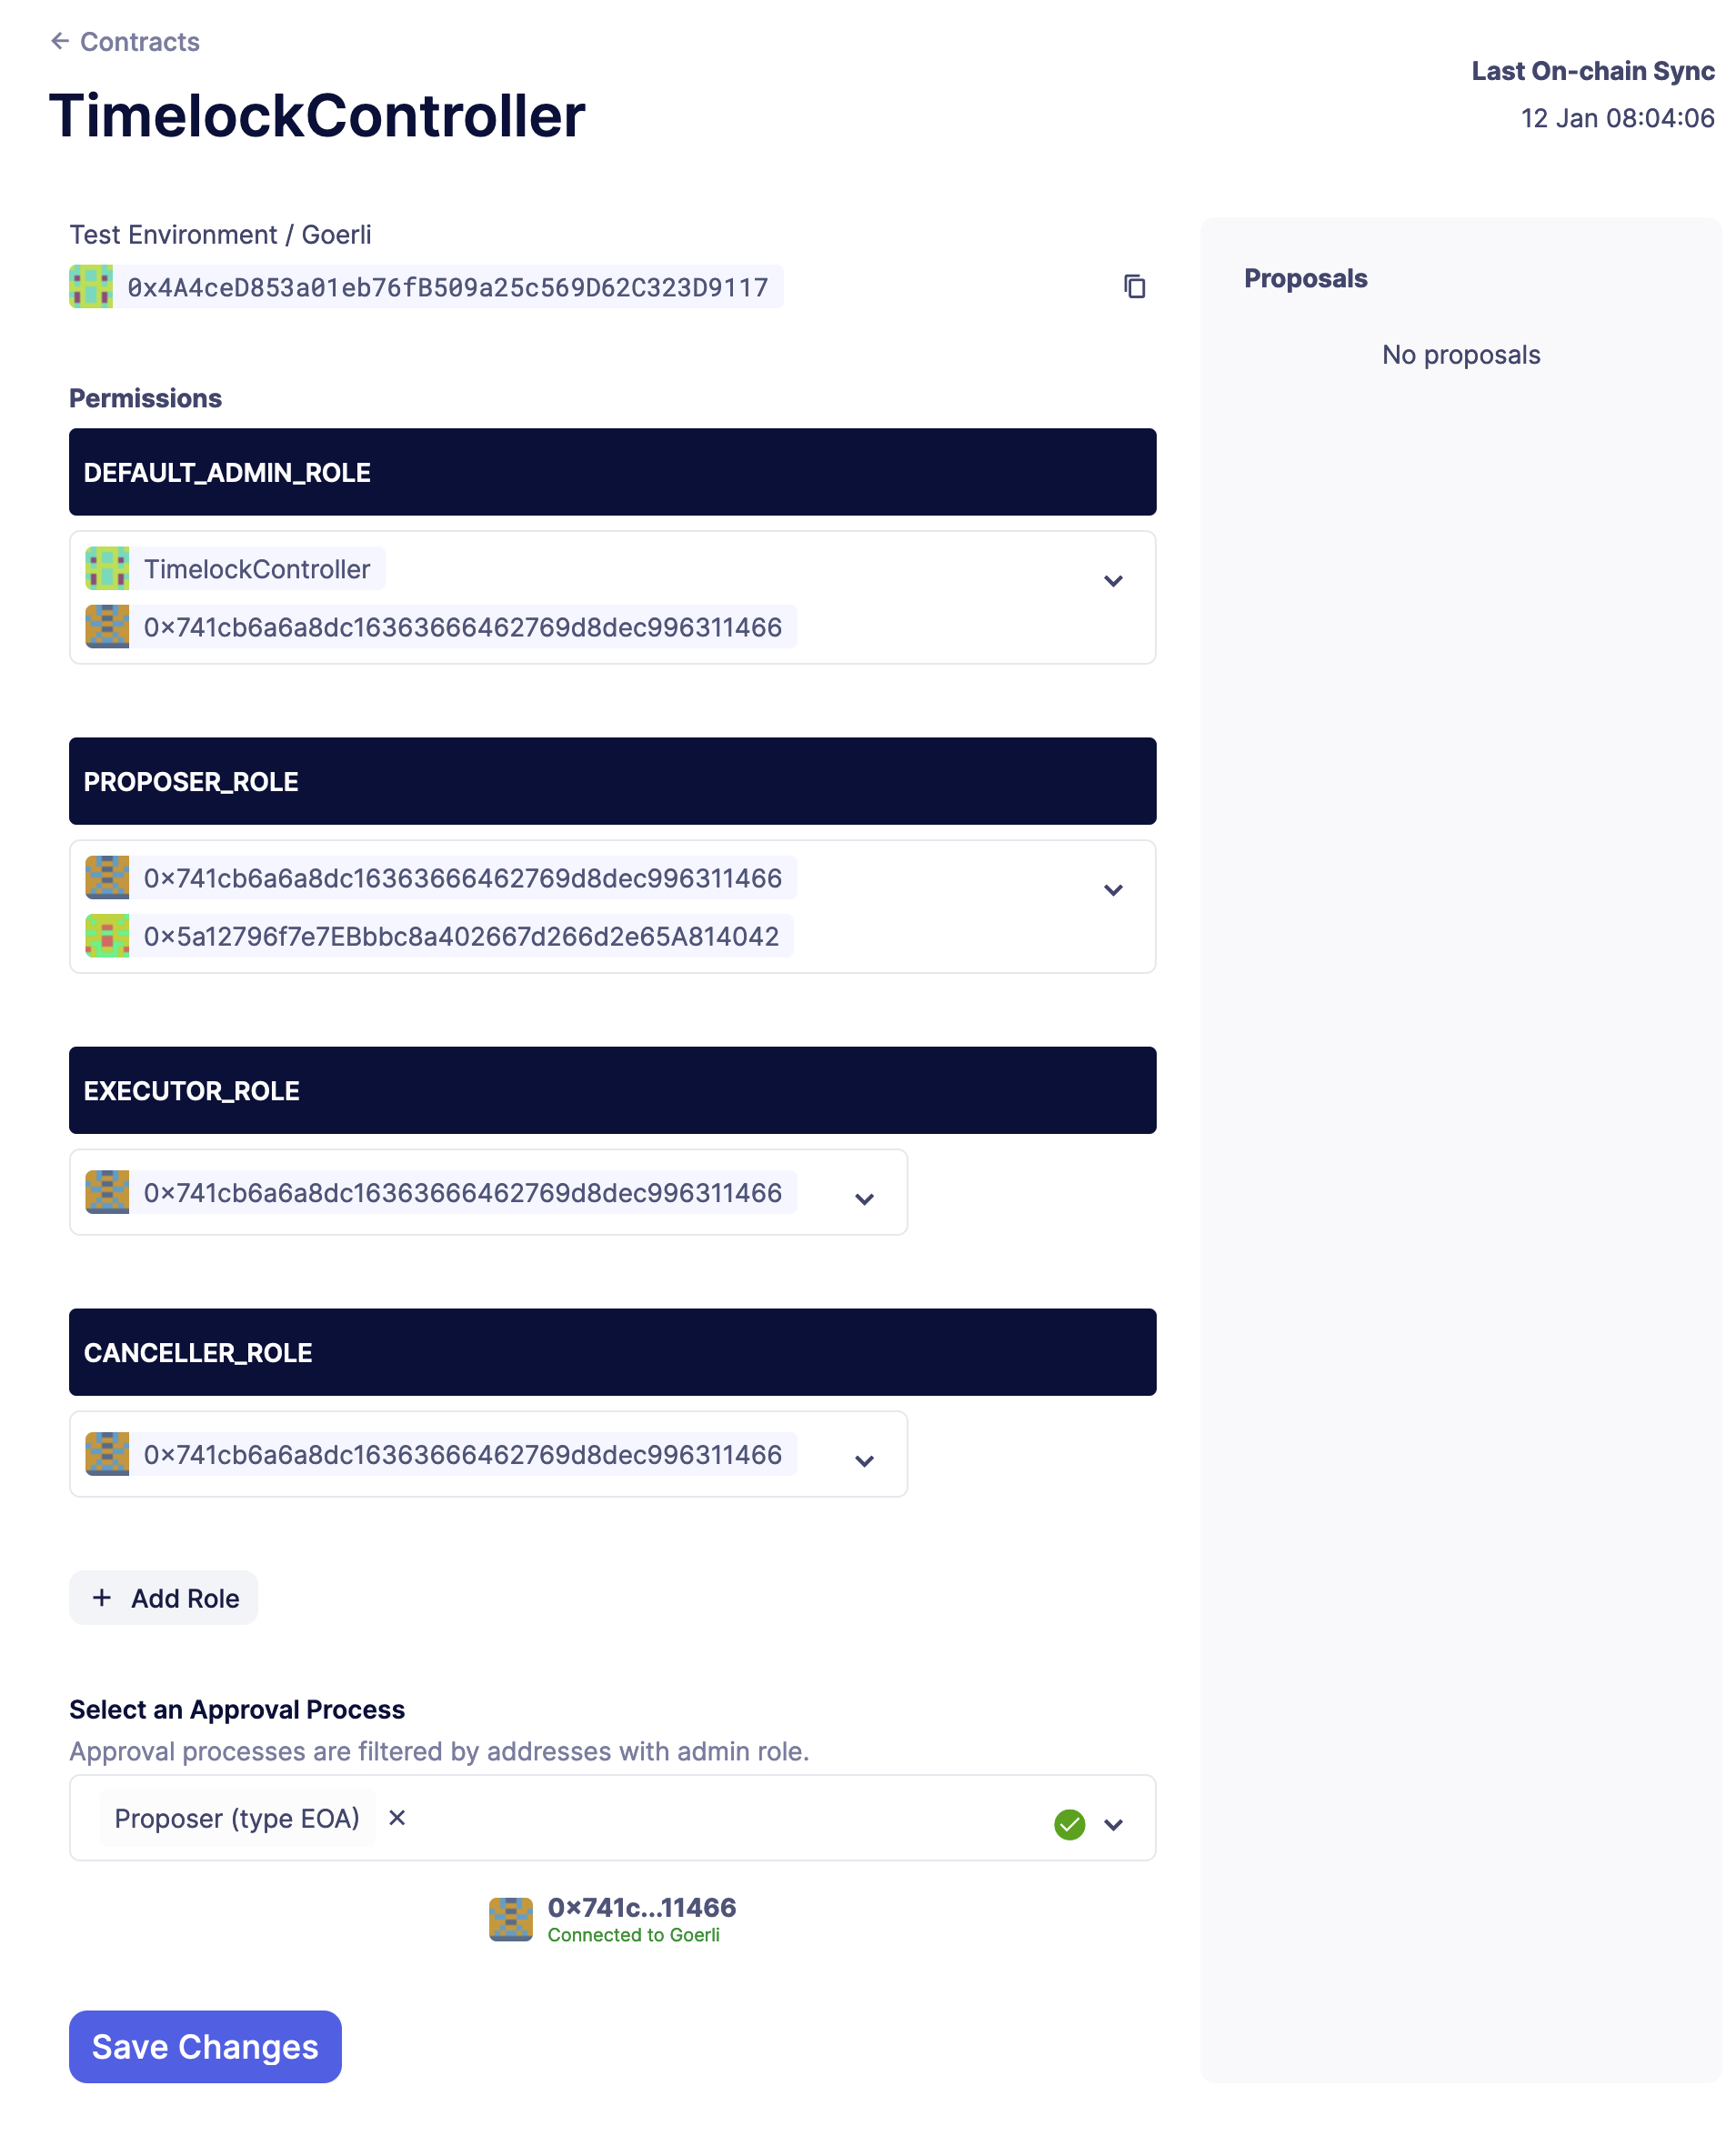
On the right side of the page, you will see that the transaction was executed and the role was granted to the address you selected.
Revoking a role
To revoke a role, you need do the same steps but unselect the address to revoke the role from in the dropdown.
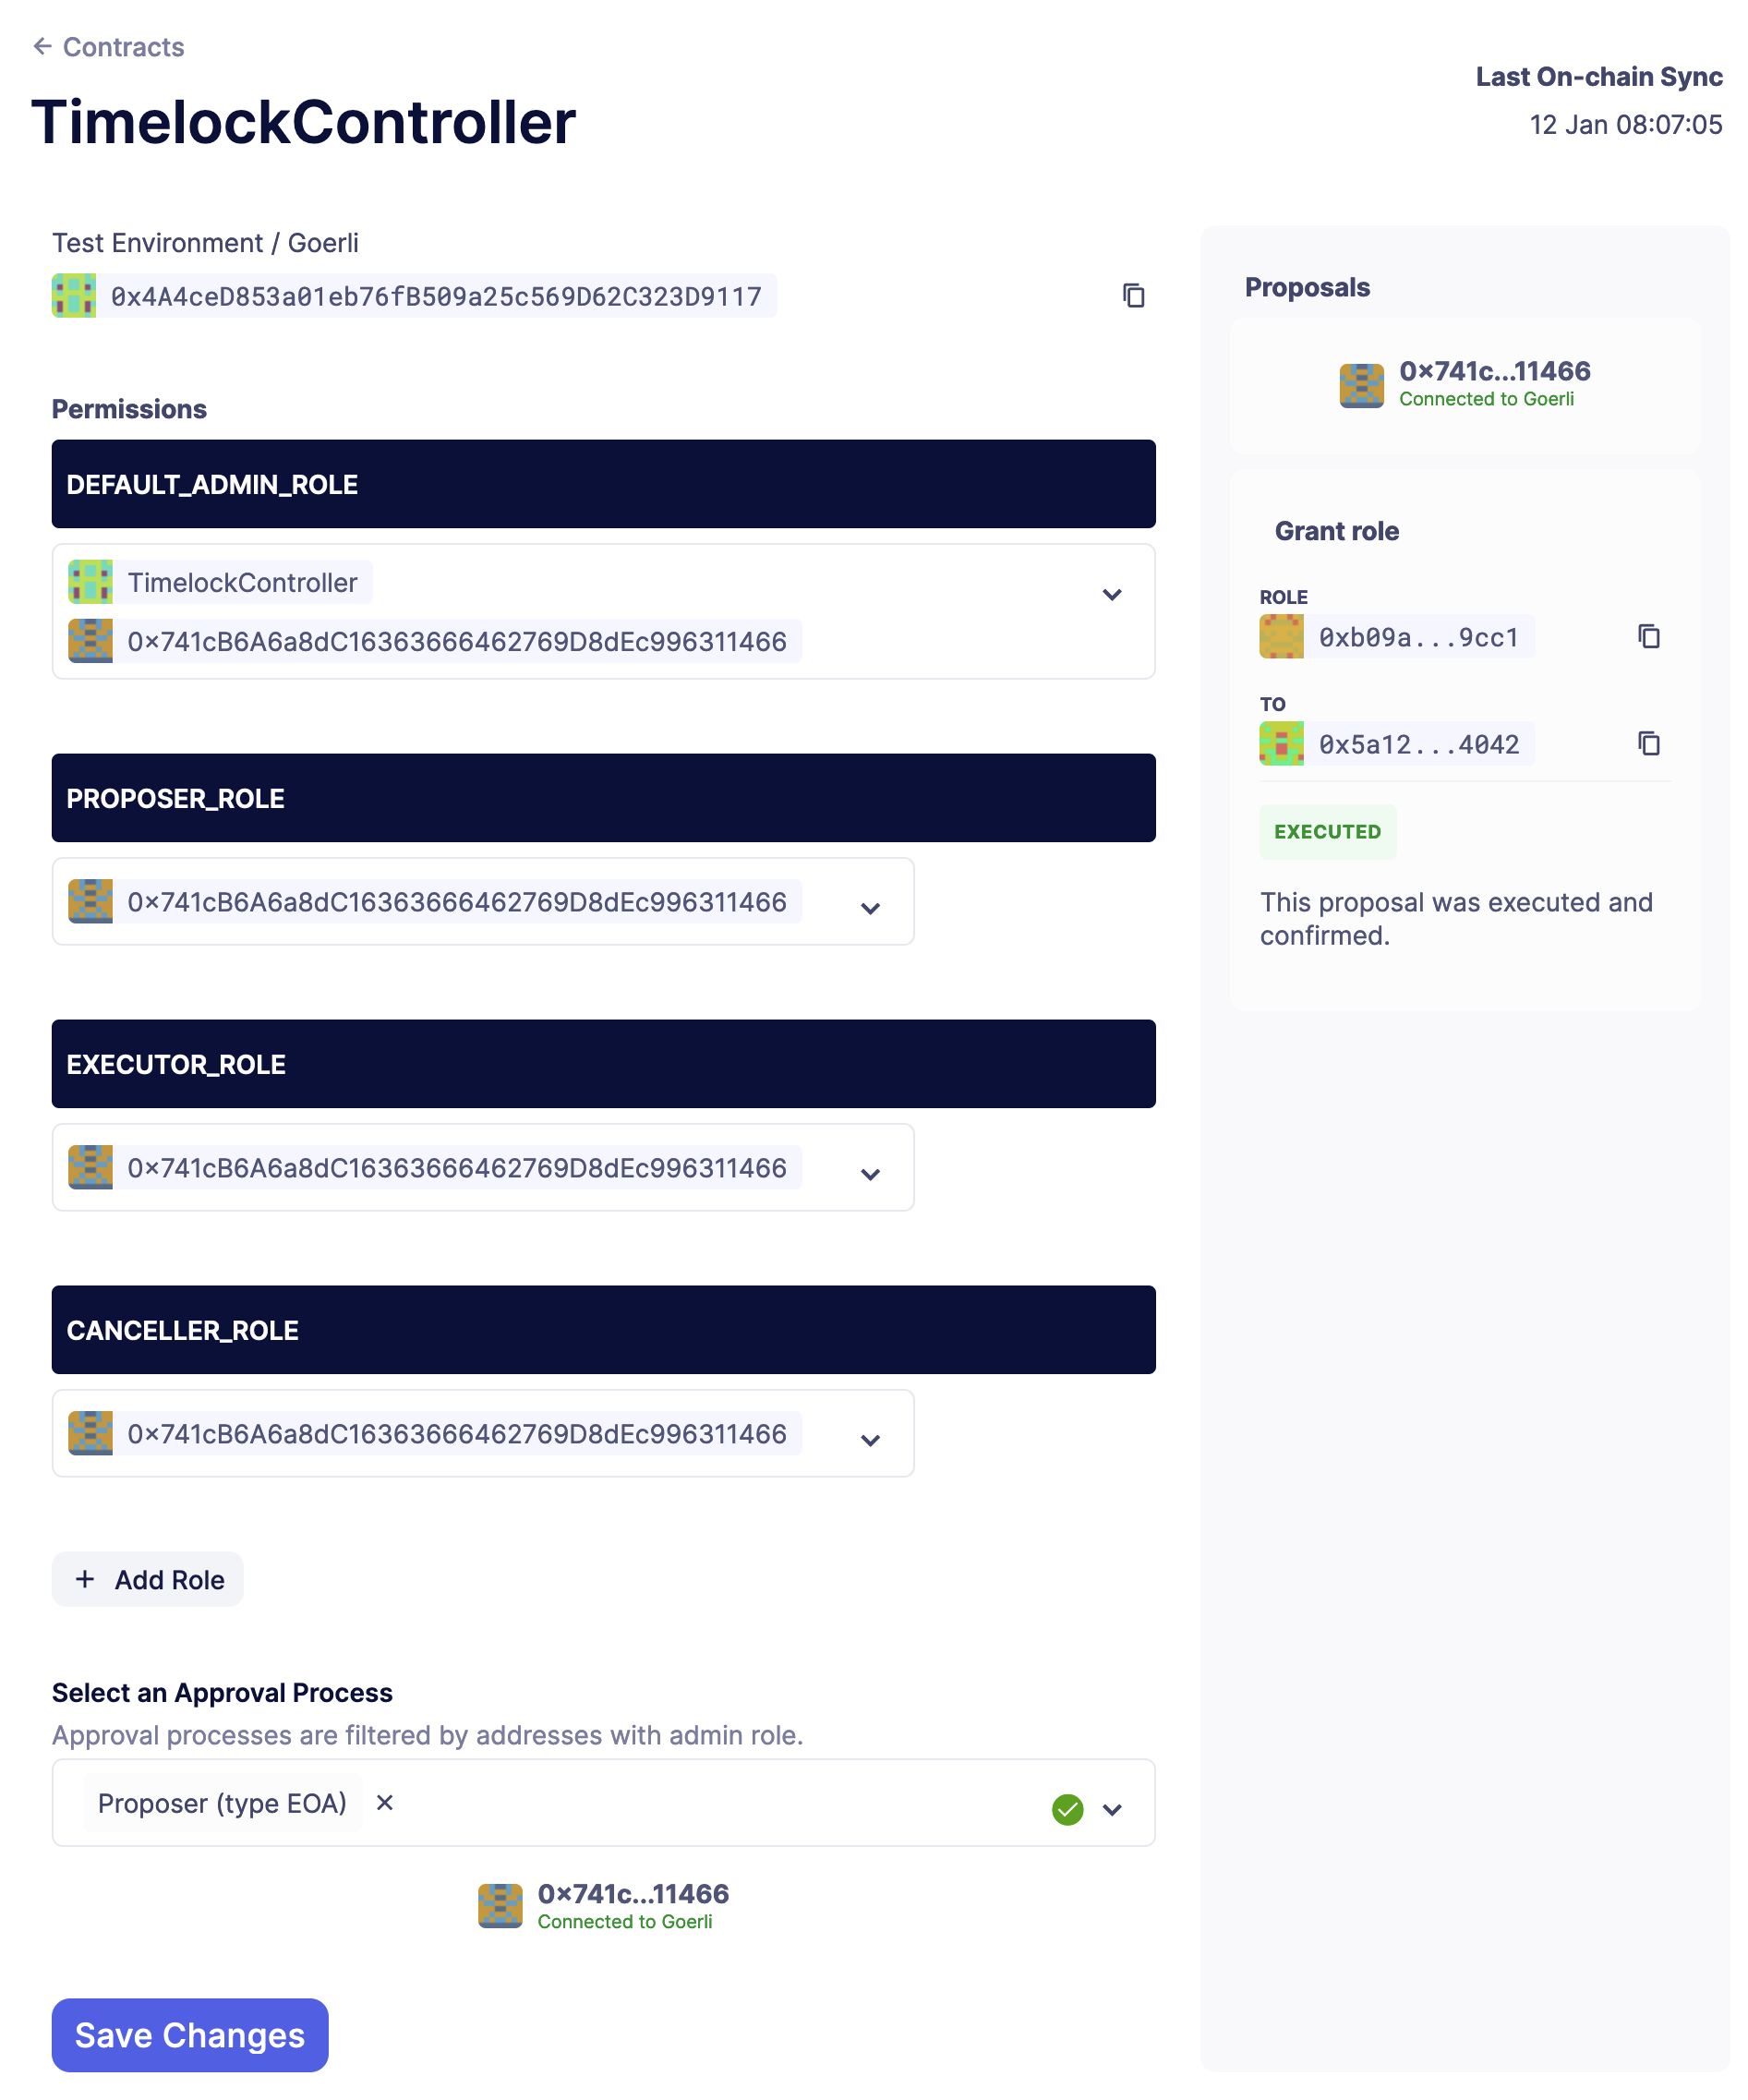
Then, use the same approval process and save the changes. The transaction should be executed and the role revoked, as confirmed on the right side of the page.
