Deploy
Deploy allows you to deploy and upgrade smart contracts across chains securely. You can prove that the code running on-chain matches the audited implementation and minimize crucial mistakes that can lead to losses or issues.
Use cases
- Configure production and test environments with granularity over deployer addresses.
- Pay gas for deployments automatically.
- Ensure all smart contract deployments are verified on block explorers.
- Manage deployments to multiple chains from a single place.
- Automate multisig approval process for upgrades.
- Fully compatible with CI/CD for automated releases.
- Track the details and history for every deployment or upgrade.
Environments
Deploy is divided into production and test environments, with mainnet networks for the former and testnet networks for the latter. Each environment is associated with one or more networks according to its type of environment, which allows to separate test contracts from production safely. To facilitate the onboarding process, the setup for each environment is configured through a wizard, which swiftly walks you through the following steps.
Wizard
Step 1: Networks
In the first step, you select the networks to use. Deploy supports multi-chain deployments, allowing users to deploy contracts to the same addresses across multiple networks. You can add or remove networks at any time through the environment page.
To maintain the best security practices, the wizard will only show networks according to the type of environment chosen to prevent mixing networks.
Step 2: Deploying
In this step, users choose the default approval process for each network. The resource associated to this approval process is the one that will be used to pay and execute the deployment transactions. If you don’t have an approval process for a network, the wizard will allow you to create one of either type Relayer, Safe or EOA ("Externally Owned Account"). You can learn more about approval processes here.
Step 3: Upgrading
This last step is optional but recommended if you plan to deploy upgradeable contracts. Here you choose the approval process for upgrades for each network. You can find a list of supported processes here.
Environment Page
Once inside an environment, you can see the configuration and activity of deployments within it.
Configuration
You can edit the configuration of any network within the environment. To do so, click the edit button to reach the configuration page, where you can add or remove a network and change the default approval processes. We use system block explorer API keys to automatically verify contracts on Etherscan. You can manage your own keys in the configuration page.
History
The history table shows the activity within the environment, allowing you to check the status of deployments or upgrades. There are three possible statuses:
COMPLETE: The deployment has been successfully executed in the network.PENDING: The upgrade is waiting for approval.FAILED: The deployment has failed. Make sure the relayer or EOA associated to the approval process has enough funds and that the smart contract is valid.
Deploying and Upgrading
After an environment is configured, you can use it for deployments and upgrades. To do so, we provide an API, and Hardhat and Foundry plugins. The Deploy API is recommended for custom projects that don’t use Hardhat or Foundry. On the other hand, the plugins are extremely easy to use as they only require a few lines of code to implement.
Defender will use the default approve process for deployments and upgrades. However, the Hardhat and Foundry plugins allow you to specify a different approval process for upgrades. If a block explorer API key is not provided, Defender will try to verify the contracts with the default key. Otherwise, it will use the one provided.
We provide a quickstart tutorial to deploy and upgrade a smart contract using Defender with Hardhat and Foundry. Check it out here!
Using CREATE2 may affect msg.sender behavior; see documentation for details here!
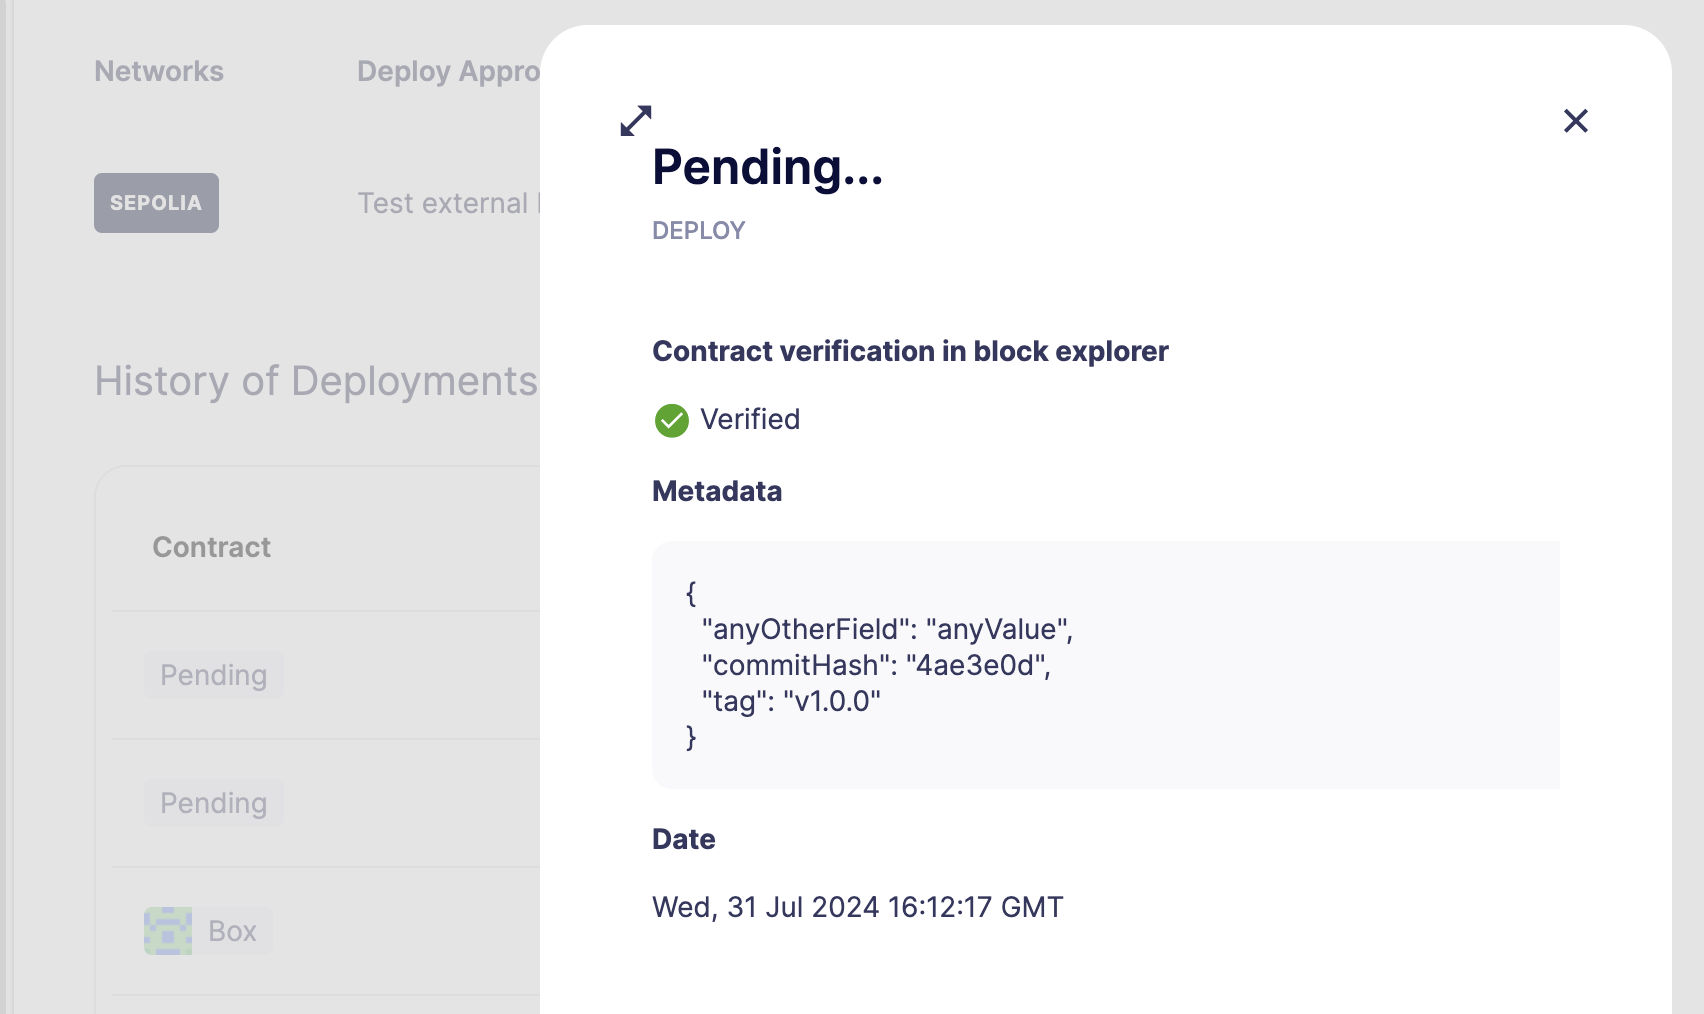
Metadata
To identify, tag, or classify deployments, you can use the metadata field, which includes properties like commitHash, tag, or any custom property that suits your use case.
  const client = new Defender(
    apiKey: process.env.API_KEY,
    apiSecret: process.env.API_SECRET,
  );

  const deployment = await client.deploy.deployContract(
    contractName: 'Example',
    ...
    metadata: {
      commitHash: '4ae3e0d',
      tag: 'v1.0.0',
      anyOtherField: 'anyValue',
    ,
  });
Once the deployment is submitted, these metadata fields will be displayed in the Defender UI under Metadata, formatted in JSON.