Account Management
User management
You can invite, manage access for, and remove team members from your Defender account under the User management section, accessible from the app’s top-right menu.
| If you want to add a user to your team, make sure to invite them from the User management section. If they sign up directly to the application, they will be added to a new team of their own instead. If this happens, consider having your teammate delete their account, so you can re-send the invitation for your team. Alternatively, they can join your team using a different email address. |
Role based access control
You can manage authorization to access, modify and/or operate your Defender resources (relayers, sentinels, autotasks, contracts, etc) through Defender’s role based access control system, which you can operate from the User management section.
When you invite a new user to your team, Defender will ask you to assign a role to them, which will determine what access they get. In case you want to invite a new team member with full access to your Defender team account, you can also choose to grant them All permissions.
| users with All permissions are assigned the built-in role Admin in the user table. |
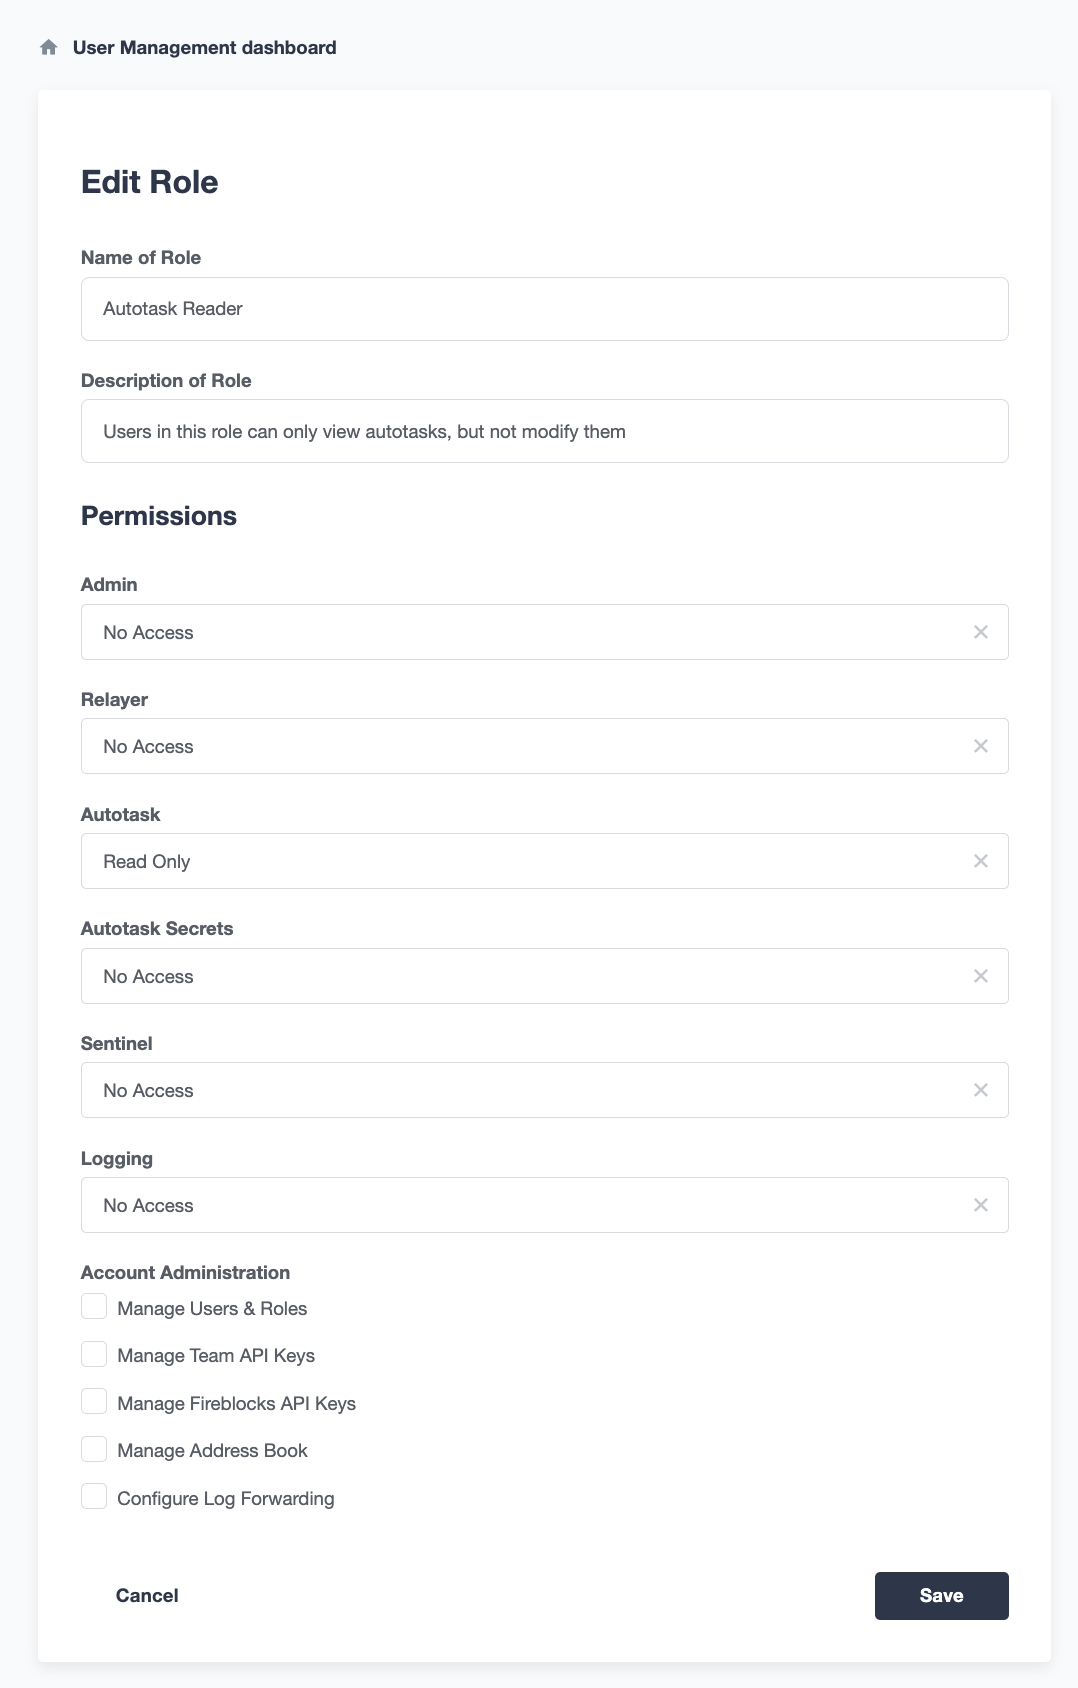
To create a new role, click on Create Role at the roles table. You will be asked to enter a role name and description, and to specify the level of access users in that role will get for each Defender subcomponent: Admin, Relayer, Autotask, Autotask Secrets, Sentinel, Logging. You can also specify which administrative powers the role will give access to: team API keys management, Fireblocks API keys management, address book, log forwarding, and user and roles management.
After saving, the new role will be available from the user invite form, and you might also use it to manage access levels of preexisting users in your team.
Naturally, if in the future you decide to modify the access level of a given role, all users who have that role will as a consequence see their access level change.
| Be careful when granting administrative permissions. A user with the rights to modify roles but not to access any other component can modify their own role to grant them access to any other parts of the application. |
Two factor authentication (2FA)
We strongly suggest that you enable 2FA to improve your Defender account security. As a second authentication factor, Defender relies on the Time-based One-Time Password standard (TOTP). To enable 2FA on Defender, you need a TOTP compliant application, such as Authy or Google Authenticator. You can enable 2FA under the Account settings section, accessible from the top-right user menu. Defender will guide you through the necessary steps.
Password reset
To change your user password for Defender, follow the steps below.
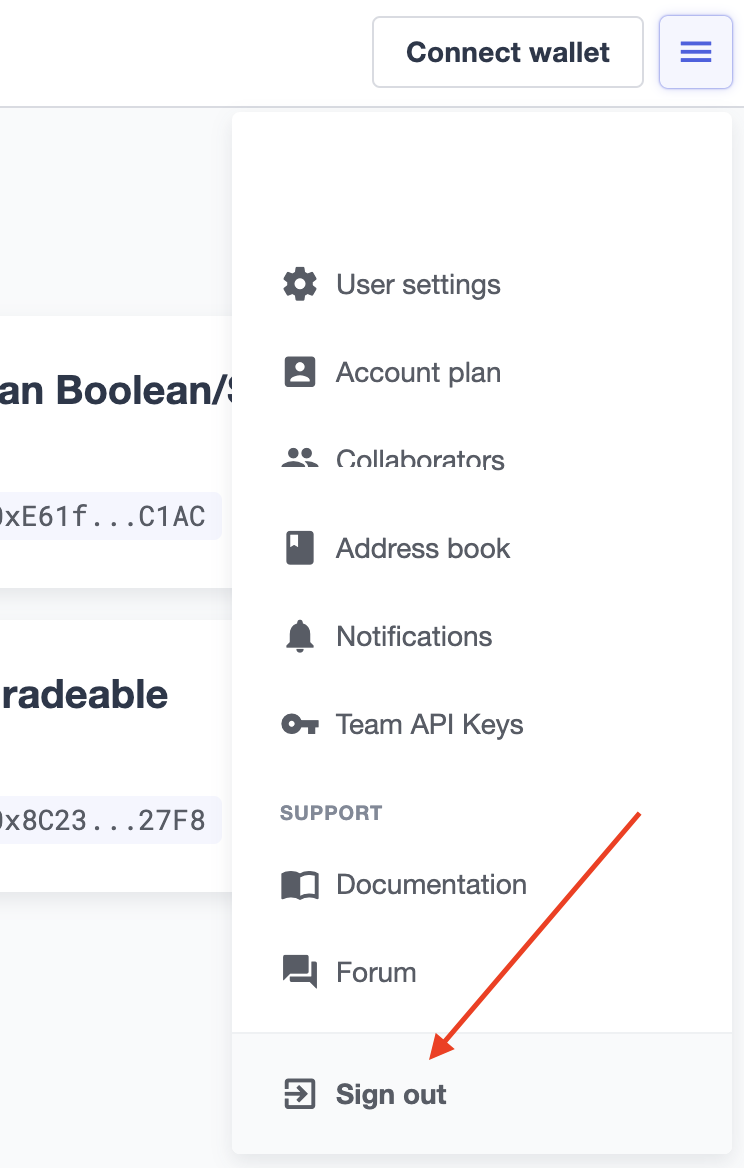
If you are logged into Defender, sign out by opening the upper right corner menu and clicking on Sign out. You will be redirected to Defender’s splash page. If you are not logged into Defender, skip to the next step.
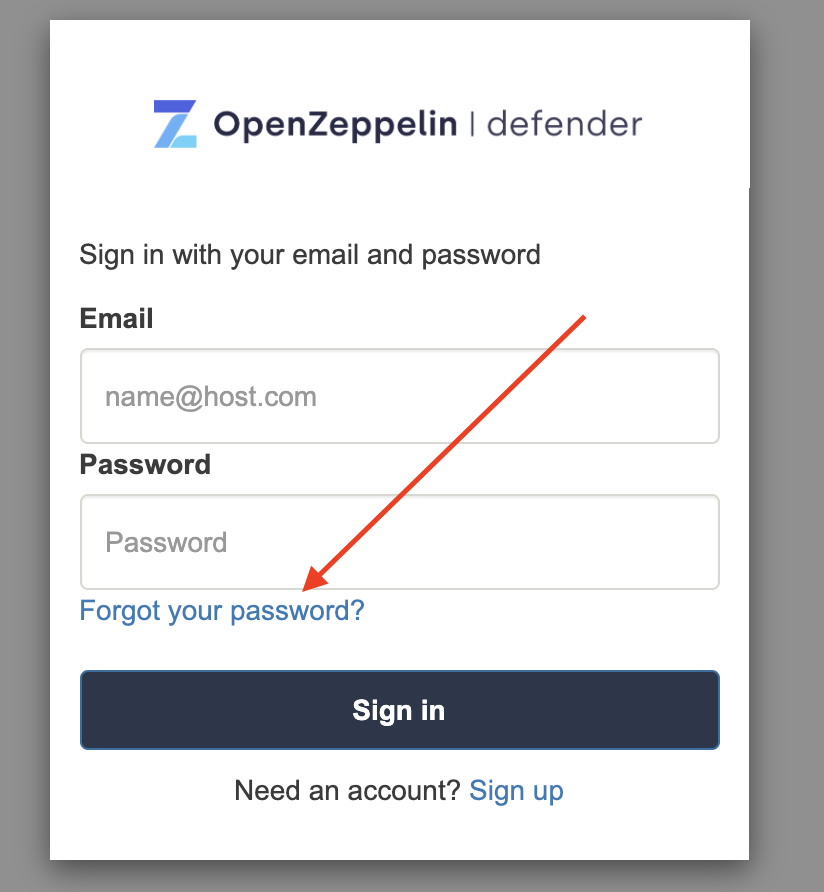
From Defender’s splash page, click on Sign in. You will be redirected to Defender’s sign in page.

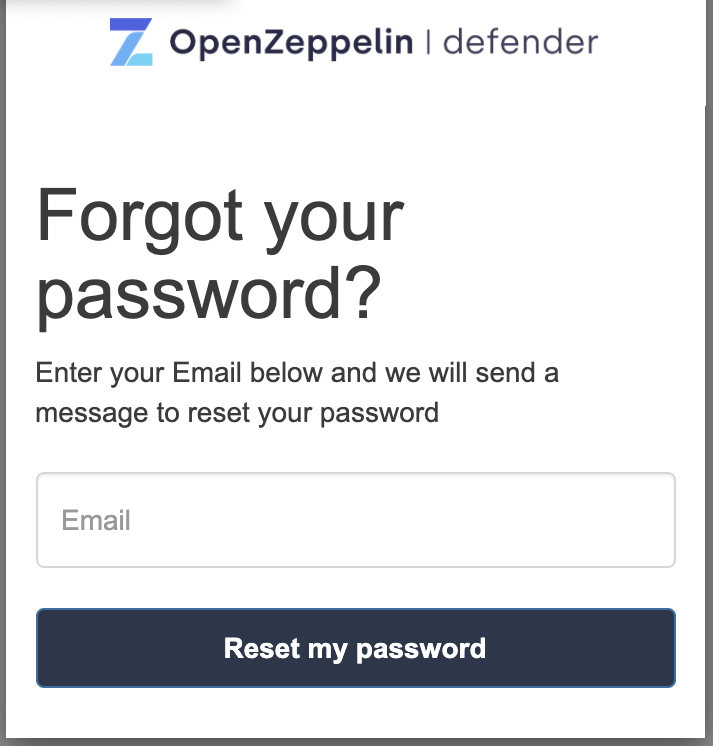
From Defender’s sign in page, click on Forgot your password?.
Enter your email address and click on Reset my password. You will shortly receive an email with instructions on how to continue with the password reset process.