How to Relay Gasless Meta-Transactions
Gasless meta-transactions offer users a more seamless experience, and potentially one where they don’t have to spend as much money to engage with the blockchain. This method gives users the option to sign a transaction for free and have it securely executed by a third party, with that other party paying the gas to execute the transaction.
A gasless meta-transaction relay can be easily and securely implemented using OpenZeppelin Defender by way of a Relayer. A Defender Relay allows you to send transactions easily and handles private key storage, transaction signing, nonce management, gas estimation, and automatic resubmissions if necessary.
This demo app implements meta-transactions using MinimalForwarder and ERC2771Context to separate msg.sender from the relayer’s address. All the user needs to do is sign a message using the account they would like to issue the transaction from. The signature is formed from the target contract and the data of the desired transaction, using the user’s private key. This signing happens off-chain and costs no gas. The signature is passed to the Relayer so it can execute the transaction for the user (and pay the gas).
Demo App Overview
You can view the live demo dapp here. It accepts registrations directly if the user has the available funds to pay for the transaction, otherwise the data is sent as a meta-transaction.
In the example code, the functionality of the SimpleRegistry contract is to take a string and store it. The contract’s metatransaction implementation achieves the same result by decoupling the signer from the sender of the transaction.
When comparing the code, note the metatransaction’s use of _msgSender() as opposed to the SimpleRegistry’s use of msg.sender. By extending from ERC2771Context and MinimalForwarder, the contract becomes metatransaction capable. (Note that all OpenZeppelin contracts are compatible with the use of _msgSender().)
The second fundamental change between the two contracts is the need for the metatransaction contract to specify the address of the trusted forwarder, which in this case is the address of the MinimalForwarder contract.
Configure the project
First, fork the repository and then git clone your fork to your computer and install dependencies:
$ git clone https://github.com/[GitHub username]/workshops.git
$ cd workshops/25-defender-metatx-api/
$ yarn
Create a .env file in the project root and supply your Team API key and secret from Defender. A private key will be used for local testing but the Relayer is used for actual contract deployment.
PRIVATE_KEY="Sepolia private key"
TEAM_API_KEY="Defender Team API key, used for uploading autotask code"
TEAM_API_SECRET="Defender Team API secret"
Create Relayer
Run the relayer creation script:
$ yarn create-relayEdit the scripts/createRelay.js file, supplying your Defender API key in your .env file and adjusting variable names as appropriate.
The Relayer is created using the create method:
const relayClient = new RelayClient({ apiKey, apiSecret });

const requestParams = {
  name: 'MetaTxRelayer',
  network: 'sepolia',
  minBalance: BigInt(1e17).toString(),
};
const relayer = await relayClient.create(requestParams);
Note that you will later need the relayerId from either the console log or the created relay.json file. You’ll use this when creating the Autotask.
The Relayer’s API key and secret will be used whenever you would like to send a transaction via API. In the above code, it is appended to the existing .env file.
Compile the Contract Using Hardhat
Use the following code for your Registry.sol contract:
// SPDX-License-Identifier: MIT
pragma solidity ^0.8.0;

import "@openzeppelin/contracts/metatx/ERC2771Context.sol";
import "@openzeppelin/contracts/metatx/MinimalForwarder.sol";

contract Registry is ERC2771Context {
  event Registered(address indexed who, string name);

  mapping(address => string) public names;
  mapping(string => address) public owners;

  constructor(MinimalForwarder forwarder) // Initialize trusted forwarder
    ERC2771Context(address(forwarder)) {
  }

  function register(string memory name) external {
    require(owners[name] == address(0), "Name taken");
    address owner = _msgSender(); // Changed from msg.sender
    owners[name] = owner;
    names[owner] = name;
    emit Registered(owner, name);
  }
}
Run npx hardhat compile to get the code ready for deployment.
Deploy Using Relayer
You can easily deploy a compiled smart contract without handling a private key by using Defender Relayer client.
Create an instance of the relay-client, supplying the Relay’s API key and secret as its credentials, and connect to it when calling deploy().
// ...
  const credentials = {
    apiKey: process.env.RELAYER_API_KEY,
    apiSecret: process.env.RELAYER_API_SECRET,
  }
  const provider = new DefenderRelayProvider(credentials)
  const relaySigner = new DefenderRelaySigner(credentials, provider, {
    speed: 'fast',
  })

  const Forwarder = await ethers.getContractFactory('MinimalForwarder')
  const forwarder = await Forwarder.connect(relaySigner)
    .deploy()
    .then((f) => f.deployed())
// ...
The script in deploy.js pulls the Relayer’s credentials from the local .env file along with the artifacts for the Registry and MinimalForwarder contracts and uses ethers.js to deploy. The relevant addresses of these contracts are saved to the local file deploy.json.
In the demo app, run this script with yarn deploy
After the code is deployed, the Relayer key and secret can be safely deleted; they are not needed unless additional local testing is desired.
Create Autotask via API
The demo app uses an Autotask to supply the necessary logic for telling the Relayer to send a transaction to the forwarder contract, supplying the signer’s address. The Autotask will get triggered by each call to its webhook from the dapp.
Due to the tight relationship between components, the Relayer credentials are securely available to the Autotask simply by instantiating a new provider and signer.
The position of the Autotask here is crucial — only the Autotask’s webhook is exposed to the frontend. The Autotask’s role is to execute the transaction according to the logic assigned to it: if the user has funds, they pay for the transaction. If not, the Relayer pays for the transaction.
It’s important that the Relayer’s API key and secret are insulated from the frontend. If the Relayer keys were exposed, anyone could potentially use the Relayer to send any transaction they wanted.
const ethers = require('ethers');
const { DefenderRelaySigner, DefenderRelayProvider } = require('@openzeppelin/defender-relay-client/lib/ethers');

const { ForwarderAbi } = require('../../src/forwarder');
const ForwarderAddress = require('../../deploy.json').MinimalForwarder;
const RegistryAddress = require('../../deploy.json').Registry;

async function relay(forwarder, request, signature, whitelist) {
  // Decide if we want to relay this request based on a whitelist
  const accepts = !whitelist || whitelist.includes(request.to);
  if (!accepts) throw new Error(`Rejected request to ${request.to}`);

  // Validate request on the forwarder contract
  const valid = await forwarder.verify(request, signature);
  if (!valid) throw new Error(`Invalid request`);

  // Send meta-tx through relayer to the forwarder contract
  const gasLimit = (parseInt(request.gas) + 50000).toString();
  return await forwarder.execute(request, signature, { gasLimit });
}

async function handler(event) {
  // Parse webhook payload
  if (!event.request || !event.request.body) throw new Error(`Missing payload`);
  const { request, signature } = event.request.body;
  console.log(`Relaying`, request);

  // Initialize Relayer provider and signer, and forwarder contract
  const credentials = { ... event };
  const provider = new DefenderRelayProvider(credentials);
  const signer = new DefenderRelaySigner(credentials, provider, { speed: 'fast' });
  const forwarder = new ethers.Contract(ForwarderAddress, ForwarderAbi, signer);

  // Relay transaction!
  const tx = await relay(forwarder, request, signature);
  console.log(`Sent meta-tx: ${tx.hash}`);
  return { txHash: tx.hash };
}

module.exports = {
  handler,
  relay,
}
Note that the Autotask code must include an index.js file that exports a handler entrypoint. If the code relies on any external dependencies (such as an imported ABI) it’s necessary to bundle the Autotask using webpack, rollup, etc.
Although you can create an Autotask using the Defender web client, it may be more convenient to use a script that makes use of Defender’s API.
In the demo app, run yarn create-autotask to compile the Autotask code, create the Autotask in Defender and upload the bundled code by calling the Autotask client’s .create() method:
// ...
const client = new AutotaskClient({ apiKey, apiSecret });
const {autotaskId } = await client.create({
name: "Relay MetaTX",
encodedZippedCode: await client.getEncodedZippedCodeFromFolder('./build/relay'),
relayerId: relayerId,
trigger: {
type: 'webhook'
},
paused: false
});
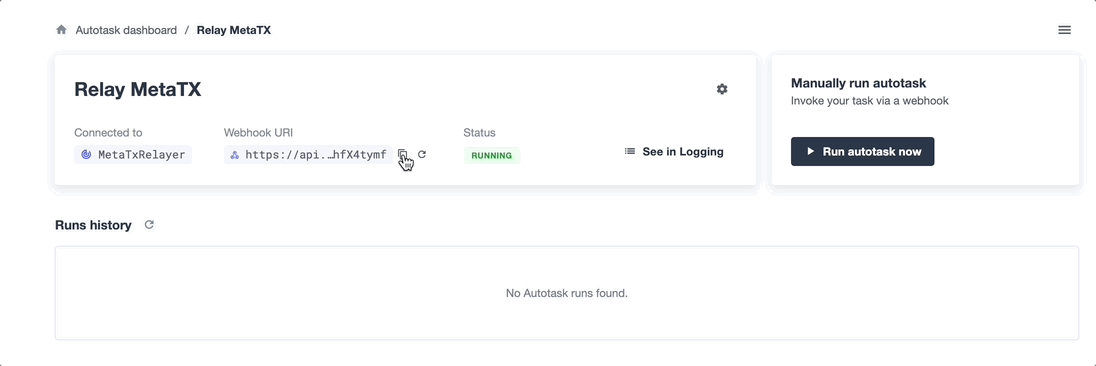
// ...Head to Defender and grab the Autotask’s webhook so that you can test functionality and connect the app to the Autotask for relaying meta-transactions.
Save the Autotask webhook to your .env as the WEBHOOK_URL and in the /app .env file as the REACT_APP_WEBHOOK_URL.
Test the meta-transaction’s functionality with yarn sign followed by yarn invoke.
Create Web App
The key building blocks have been laid, so next it is a matter of crafting a web application that makes use of these components.
You can see the details of this relationship in the register.js file. The user’s transaction request is sent to the Relayer by way of the Autotask’s webhook, and this executes the Autotask’s logic given the parameters supplied by the application. Note that the signer’s nonce is incremented from the transaction.
import { ethers } from 'ethers';
import { createInstance } from './forwarder';
import { signMetaTxRequest } from './signer';

async function sendTx(registry, name) {
  console.log(`Sending register tx to set name=${name}`);
  return registry.register(name);
}

async function sendMetaTx(registry, provider, signer, name) {
  console.log(`Sending register meta-tx to set name=${name}`);
  const url = process.env.REACT_APP_WEBHOOK_URL;
  if (!url) throw new Error(`Missing relayer url`);

  const forwarder = createInstance(provider);
  const from = await signer.getAddress();
  const data = registry.interface.encodeFunctionData('register', [name]);
  const to = registry.address;

  const request = await signMetaTxRequest(signer.provider, forwarder, { to, from, data });

  return fetch(url, {
    method: 'POST',
    body: JSON.stringify(request),
    headers: { 'Content-Type': 'application/json' },
  });
}

export async function registerName(registry, provider, name) {
  if (!name) throw new Error(`Name cannot be empty`);
  if (!window.ethereum) throw new Error(`User wallet not found`);

  await window.ethereum.enable();
  const userProvider = new ethers.providers.Web3Provider(window.ethereum);
  const userNetwork = await userProvider.getNetwork();
  if (userNetwork.chainId !== 11155111) throw new Error(`Please switch to Sepolia for signing`);

  const signer = userProvider.getSigner();
  const from = await signer.getAddress();
  const balance = await provider.getBalance(from);

  const canSendTx = balance.gt(1e15);
  if (canSendTx) return sendTx(registry.connect(signer), name);
  else return sendMetaTx(registry, provider, signer, name);
}
Try the App
Install the necessary dependencies using and run the app.
$ cd app
$ yarn
$ yarn start-
Open app: http://localhost:3000/
-
Change to Sepolia network in Metamask
-
Enter a name to register and sign the metatransaction in MetaMask
-
Your name will be registered, showing the address that created the metatransaction and the name.
Use the frontend to see it working for yourself! Compare what happens when you sign the registry with an account that has funds, and then try it with an account that has a zero ETH balance.