Admin
The Defender Admin service acts as an interface to manage your smart contract project through secure multisig contracts or timelocks. Defender Admin holds no control at all over your system, which is fully controlled by the keys of the signers.
Use cases
Use Defender Admin whenever you need secure management of your smart contracts on-chain. Any administrative operation should not be unilaterally controlled by a single owner. Instead, set up a multi-signature wallet and rely on Defender Admin to run any of the following actions through it:
-
Upgrading a contract to a new implementation
-
Tweaking a numerical parameter in your protocol that affects its behavior
-
Managing an access control list for restricted operations
-
Pausing your contract in the event of an emergency
Contracts and Proposals
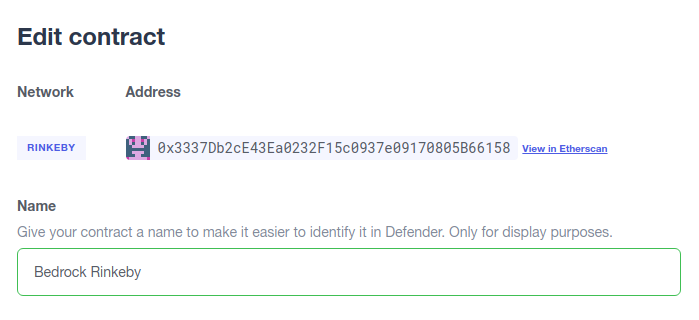
To begin managing one of your Contracts in Defender Admin, the first step is to register it. This is a one-time process where you specify network and address and assign a name to your contract. The contract’s ABI will be automatically pulled in from etherscan or sourcify if it has been verified, but you will need to manually enter it otherwise.
| Defender Admin will automatically attempt to detect some features of your contract. Today, it will detect whether it’s an EIP1967-compatible or a legacy zOS proxy (and load the implementation’s ABI in that case) and whether it’s managed by a ProxyAdmin contract. If you have validated your contract with Sourcify your NatSpec annotations will be available in the Admin panel. |

Once the contract has been added, you can create new Proposals for it. Each proposal is an action you will want to execute on the contract, which is executed via a multisig contract, and requires a quorum of admins to be in agreement. Once created, other admins can review and approve the proposal until it reaches the approval threshold and is executed.
Alternatively, you can also choose to execute an action directly on a Contract using Admin, if the function is not restricted to be called via a multisig.
| When creating a new proposal, Defender Admin will first simulate it and will refuse to create it if the action reverts, showing the revert reason returned by the contract. |
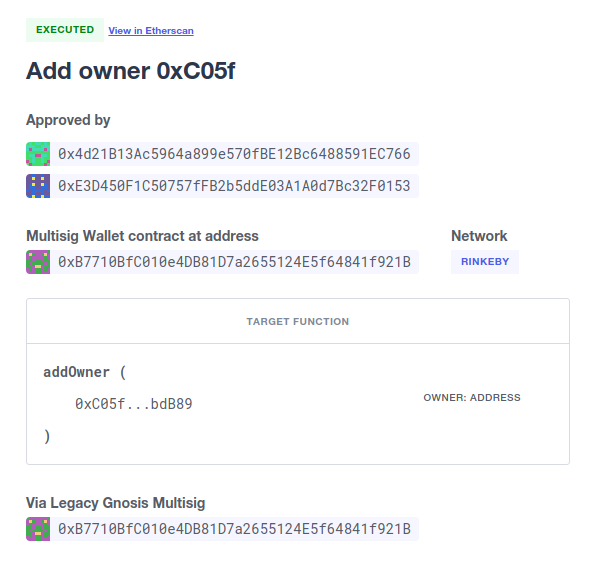
Here is a video walkthrough showing an Admin action being proposed and approved using both an EOA and a multisig:
API Access
You can programmatically add contracts to your Admin dashboard and create new proposals via the Defender Admin API. Check out the @openzeppelin/defender-admin-client npm package for more info.
Proposal types
Defender Admin supports three kinds of proposals today: upgrades, pause and custom actions. More proposal types will be added down the road.
Upgrades
An upgrade action can only be executed on EIP1967-compatible or legacy zOS upgradeable proxies that expose an upgradeTo(address) function. Defender Admin will handle proxies directly owned by a multi-signature wallet or proxies managed by a ProxyAdmin that is in turn owned by the wallet. The upgrade action only requires you to choose the new implementation address, and Defender Admin takes care of the rest.
Defender Admin currently does not validate storage layout compatibility of the implementations. For this reason, we strongly suggest using the openzeppelin-upgrades library to deploy the target implementation. This can be done with the prepareUpgrade function in Truffle or the defender.proposeUpgrade function in Hardhat.
|
Pause/Unpause
A pause action can be executed on contracts whose ABI exposes a pause() function. If the ABI also exposes an unpause() function, Defender Admin will also let you execute unpause actions. Both the pause and the unpause actions only require you to specify which Admin account they should be executed through.
If, additionally, your contract ABI exposes a paused() or isPaused() function returning a boolean result, Defender will query it and show you its status in the contract’s dashboard page, as seen in the image below.

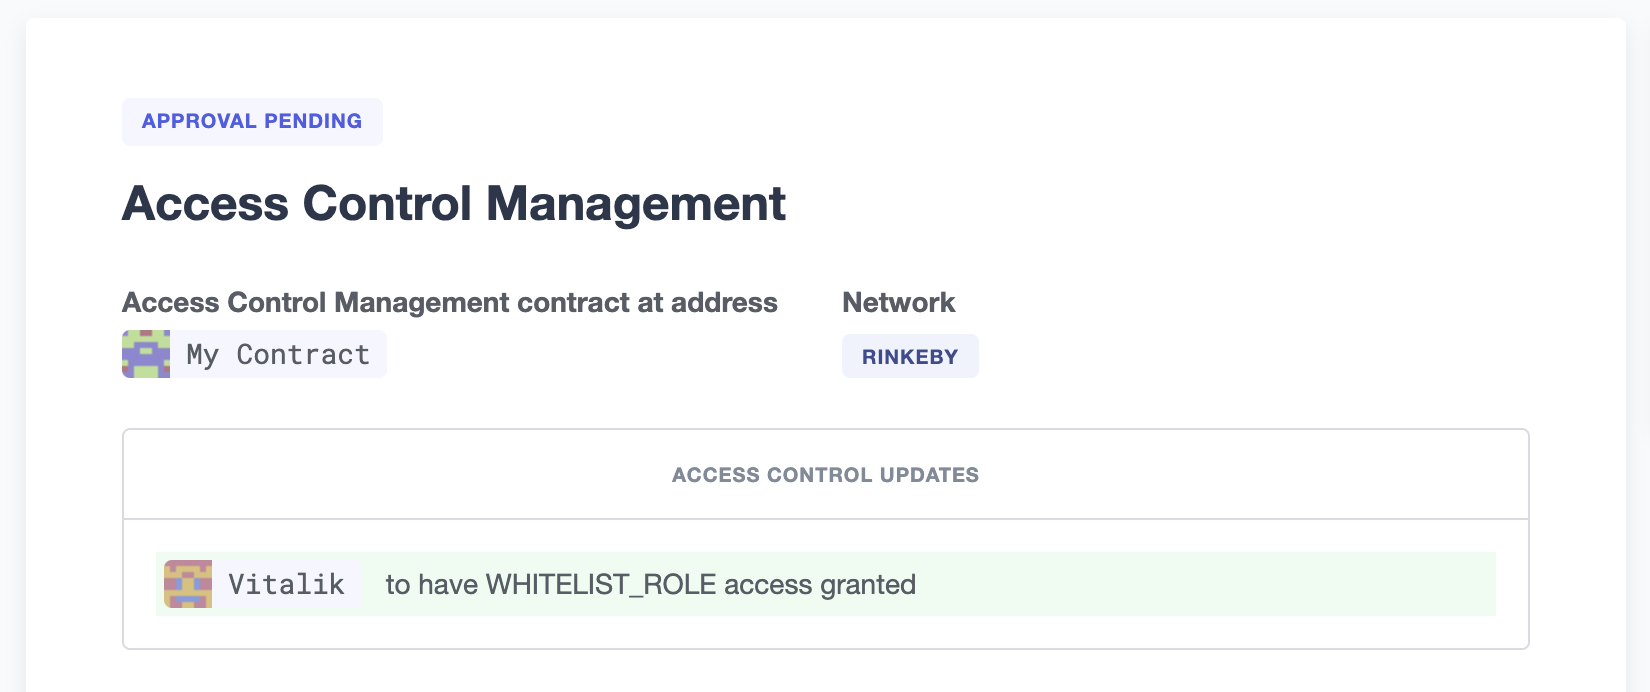
Access Control Management
An access control action is a call that’s compliant with OpenZeppelin’s Access Control’s grantRole and revokeRole interfaces via its ABI.
Defender provides functionality to create such proposals when the ABI contains both grantRole and revokeRole functions, and you can fill them using the roles that a contract has already indexed before (via events consumed from TheGraph if the contract’s network is supported, otherwise, indexed via getLogs JSON-RPC call).
In the case you want to provide a role that’s not indexed in your contract, you can always provide new roles for your contract by giving it its corresponding bytes32.
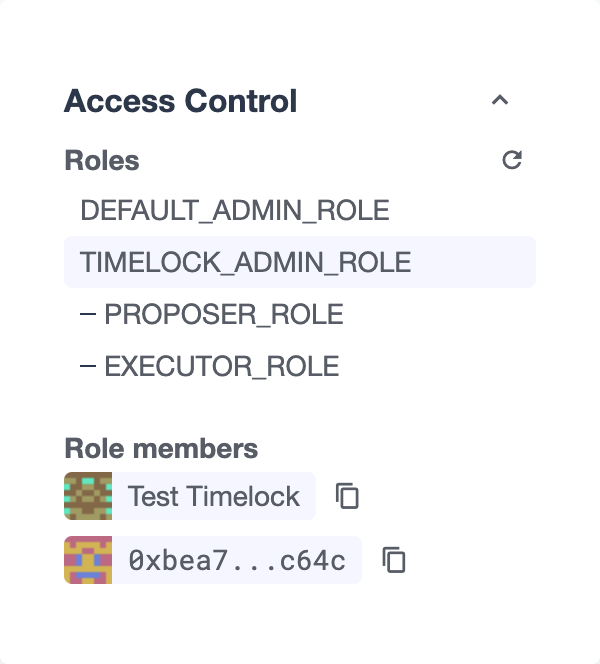
Also, if the contract is detected to have the Access Control Interface, we provide a small widget to easily navigate contract roles, their admins and their members.
Custom actions
A custom action is a call to any function in the managed contract. Defender Admin will handle the encoding of the transaction data and submit it as a new proposal via the chosen multi-signature wallet.
If no multi-signature wallet is specified, Defender will send the transaction directly to the contract.
Custom actions can also be repeated, which will present you to a pre-filled form, so you can review and tweak the action before approving it.
| Certain ABI types, such as nested structs, are not yet supported. Contact us if you need to call a function that is currently unsupported! |
Batches
A batch proposal is a call to multiple functions from multiple contracts (or just one). It allows you to atomically execute multiple actions in a single transaction.
Batch transactions are currently supported only using a MultiSig (such as Gnosis Safe) by encoding a DELEGATECALL to the Gnosis MultiSendCallOnly module
|
| Batch transactions are also required to be on the same network |
Defender provides this functionality through the Admin UI by clicking on the Add Proposal option in the home dashboard.
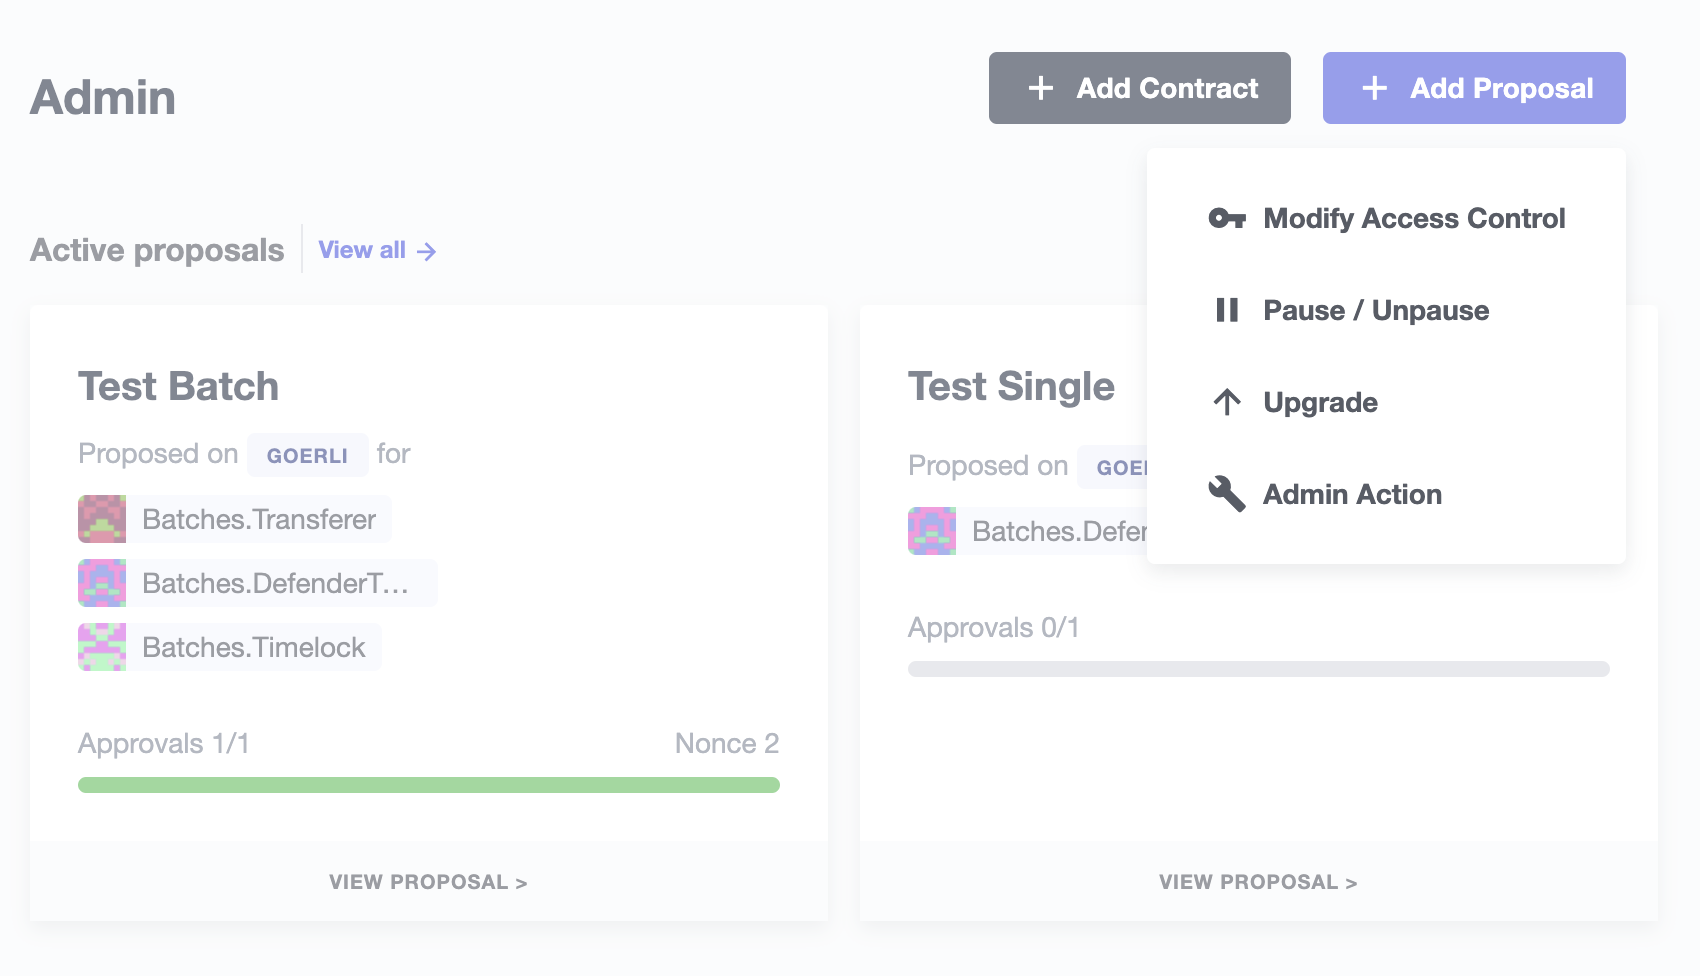
By using this proposal creation workflow, you can add new steps before creating the proposal after defining the first step. For example, you can add a Modify Access Control step and then add another step to call a Custom Action. This will be shown in the proposal creation review page and it’ll be validated as a whole before creation.

| Currently, only Access Control Management and _Custom Actions are supported |
Multi-signature wallets
Defender Admin supports two kinds of multi-signature wallets: Gnosis Safe and Gnosis MultisigWallet. If you are using a multi-signature implementation that is not supported, let us know!
Gnosis Safe
The Gnosis Safe wallet gathers offline signatures of each admin and then submits a single transaction with all signatures to execute the action. To share signatures, it relies on the Safe Transaction Service hosted by Gnosis.
| The Safe Transaction Service is only available on Mainnet, xDai, BSC, Polygon, Avalanche, Aurora, Optimism, Arbitrum and Sepolia. Still, you can use Defender Admin on any network; it will just skip syncing with the transaction service if it’s not available. |
When using a Gnosis Safe, Defender Admin will synchronize all signatures to and from the Safe Transaction Service. This way, any admins on your team using the Safe UI will still be able to sign the Defender Admin proposals.
| The Safe contract requires all its proposals to be executed in order. If you have gathered all signatures for a proposal and still cannot execute it, make sure there are no prior proposals pending execution. |
Gnosis Safe wallets also allow executing DELEGATECALL`s into other contracts, in order to execute arbitrary code in the context of the multisig. You can currently create an Admin action proposal to issue a delegate call via the API using the @openzeppelin/defender-admin-client`.
Send funds
A send funds action on a Gnosis Safe wallet lets you transfer network native assets from your Gnosis Safe to the recipient of your choice.
To use this feature, you need to add the Gnosis Safe wallet to your Defender Admin contracts collection. Go to your Gnosis Safe page in Admin, click New proposal → Send funds. Then choose the recipient address and the amount of funds to transfer. From then on, it works just as any other admin proposal: you will need to collect approvals from enough Gnosis Safe owners to execute the transaction. Defender will guide you through that process.
| if you originally deployed your Gnosis Safe from Defender, it’s already in your list of Defender Admin contracts under section Multisigs. |
We’re working on expanding this feature with the ability to send ERC20 token funds, so stay tuned.
Gnosis MultisigWallet
The Gnosis MultisigWallet requires each admin to submit a new transaction with their approval, so there is no need for a separate service to coordinate.
In addition to the vanilla MultisigWallet, Defender Admin also supports a PartiallyDelayedMultisig variant developed by dYdX. In this wallet, once a proposal has been approved, it is required to wait for a timelock period before it can be executed. Defender Admin will load this information from the contract and display it on the interface.
Managing your multi-sig from Defender Admin
Creating a Gnosis Safe multisig from Defender
You can create and deploy a new Gnosis Safe multisig wallet directly from Defender. This comes especially handy in networks where the official Gnosis Safe UI is not yet available. To create a new Gnosis Safe, go to Admin and click on "Contracts" and then "Create Gnosis Safe". You’ll be taken to a simple form where you will be asked to provide the initial list of owners and threshold for the multisig. That’s it!
Timelocks
Creating a Timelock Controller from Defender
You can create and deploy a new Timelock Controller directly from Defender. To create a new Timelock, go to Admin and click on "Contracts" and then "Create timelock". You’ll be taken to a simple form where you will be asked to provide the initial list of proposers and executors as well as the minimum delay for a proposal to be executed.
In order to verify the contract on etherscan, you can find the source code and compiler settings below:
The deployment uses a vanilla instance of the TimelockController contract v4.8.1 provided by the OpenZeppelin Contracts library.
The compiler settings to deploy the contract:
solidity: {
    version: "0.8.4",
    settings: {
        optimizer: {
            enabled: true,
            runs: 200
        }
    }
}
Transferring contract ownership to a TimelockController
To make use of a timelock for executing functions, it is necessary for it to be assigned access rights to that smart contract(s), whether via role or ownership. This can be accomplished either by calling either the transferOwnership or the relevant role assignment function.
Creating timelocked proposals
Defender Admin supports timelocked admin proposals via the TimelockController contract provided by the OpenZeppelin Contracts library.
To execute a timelocked proposal, you need:
-
A multisig (or EOA) that’s a proposer in a TimelockController.
-
A TimelockController with rights over the action you want to run on your contract.
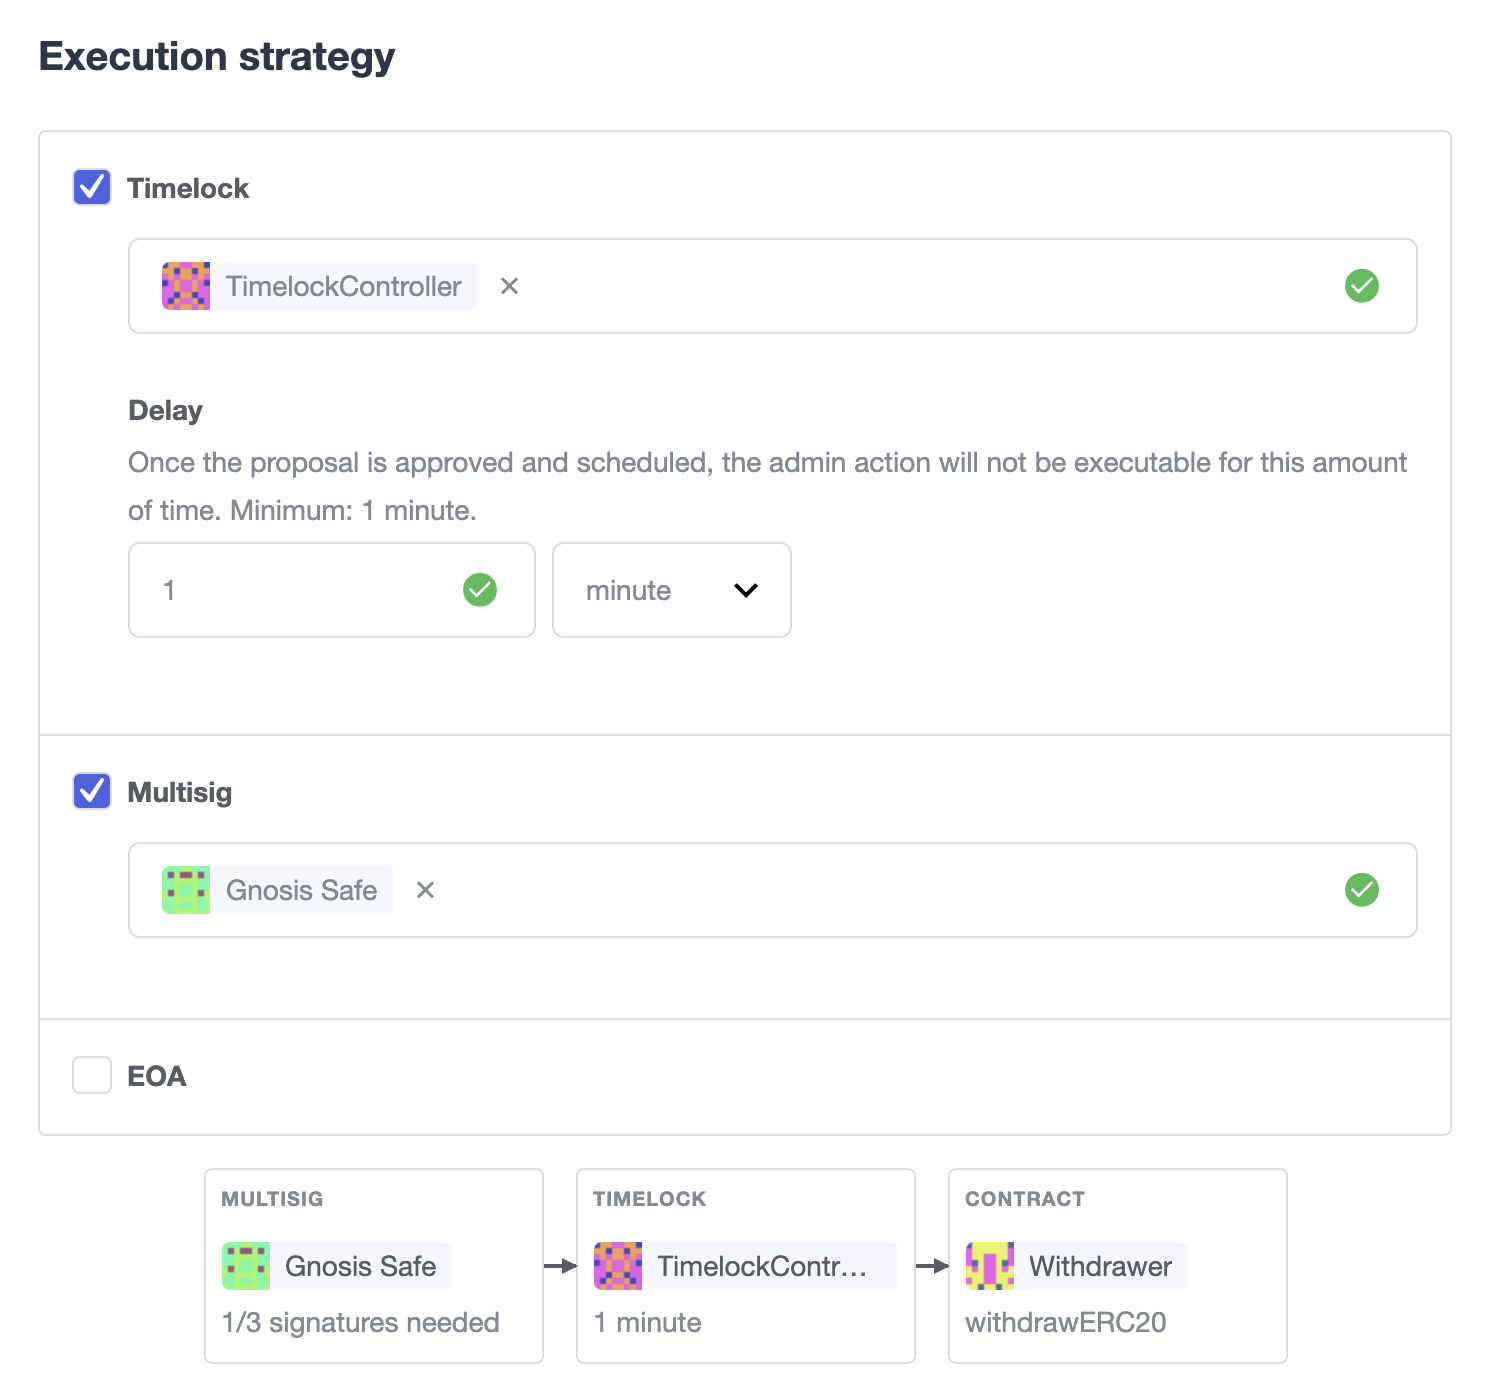
Once proper permissions are in place, just create a proposal as you normally would, ticking the Timelock checkbox in the Execution strategy section. Then enter your timelock’s address and choose the minimum delay between the proposal’s approval and its execution.
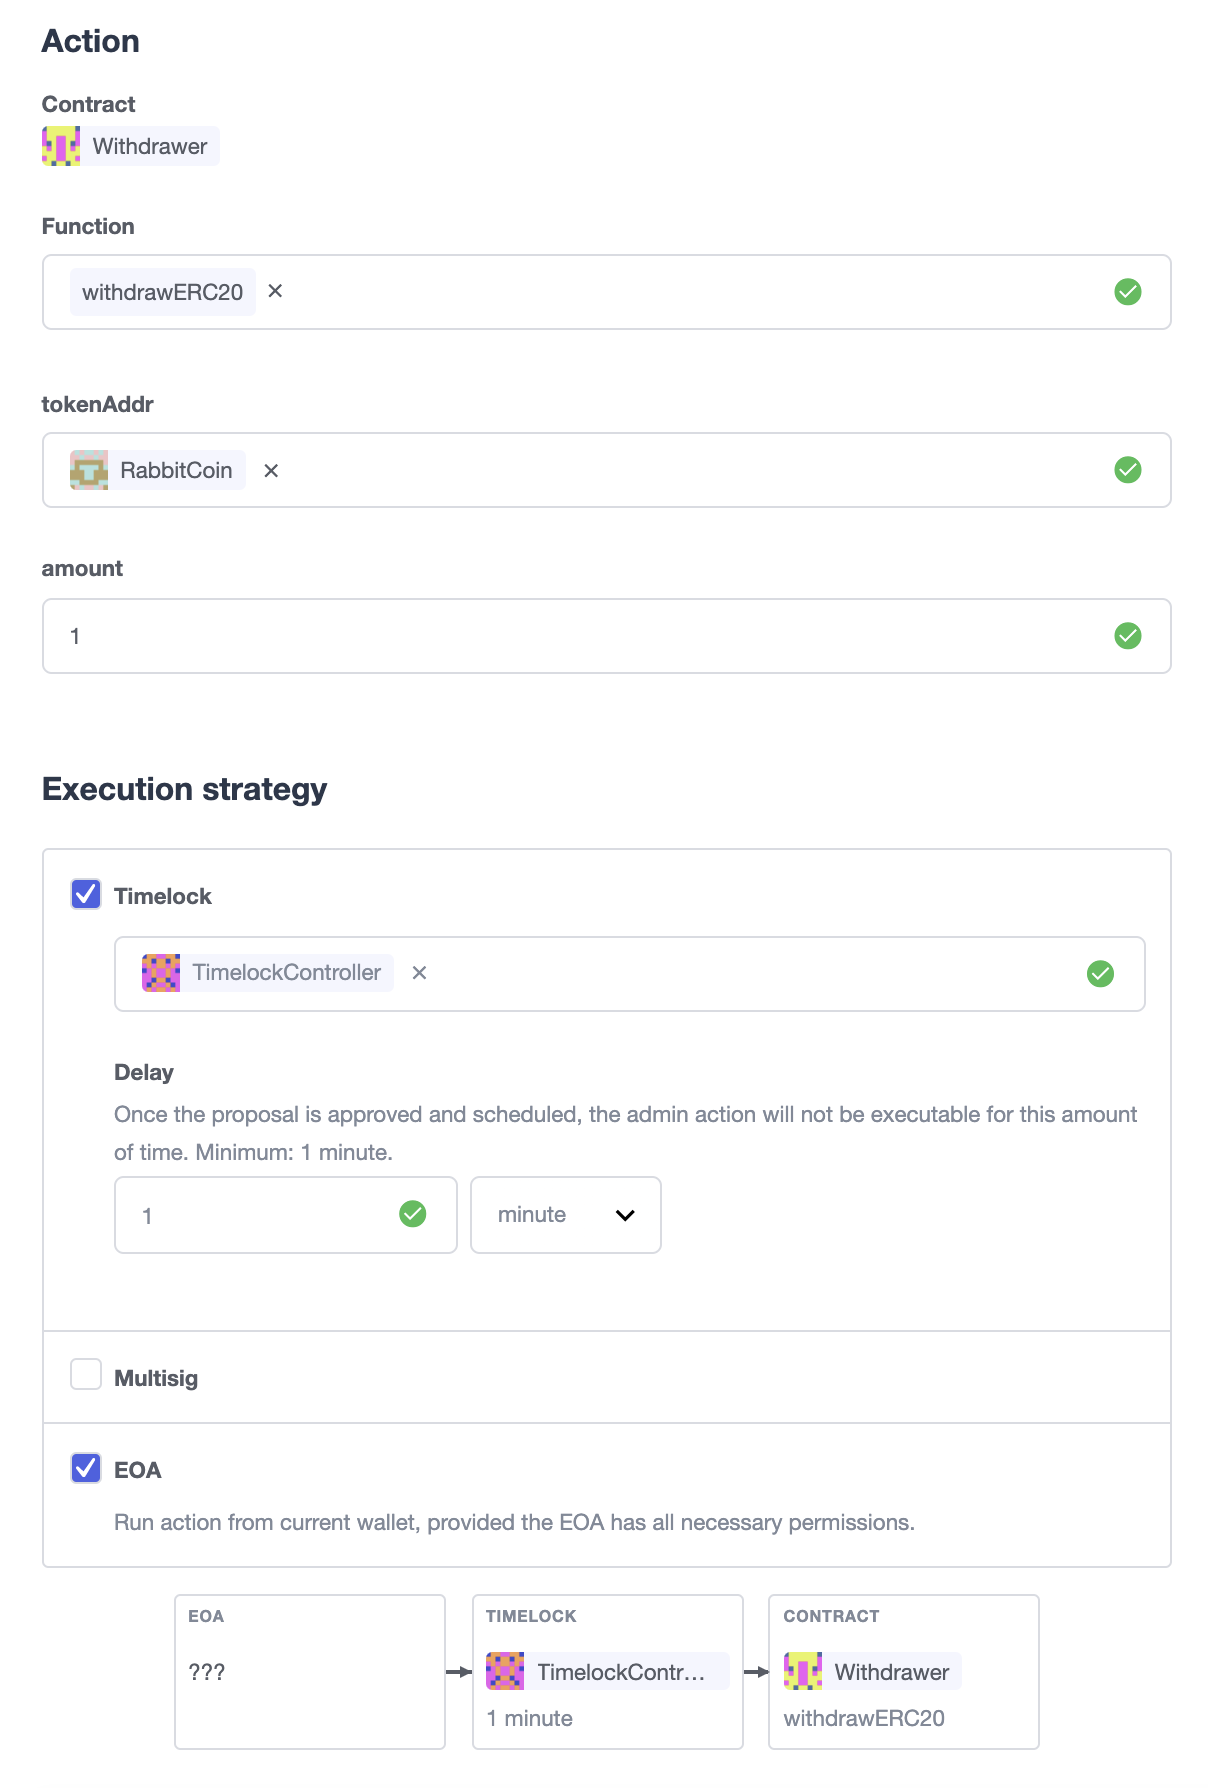
Notice that you can create a timelocked proposal regardless of whether it is approved through a multisig or an EOA. Any approval policy should work provided the right on-chain permission structure is in place.
Managing timelocked proposals
Once you created a timelocked proposal, Defender will guide you and your collaborators to see it through. Assuming you chose to approve the proposal through a Gnosis Safe, the steps from proposal creation to the underlying admin action’s execution are:
-
Collect enough multisig owner approvals (as dictated by the multisig’s current configuration).
-
Schedule the action, with the specified delay period. Keep in mind the multisig in use needs to be a proposer in the
TimelockControllercontract. Read more here. -
After the specified delay period ends, execute the action. It is worth noting here that the EOA that executes this action needs to be an executor in the
TimelockControllercontract.
| Currently Defender does not support timelocked Upgrade proposals. That capability is a work in progress and we plan to release it soon. |
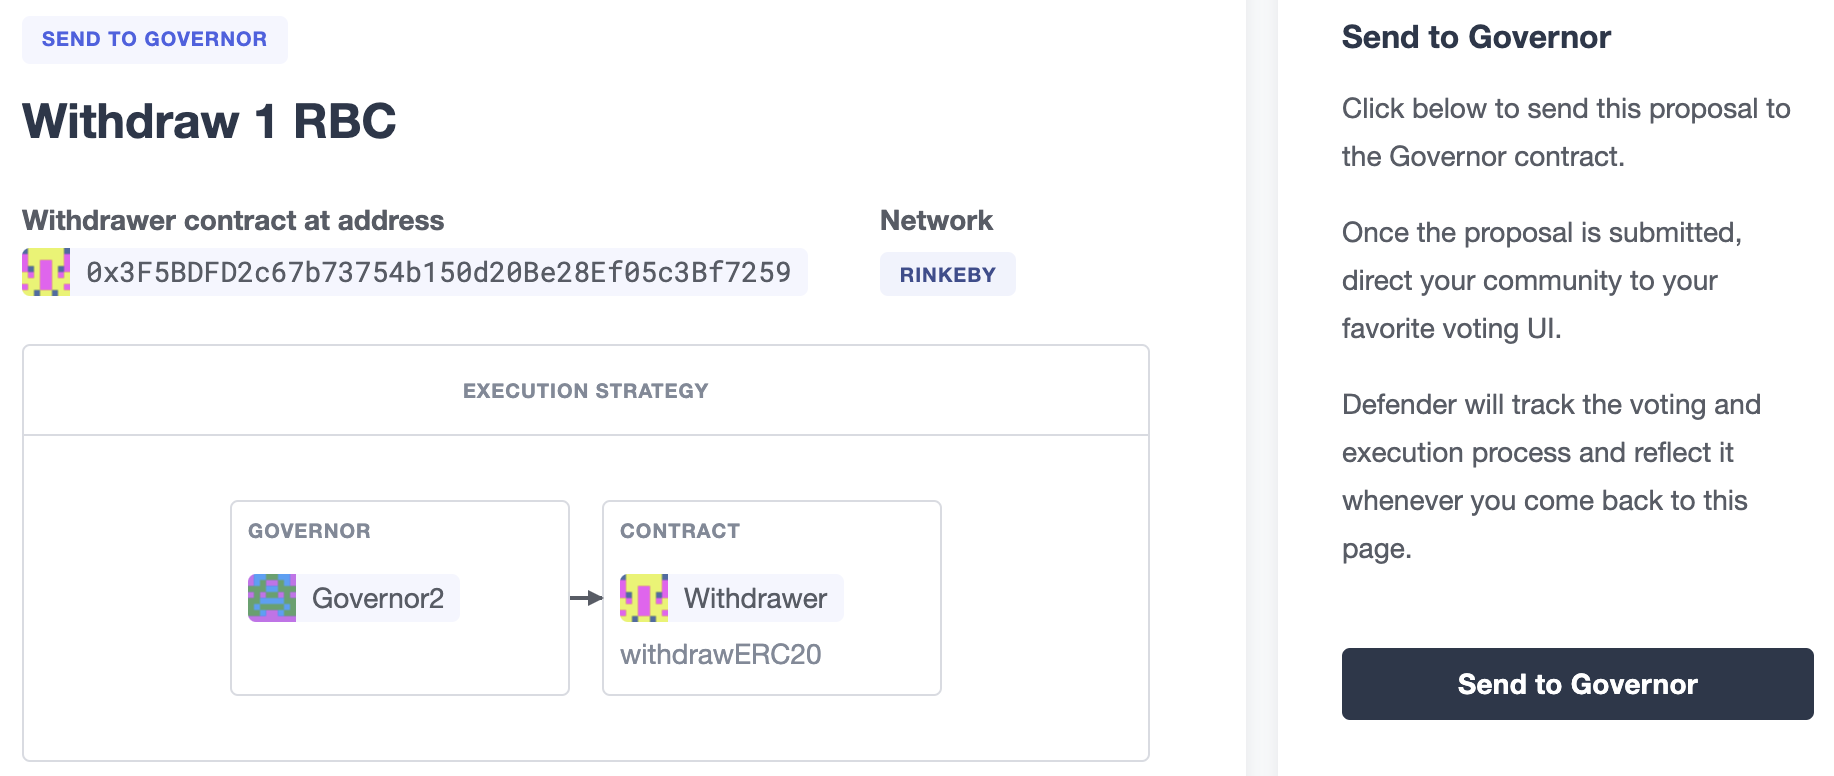
Governance
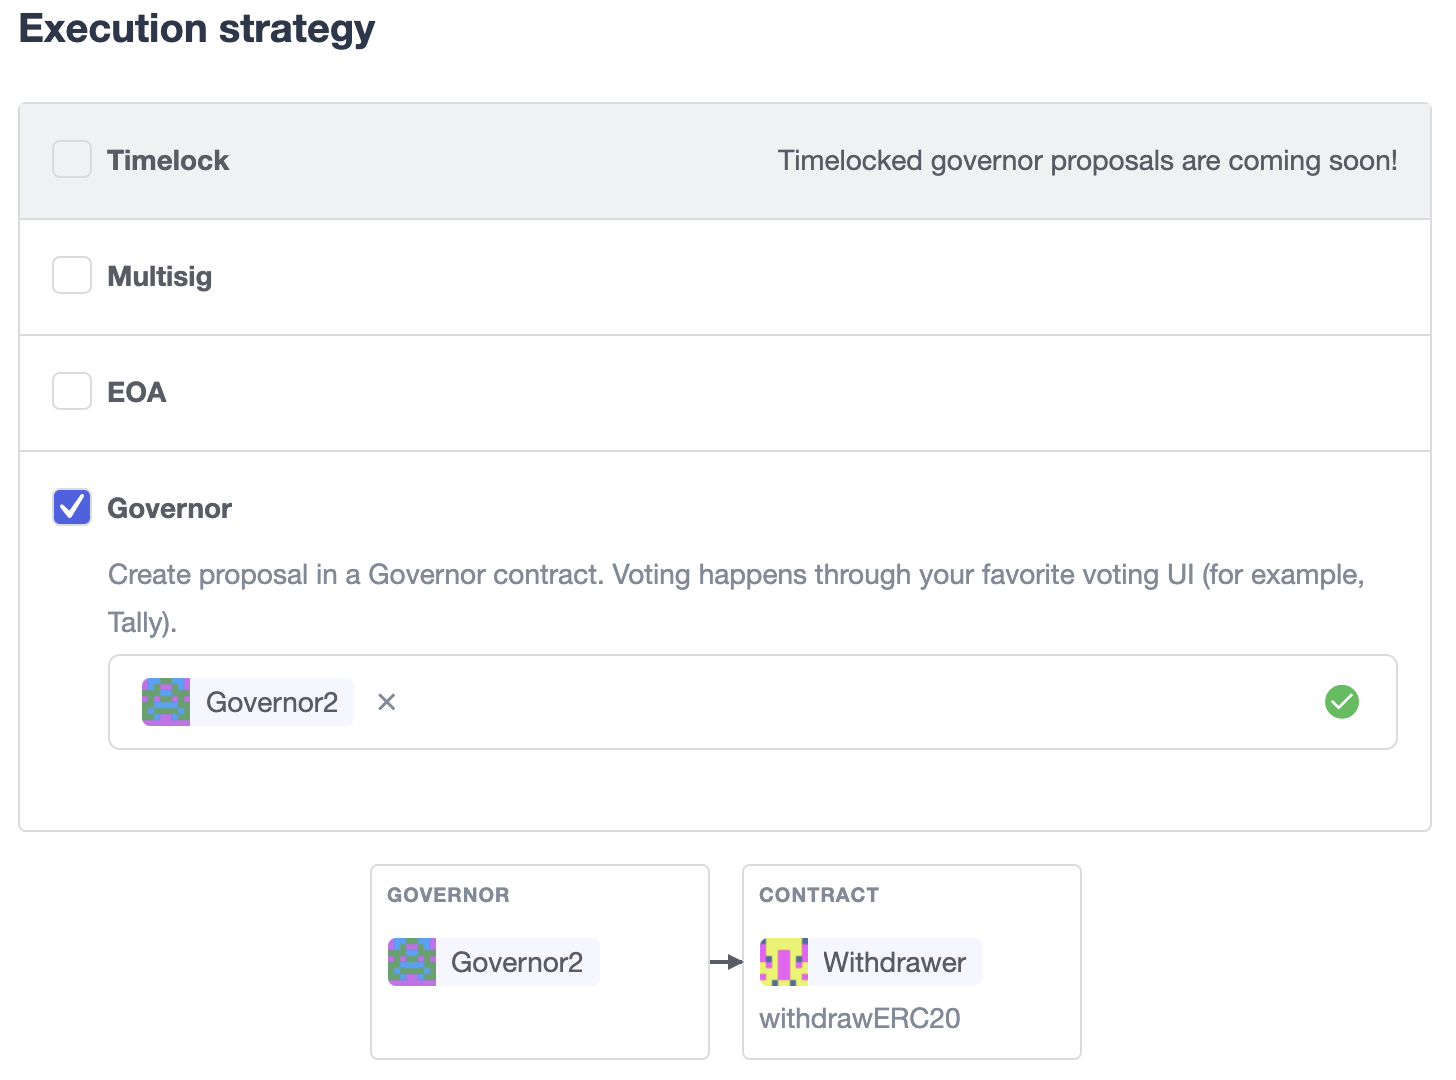
You can also delegate control of an Admin proposal to a Governor contract. To create a Governor proposal, simply set the execution strategy to Governor and enter a valid Governor contract address. Defender will perform basic checks to validate that the contract actually conforms to the Governor interface before letting you proceed.
Defender Admin supports creating proposals on OpenZeppelin’s Governor contract, as well as Compound’s Alpha and Bravo dialects.
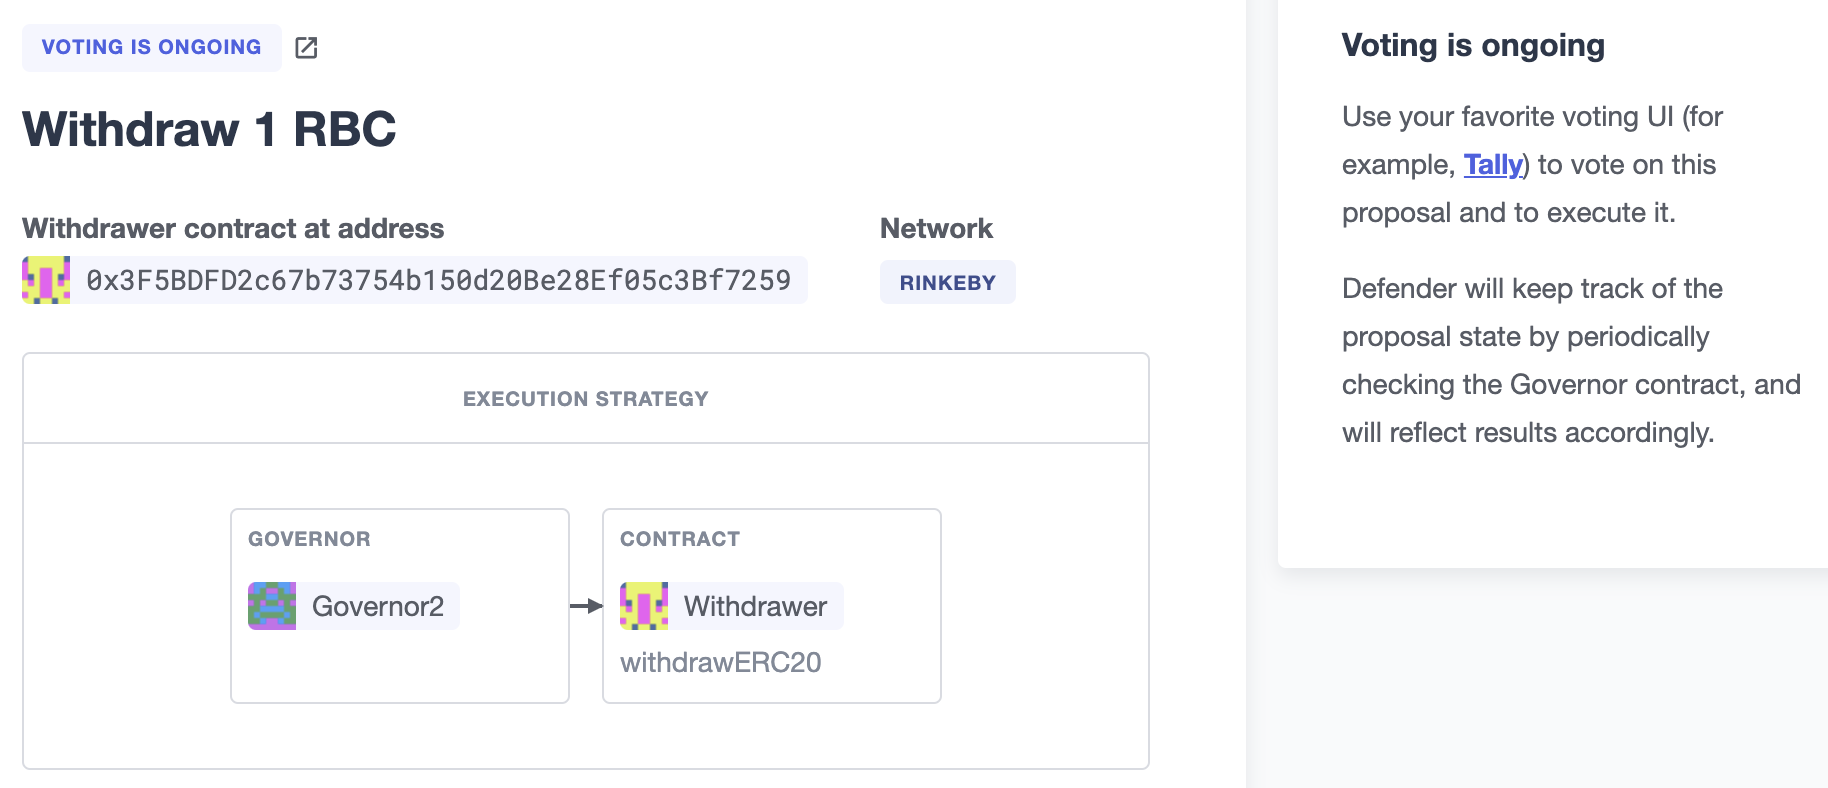
Once you entered these details, Defender will let you send the proposal to the Governor contract.
From then on, your community can use any Governor compatible voting DApp (such as Tally). Defender will track the state of the proposal each time you open it.
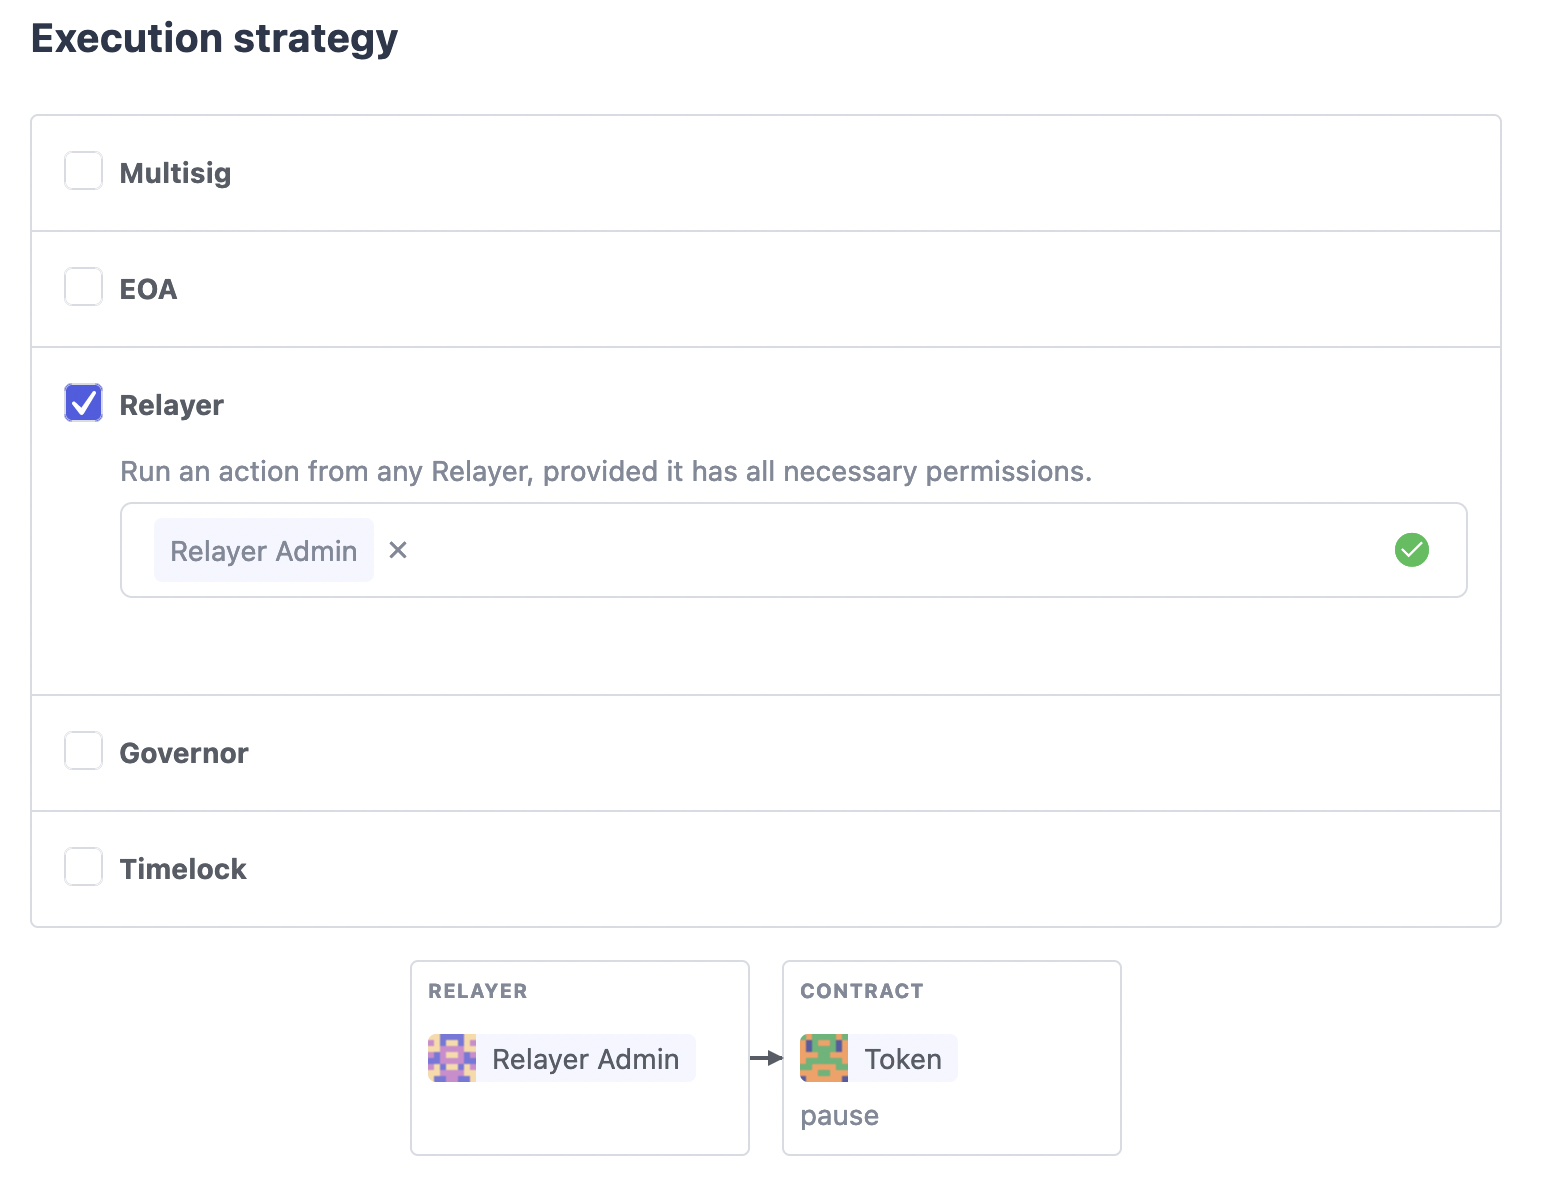
Relayer
You can also execute proposal transactions using one of your Relayers, this allows you to execute actions on your contract without needing to connect a wallet or sign a transaction. One example of how this could be used is giving your Relayer a privileged role in your contract, such as pauser, then anyone with access to the Relayer in Defender can pause the contract, without requiring any access to a private key in metamask.
To do this simply set the execution strategy to Relayer and select a valid Relayer. Defender will perform basic checks to check the Relayer is capable of executing the proposal before letting you proceed.
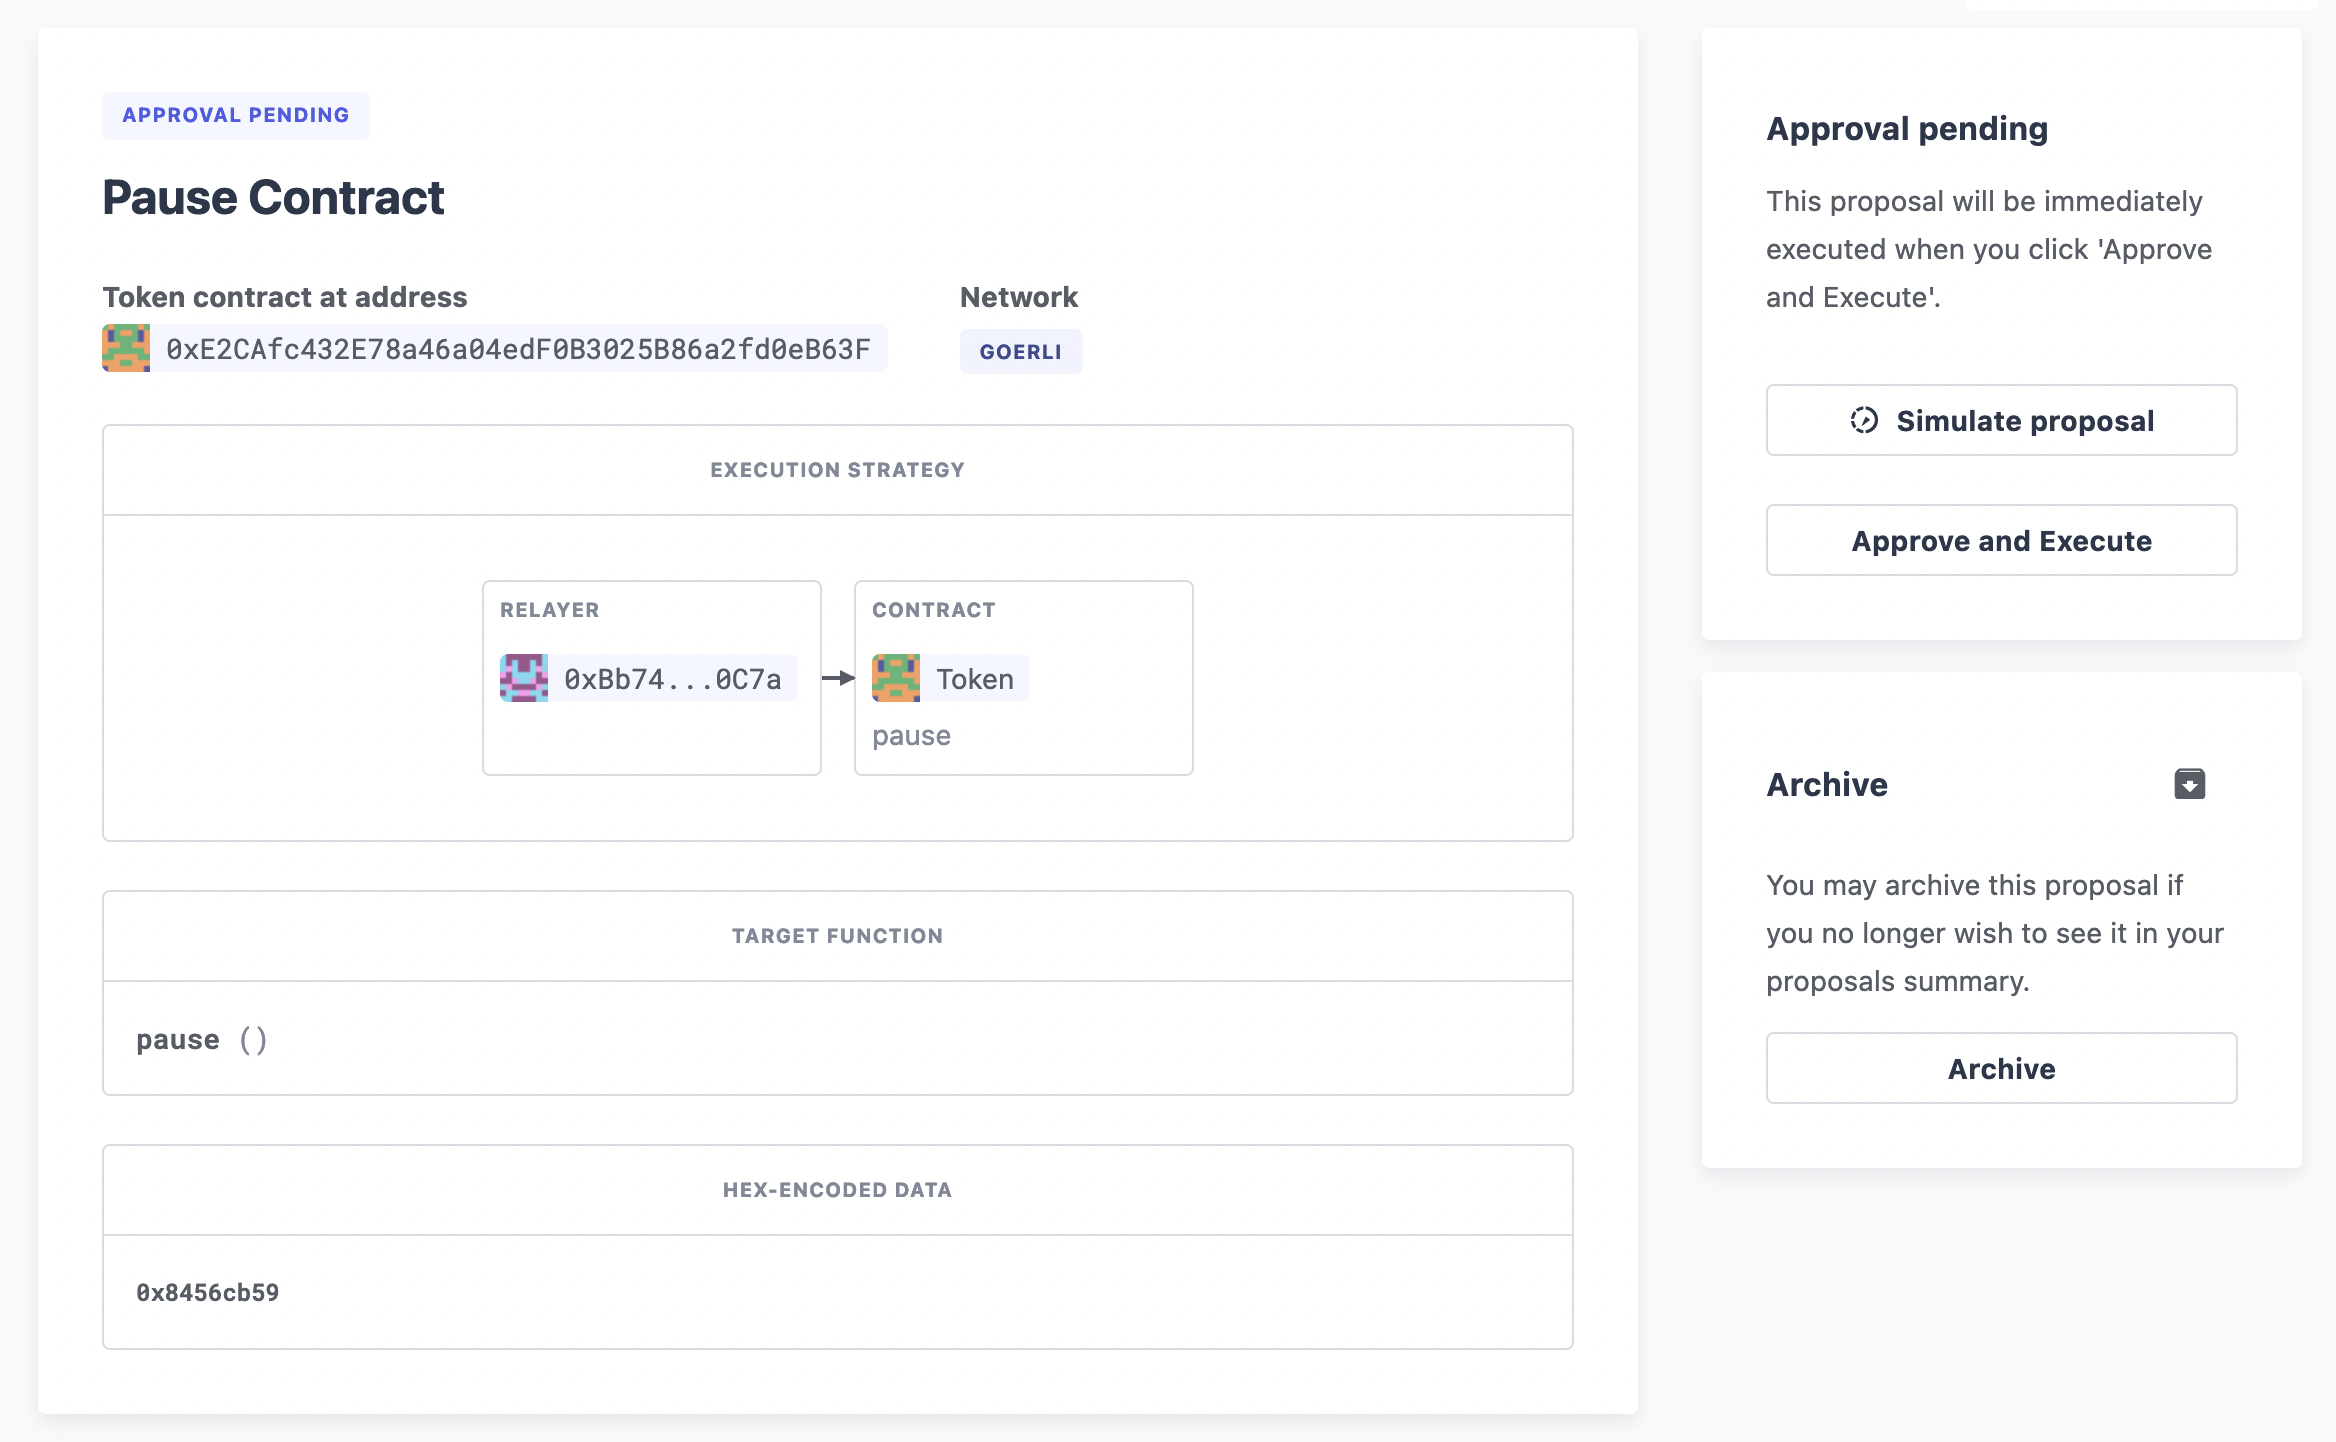
Once you have created the proposal you will then be able to execute it using your Relayer, without needing to connect any wallet.
Fireblocks
You can also submit transactions to Fireblocks from Defender directly. Fireblocks is an asset management solution that leverages multi-party computation for securing all treasury operations.
To utilise this feature, you will first need to generate a Certificate Signing Request (CSR) file.
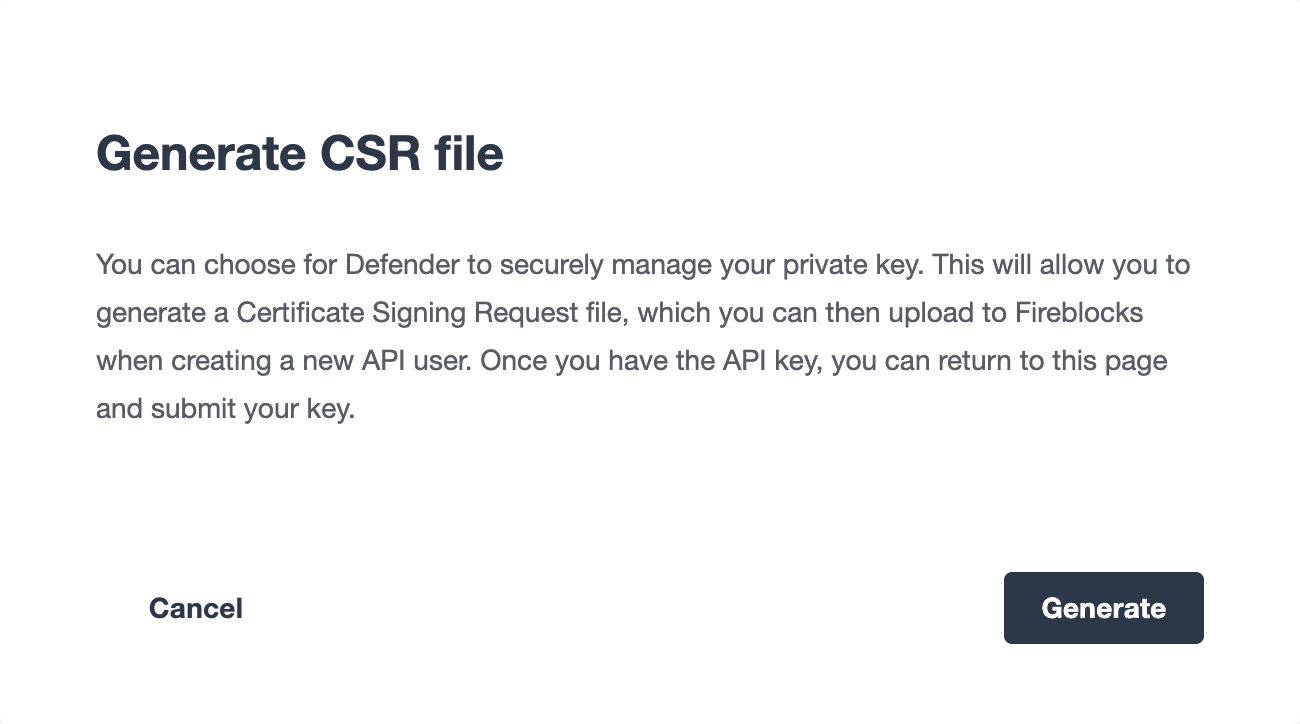
This will trigger Defender to generate a public/private key-pair. The CSR is then generated and signed with the private key and securely stored to prevent leakage.
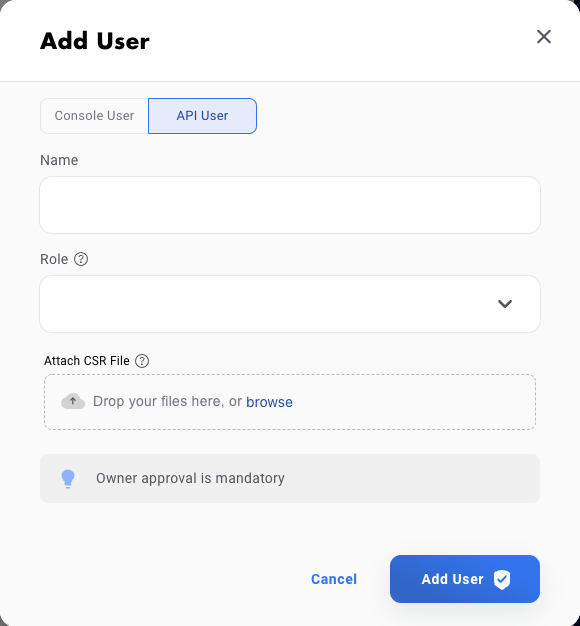
Next, you will need to import the CSR within the Fireblocks UI when creating a new API user. Note that the API user will require any role that can _at least initiate transactions, e.g. Signer.
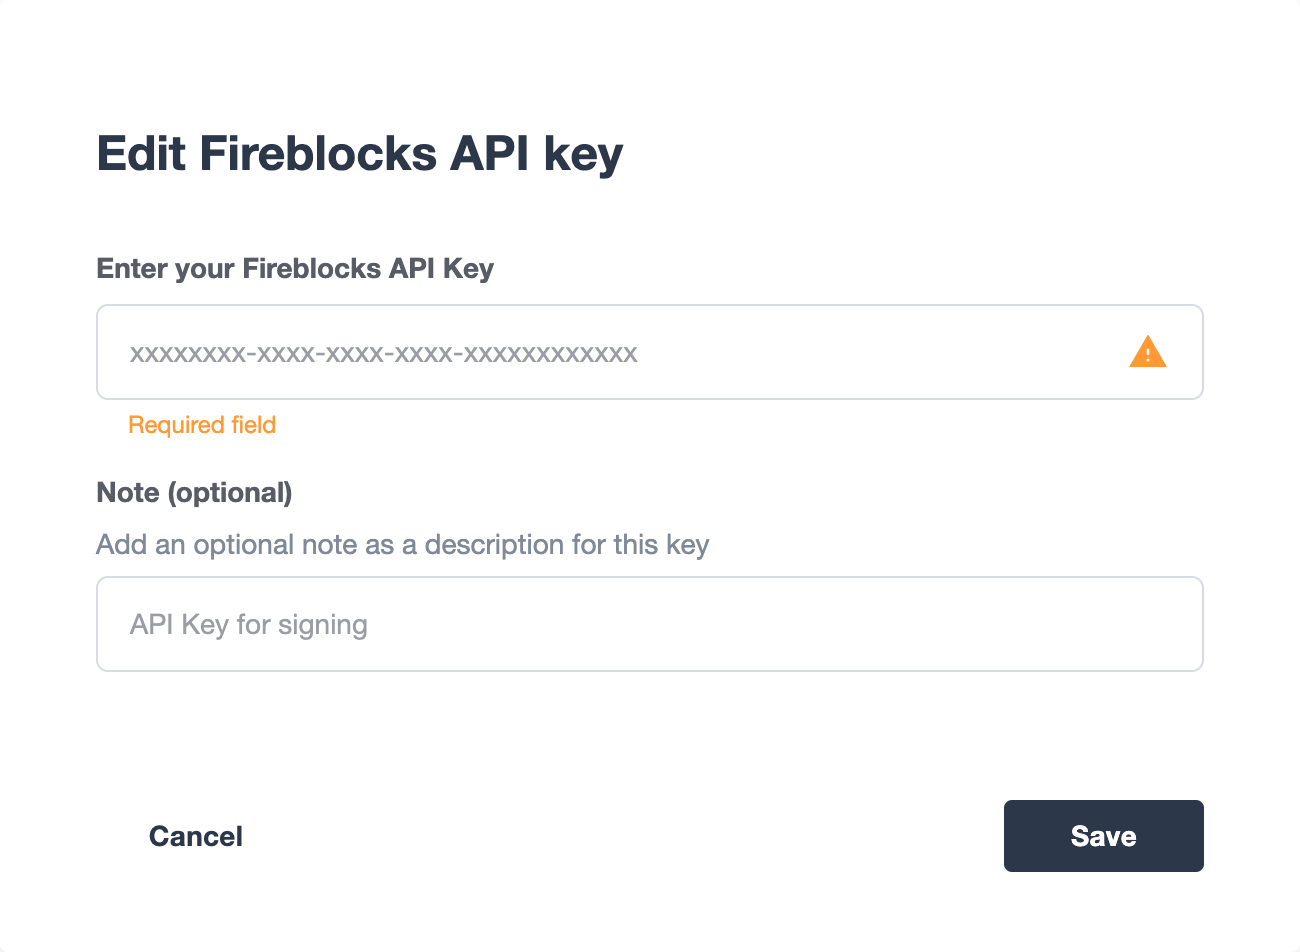
Once the API user has been created and approved by the Fireblocks workspace owner, copy the Fireblocks API key and navigate to the Fireblocks API Keys page. You should see an incomplete API key setup, which you can then edit and complete with the Fireblocks API key. Note that you will not be able to generate a new CSR file unless you complete the setup or delete the previous incomplete one.

To submit a transaction to Fireblocks via Defender, ensure the correct permissions are set in Fireblocks, such as the relevant whitelisted addresses and the Transaction Access Policy (TAP). For example, you might need to whitelist the contract address you wish to interact with, as well as ensure that the newly created API user is allowed to interact with the relevant account and vaults (defined in the TAP).

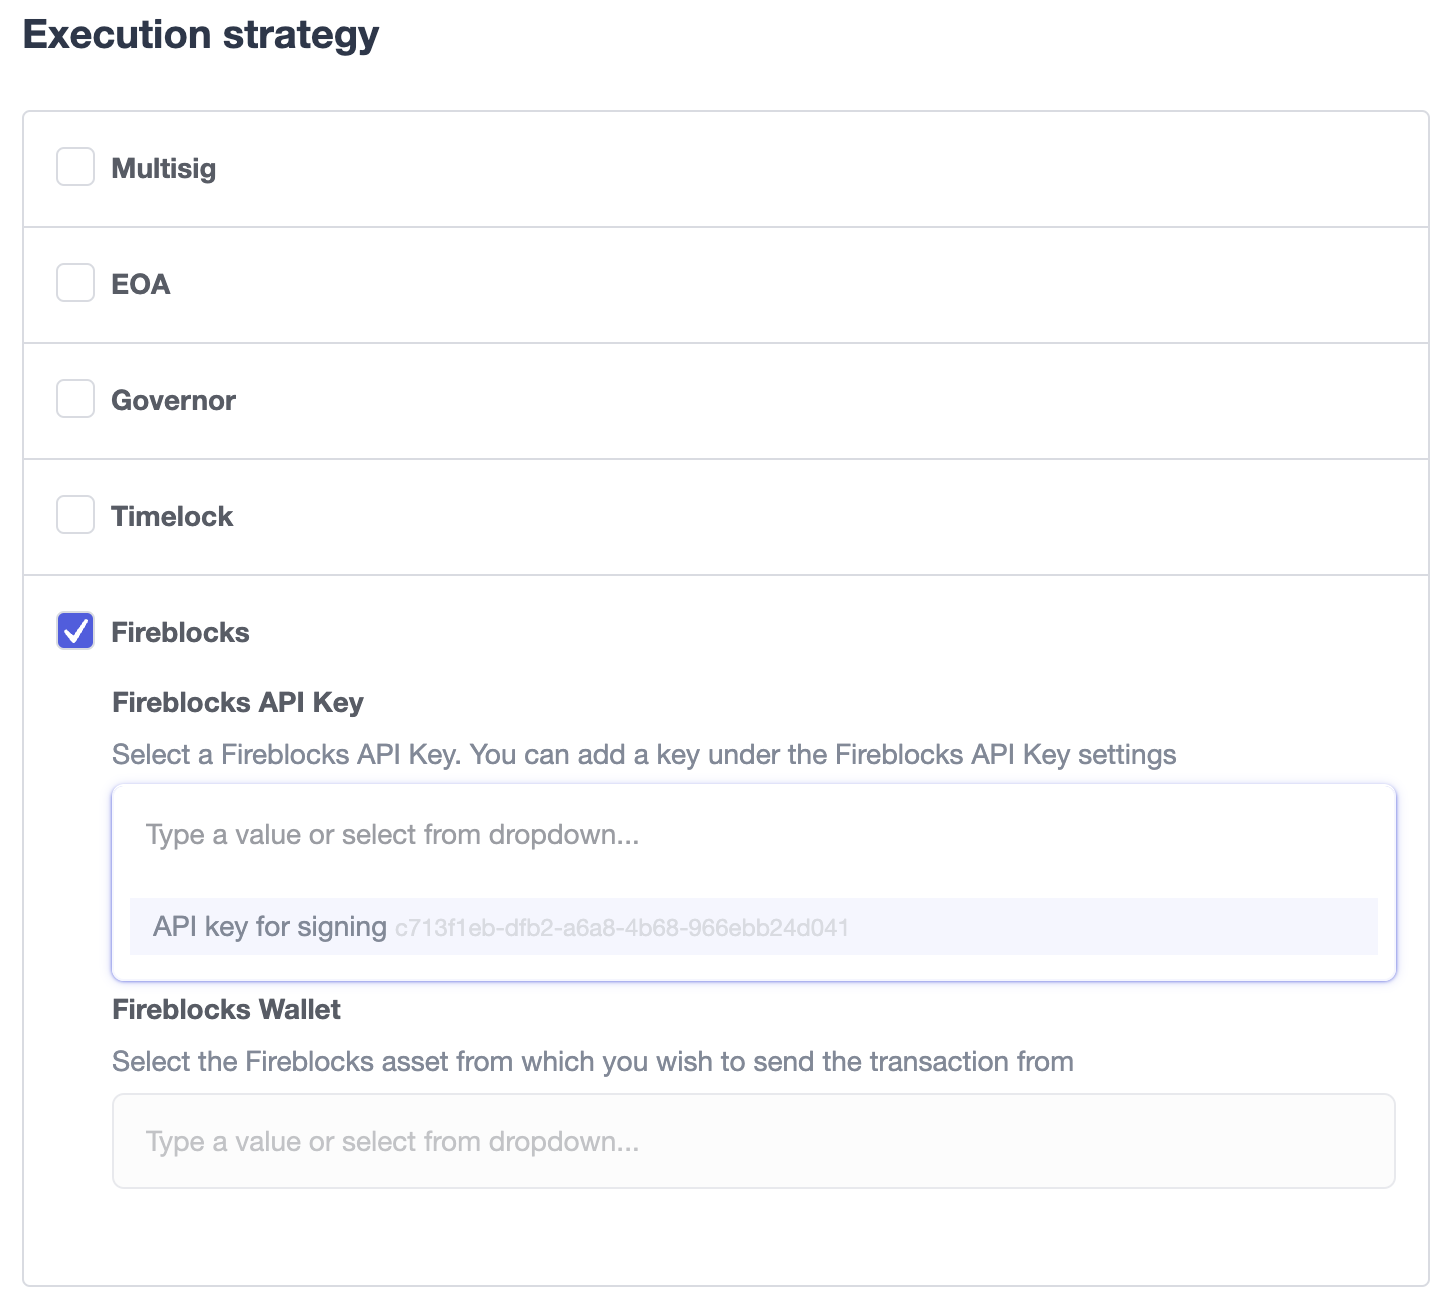
Once configured, you will be able to submit a transaction via a proposal. Select Fireblocks as the execution strategy, the API key and the vault you wish to initiate the transaction from. Once submitted, Defender will track the status of the transaction. Note, Defender will not allow you to approve or reject a transaction from the UI. This will require the Fireblocks mobile app, or console.
Wallets
All approvals in Defender Admin today are handled via Metamask. Defender Admin also supports hardware wallets through Metamask. We have so far tested support with Ledger Nano. Please contact us if you want to use a different wallet (software or hardware) with Defender.
Address book
All members of your team share an address book where you can define user-friendly names for your accounts or contracts. You can set up these names anywhere you see an address in Defender just by clicking on it, or you can manage your entire address book in the corresponding section in the top-right user menu. Defender will also automatically create address book entries for you when you import a new contract into Admin.
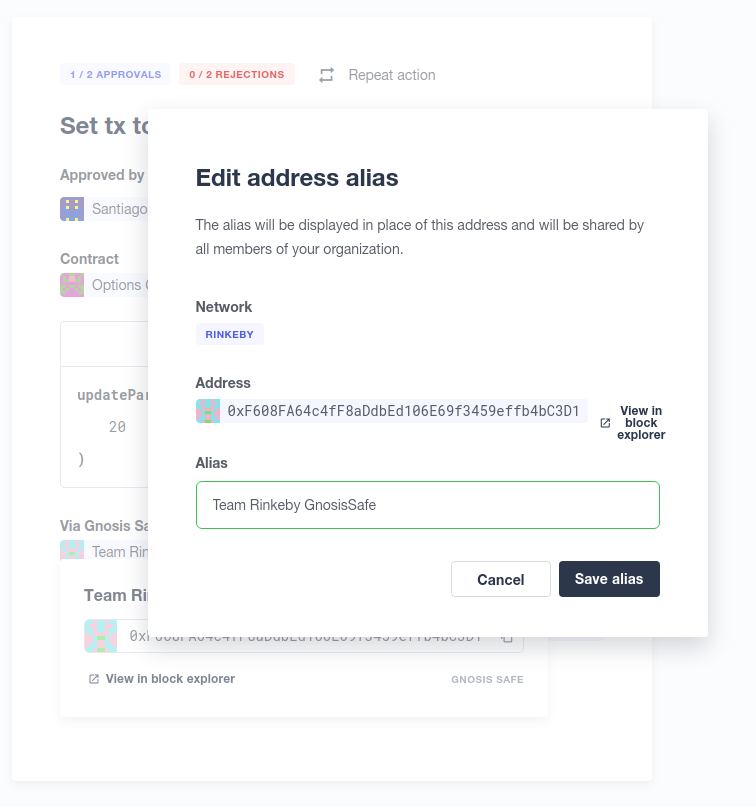
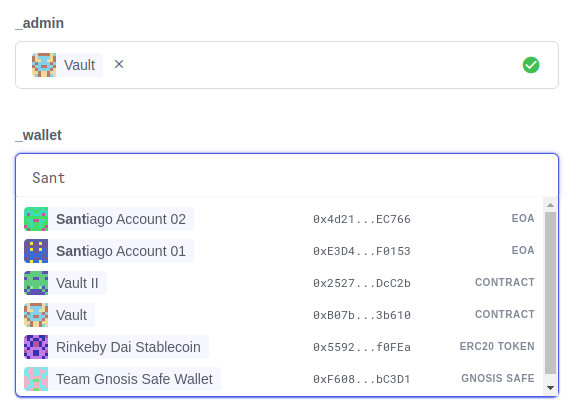
Defender will also source information from the address book whenever you are required to enter an address, so you can easily fetch addresses from your address book for creating new proposals or sending transactions.
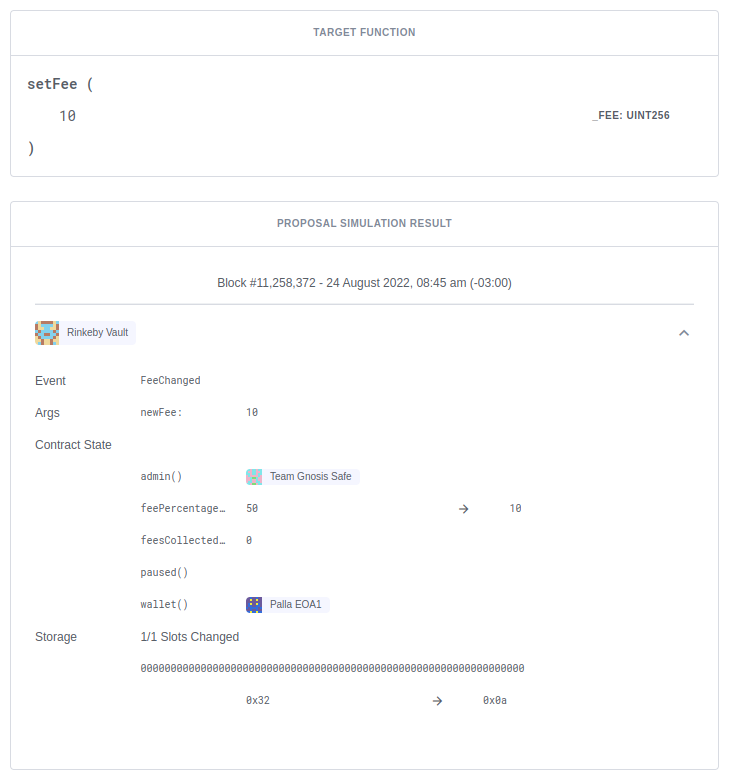
Simulation and effects
Defender can simulate a transaction associated to any pending proposal, so you can review the effects of executing a proposal before approving it. The transaction is simulated as if it were run on a recent finalized block, where the number of confirmations depend on the network, and sent directly from the executor contract (usually a multi-sig) to the recipient. Simulations are powered using a hardhat fork under the hood, and are stored for other team members to review.
A simulation will show:
-
ERC20 token transfers
-
Events emitted on the transaction
-
Storage changes for all contracts involved in the transaction
-
Changes in public getters for all contracts involved in the transaction
| Simulations are limited to six per hour per team. Contact us if you need a higher quota. |
Executed proposal effects
In addition, once a proposal has been executed, Defender will show all the ERC20 token transfers and events emitted by its transaction, including those emitted by the executor contract (eg ExecutionSuccess by a Gnosis Safe). Note that storage and state changes will not be visible, but you can review these on a public block explorer such as Etherscan.
Verification of bytecode for deployed contracts
You can have Defender check whether the bytecode compilation artifact for a contract matches the deployed bytecode at a specific address. This verification gets stored in Defender’s address book, so anyone in your team can then check that a contract matches a compilation artifact. You can rely on this to have auditable deployments and upgrades for your contracts.
| At the moment, this Defender feature only supports Hardhat compilation artifacts. If you are interested in having access to this feature but you use a different toolchain please let us know. |
Verifying the new implementation of an upgrade proposal
You can verify the new implementation of an upgrade proposal through Defender’s UI or programmatically.
To verify from the UI, navigate to an upgrade proposal. You will see an On-chain bytecode verification status section. When Defender does not have any information about the bytecode of the new implementation being proposed, this section looks like the figure below.
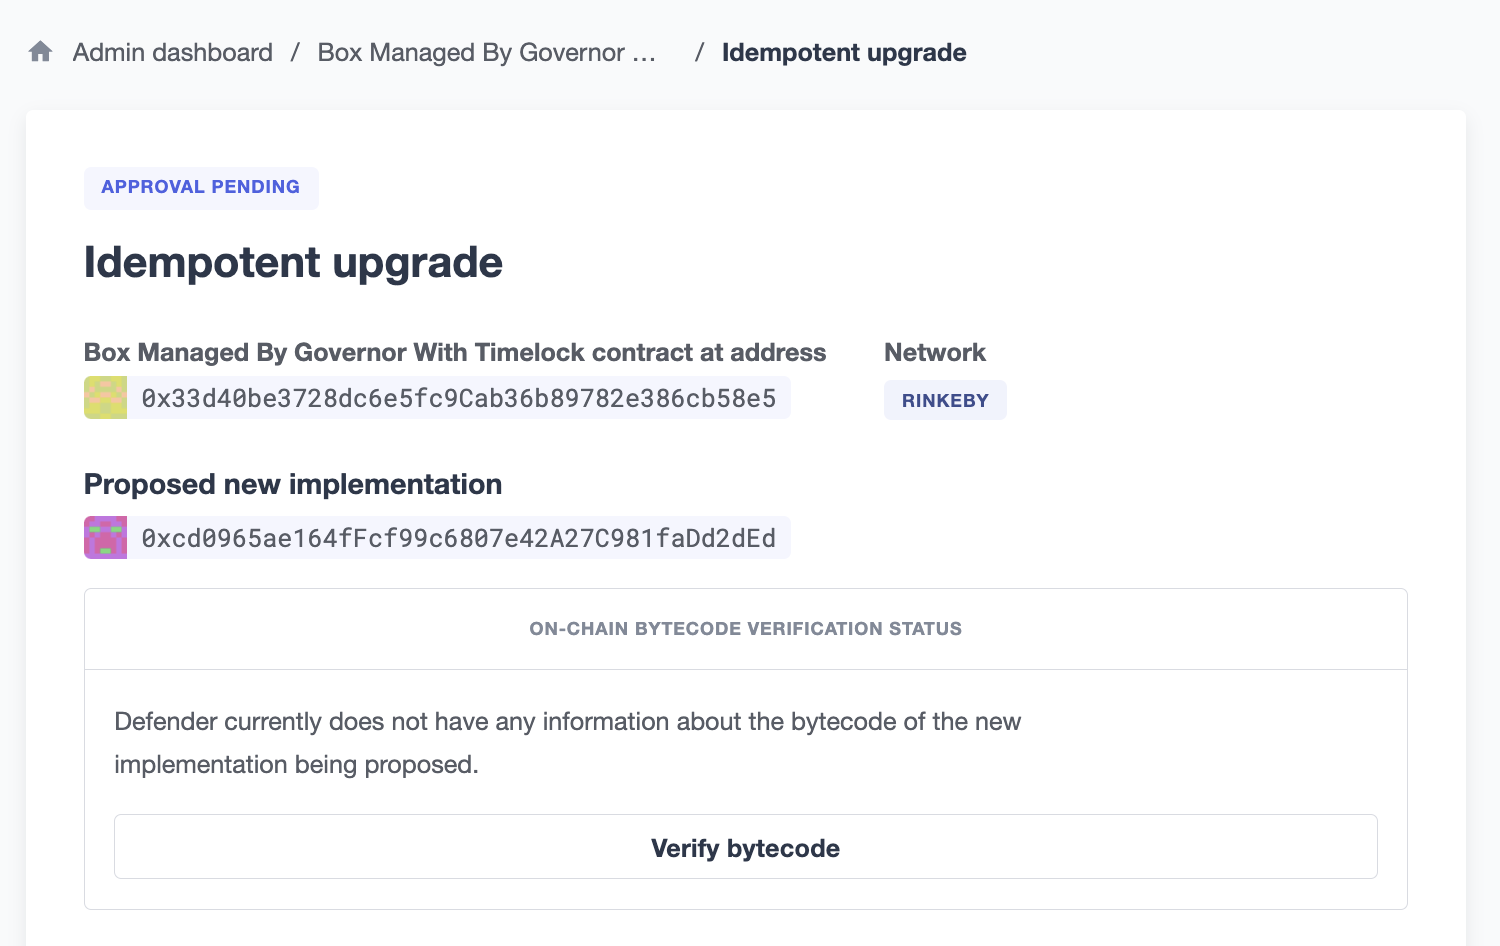
You can then click "Verify bytecode" to point Defender to a compilation artifact that matches the new implementation’s deployed bytecode.
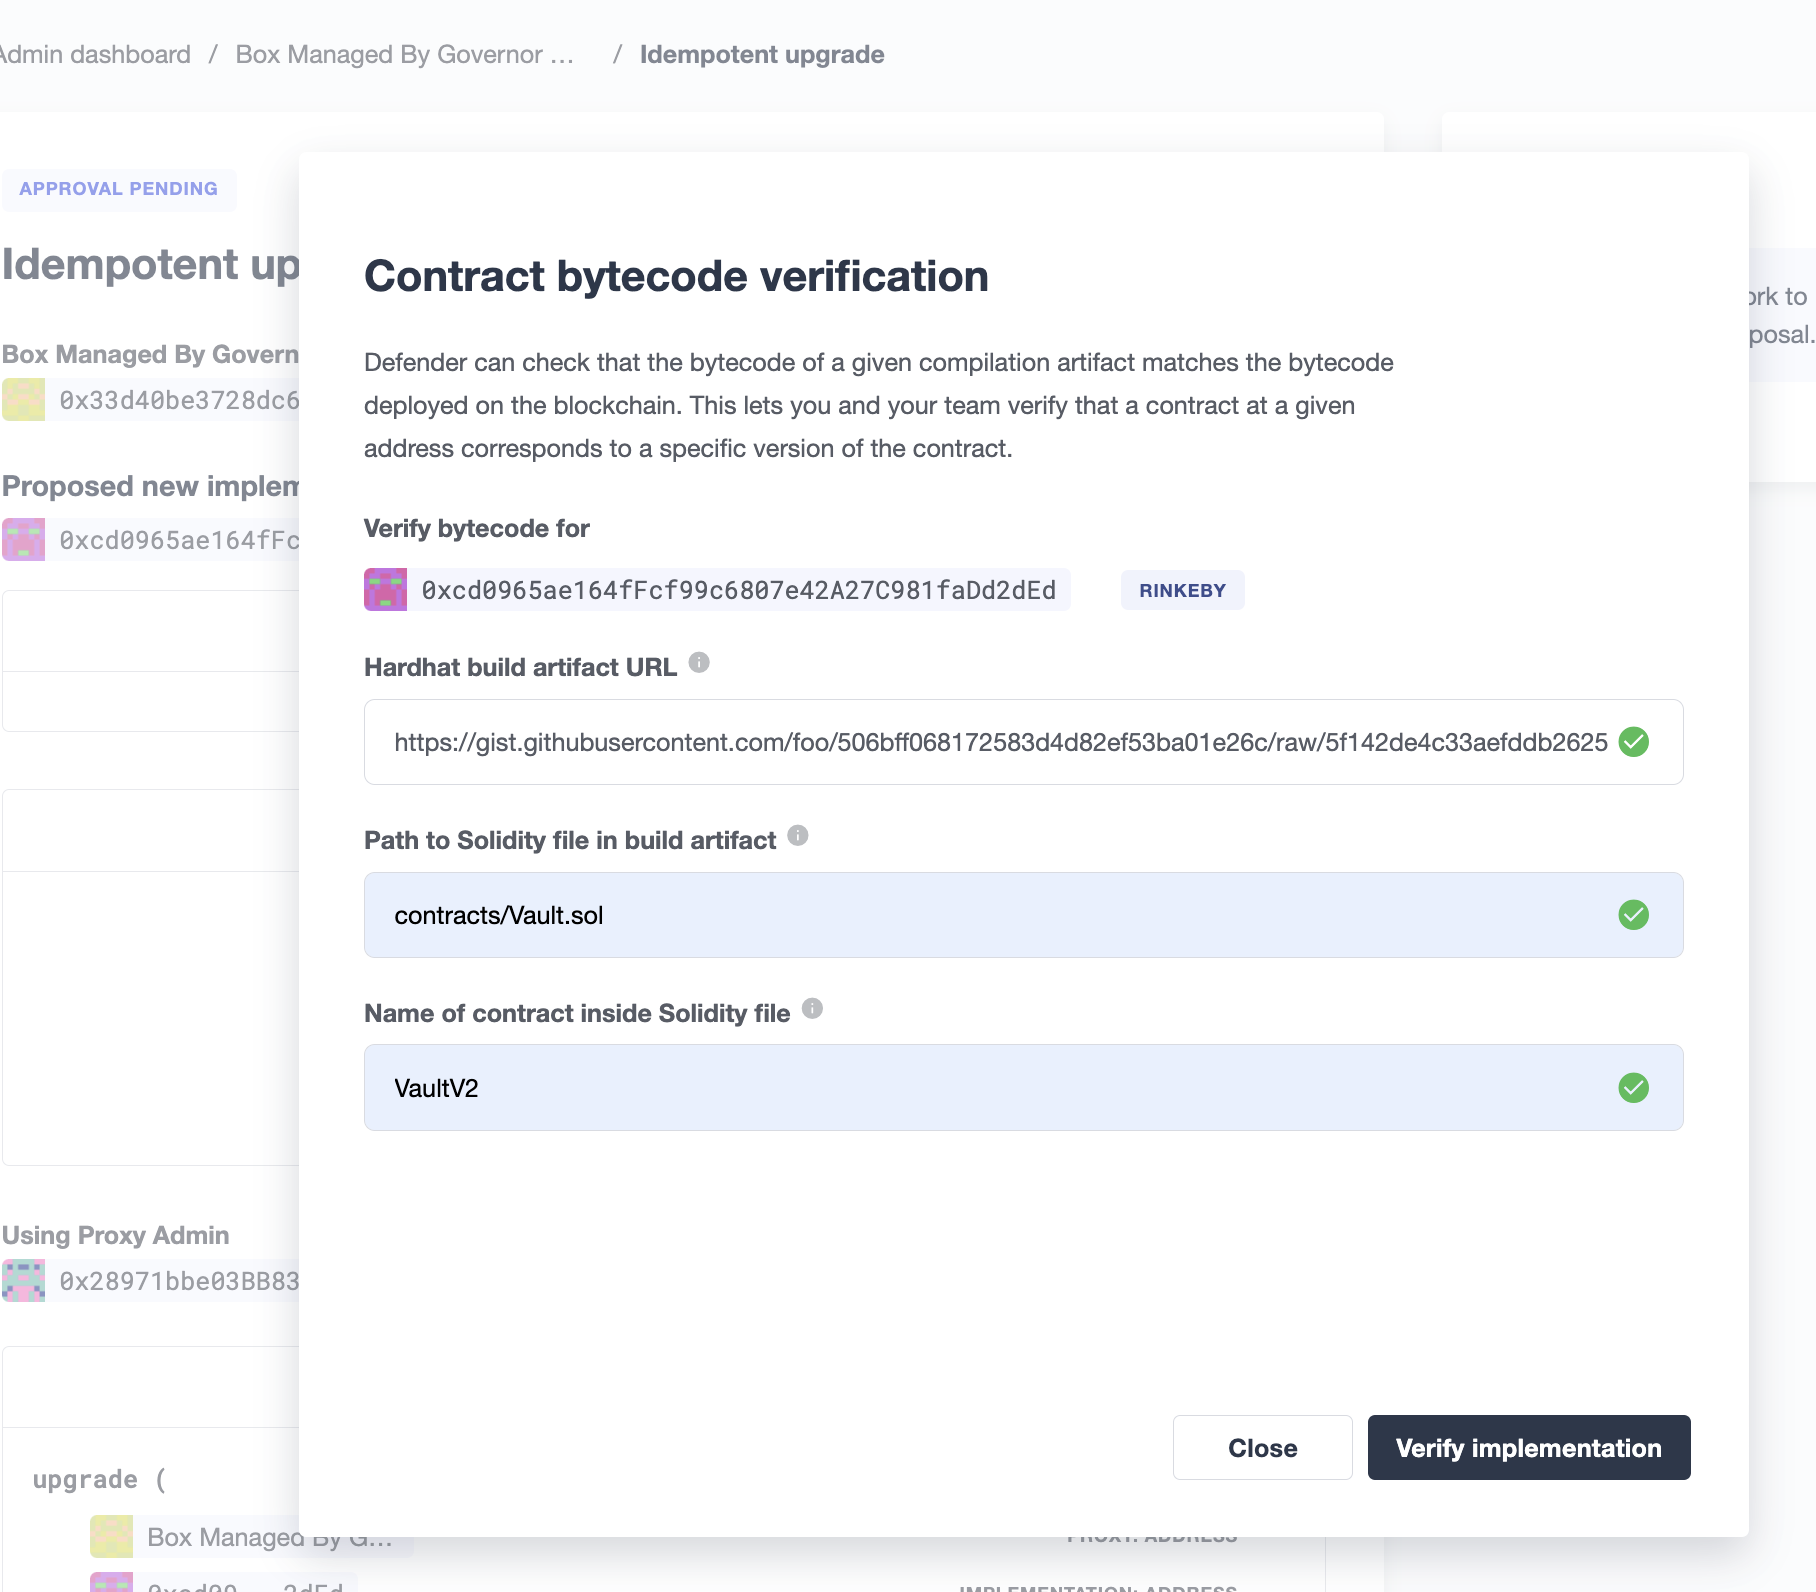
Defender will ask you to provide three pieces of information to move forward with the verification process:
-
Hardhat build artifact URL: a publicly accessible URL to a Hardhat build output file. Defender will pull it, extract the new implementation’s bytecode and match it against the bytecode found on-chain at the new implementation’s address.
-
Path to Solidity file in build artifact: some build artifact formats include multiple compilation output for multiple contracts. This path tells Defender where to look for the .sol file that defines the contract you are trying to verify.
-
Name of contract inside Solidity file: since Solidity files can include multiple contract declarations, we ask you to indicate which one corresponds to the implementation to verify.
After clicking on Verify implementation, Defender will pull the artifact from the URL you provided and try to match it against the bytecode deployed at the new implementation address.
This can result in one of four outcomes:
-
Defender cannot process your verification request. This could happen for example if the compilation artifact URL you provided is not publicly accessible, or if the artifact’s format is not currently supported.
-
Defender verifies that the compilation artifact exactly matches the deployed bytecode.
-
Defender verifies that the compilation artifact partially matches the deployed bytecode. This often means the bytecodes match except for the metadata hash, which usually means the compilation artifact and the deployed bytecode are functionally equivalent, but in theory they differ in things like comments or variable names. In practice, there could be effectful instructions hidden in the source code, so evaluate contracts with this verification result with extra care. It’s worth noting that due to internals of the Solidity compiler, depending on the contract, it might not be possible to get an exact match. In such cases, a partial match is the closest we can get to bytecode verification.
-
Defender can process your verification request, but it finds the compilation artifact and the deployed bytecode don’t match, even partially. In this case, signers of the upgrade proposal should not approve it.
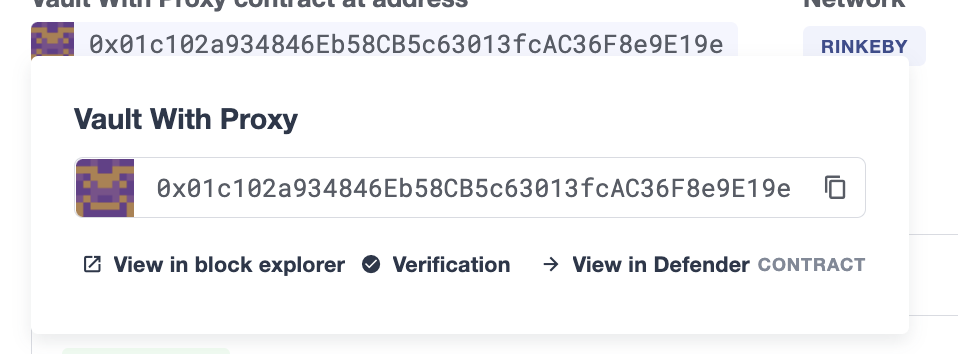
See below an example of an exact match.

To verify programmatically, we strongly recommend using the hardhat-defender plugin. However, you may also use @openzeppelin/defender-client package (see a verification example here), or interact with the raw REST API directly. These components build upon each other, so at the end of the day all capabilities are available through any of them. We still recommend you use the hardhat-defender plugin for the most streamlined experience.
Verifying any contract
While we expect the most Defender users will use this feature to help secure their upgrade workflows, it is worth noting that the verification feature is available for any contract, regardless of whether it is an upgradeable implementation or not.
The UI for verification in this case can be found by hovering any contract address shown in Defender, and clicking Verify.
Similarly, you can also trigger programmatical verification of any contract using the @openzeppelin/defender-admin-client client library or the @openzeppelin/hardhat-defender plugin for Hardhat. It is not necessary for the verified contract to take part in an upgrade.
Security considerations
Defender Admin acts exclusively as an interface to your contracts and multi-signature wallets. This means that you do not grant Defender any rights over your contracts by using Admin to manage them. All proposal approvals are signed client-side using the admin user private key through Metamask. The Defender Admin backend is only involved in storing proposal metadata and sharing the approval signatures when these are not stored on-chain. Ultimately, the multi-signature wallet contracts are the ones that verify these approvals and execute the proposed actions.
Defender Admin’s main contribution to security is then related to usability. First, it automates the process of crafting the transaction for a proposal to avoid manual errors. Second, it provides a clear interface for reviewing a proposal without having to manually decode the proposal hex data.
Hedera Support
On the Hedera network, only testnet is supported by Defender Admin at this time. Once the Hedera JSON RPC Relay service is out of beta, Defender will provide Hedera Mainnet support.
We are currently testing Governance execution strategy and Upgradable contracts administration, they are not yet available on the Admin module but will be shortly.