Automated Security Monitoring of Factory Clones
The factory-clone pattern can be advantageous for minimizing gas costs. However, since each clone gets deployed to a new address, it may be a challenge to efficiently track and monitor each of these contracts.
This guide shows how you can use Defender to automate security monitoring for a factory contract as well as the clone contracts created by it.
This automation is achieved through the following relationship between Defender components:
-
A Sentinel watches for every successful Event emitted by the contract that creates a clone. If detected, it triggers an Autotask to run and passes along information about the transaction
-
The Autotask makes use of the Admin API to add the address of the newly created contract to Admin dashboard for easy monitoring of clone contract state
-
The Autotask uses the Sentinel API to add the clone address to the list of addresses watched by a Contract Sentinel
In this case, the contract ABI can be pre-supplied since clone contracts will have identical ABIs. Alternatively, you may be able to dynamically retrieve the ABI from a verified contract at a given address using Etherscan’s API.
Generate API Key
To programmatically add a contract to the Admin dashboard, the @openzeppelin/defender-admin-client API requires credentials in the form of an API key and secret.
You can use an existing API key or create one to be used solely for this purpose.
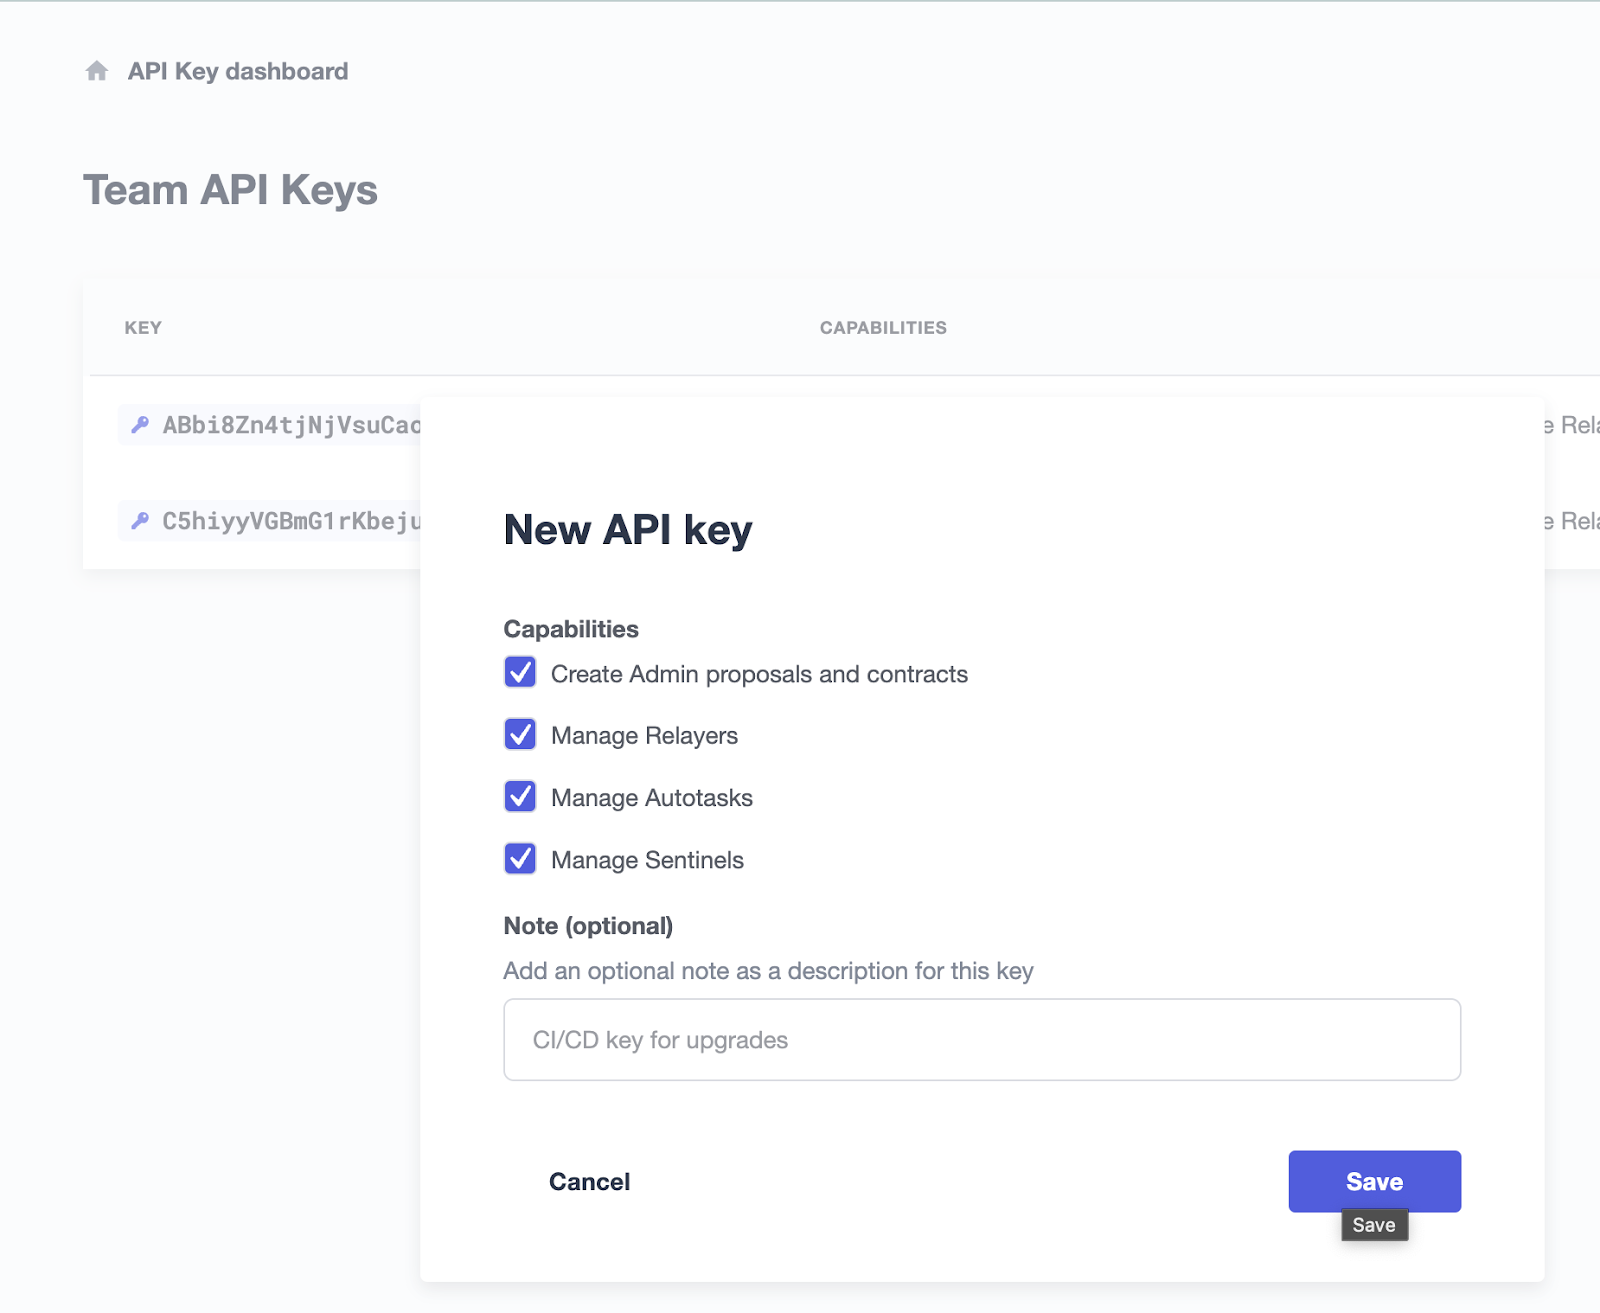
To create a new key, open the hamburger menu at the top right and select Team API Keys. Generate a new key and secret with at least the ability to create Admin proposals. Copy and save these in a secure location.
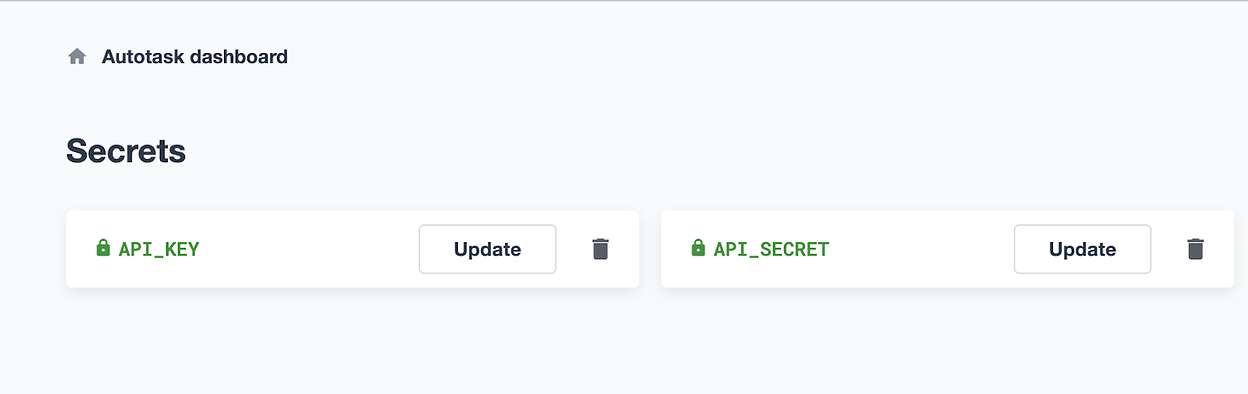
You can use Defender’s handy Secrets vault to securely store the Admin API key and secret created in the previous step.
Select Autotask from the left and then Secrets. Give the API key and secret a name and paste in the respective string.
Create the Autotask
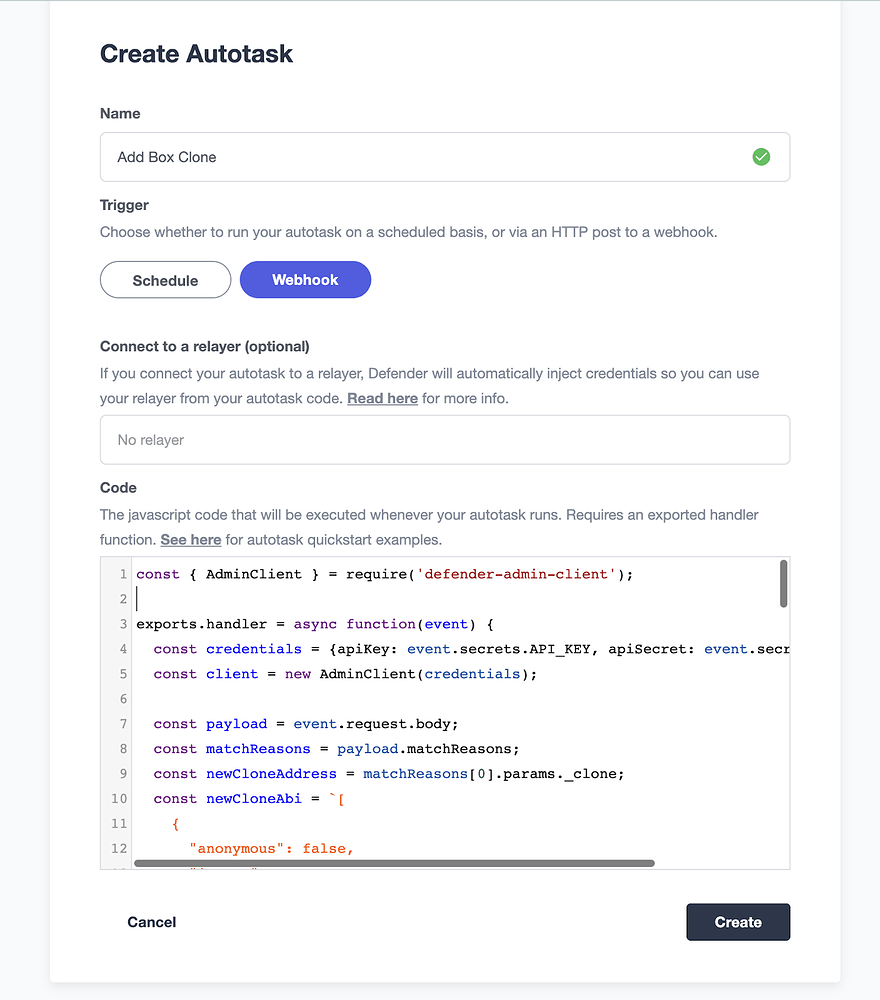
From the Autotask dashboard at the right select Create Autotask.
Name the Autotask and select Webhook.
Paste in the following Autotask code and hit Create.
const { AdminClient } = require('@openzeppelin/defender-admin-client')

exports.handler = async function (event) {
  const credentials = {
    apiKey: event.secrets.API_KEY,
    apiSecret: event.secrets.API_SECRET,
  }
  const adminClient = new AdminClient(credentials)
  const payload = event.request.body
  const matchReasons = payload.matchReasons
  const newCloneAddress = matchReasons[0].params._clone
  const newCloneAbi = `[
    {
      "anonymous": false,
      "inputs": [
        {
          "indexed": false,
          "internalType": "uint256",
          "name": "value",
          "type": "uint256"
        }
      ],
      "name": "ValueChanged",
      "type": "event"
    },
    {
      "inputs": [
        {
          "internalType": "uint256",
          "name": "value",
          "type": "uint256"
        }
      ],
      "name": "initialize",
      "outputs": [],
      "stateMutability": "nonpayable",
      "type": "function"
    },
    {
      "inputs": [],
      "name": "retrieve",
      "outputs": [
        {
          "internalType": "uint256",
          "name": "",
          "type": "uint256"
        }
      ],
      "stateMutability": "view",
      "type": "function"
    },
    {
      "inputs": [
        {
          "internalType": "uint256",
          "name": "value",
          "type": "uint256"
        }
      ],
      "name": "store",
      "outputs": [],
      "stateMutability": "nonpayable",
      "type": "function"
    }
  ]`
  // add new box clone contract to admin
  await adminClient.addContract({
    network: 'rinkeby',
    address: newCloneAddress,
    name: `Clone ${newCloneAddress}`,
    abi: newCloneAbi,
  })
}
Now the Autotask is ready to be triggered by a Sentinel.
Note that manually triggering this Autotask will be flagged as an error, since the Autotask relies on data supplied by the actual firing of the Sentinel (such as the address of the newly deployed clone contract address).
Set Up the Factory Sentinel
This Sentinel will watch for an event emitted by the contract signaling that a new clone has been created.
Select Sentinel from the left, then Create Sentinel.
Leave the Sentinel Type as Contract.
Give it a name, such as "New Clone Event Detected"
Select the appropriate network.
If the factory contract is already loaded into the Admin dashboard, select the name of the contract from the Addresses dropdown. Otherwise, paste the contract address and ABI.
Leave the confirmation blocks at 1 for rapid detection or specify a higher block number for additional thoroughness.
Select Next.
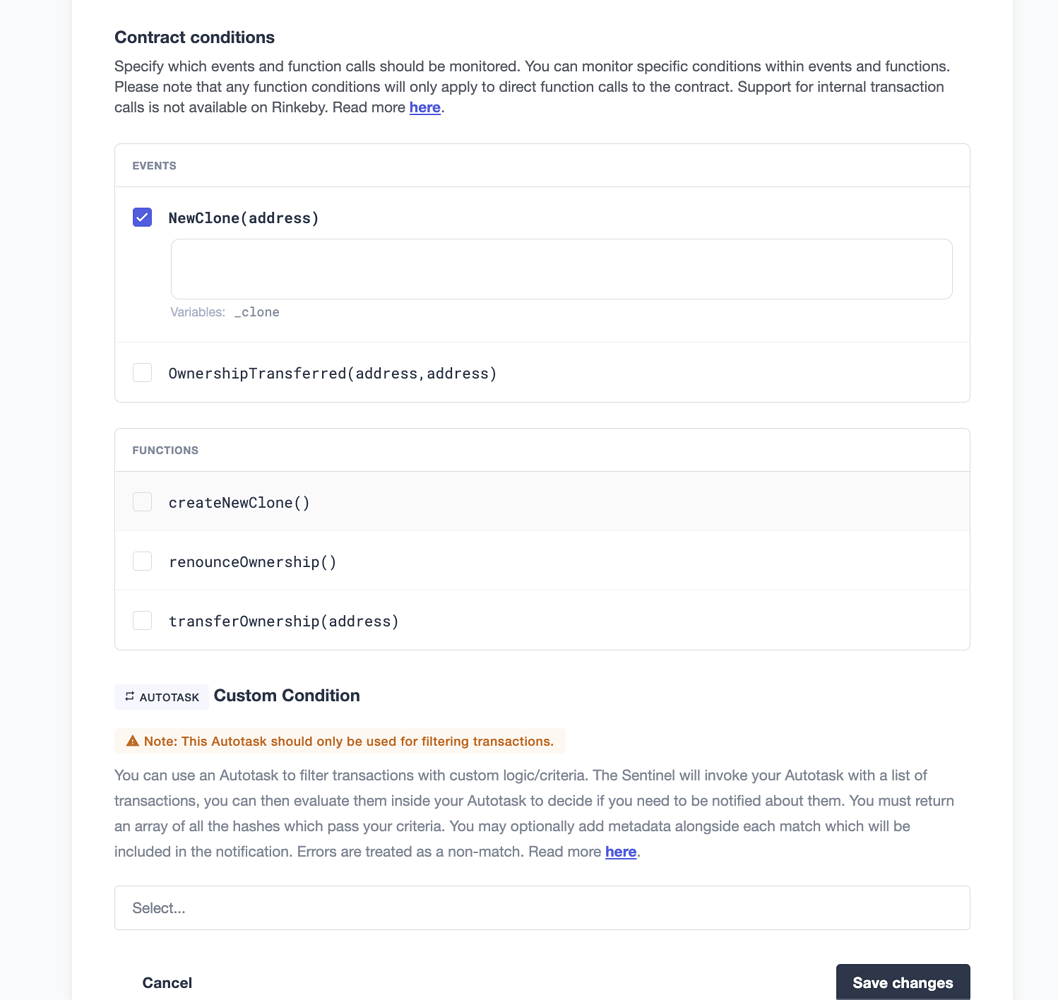
Now comes the time to select the conditions that will trigger the Sentinel. Either function calls or event emissions can be monitored.
Select the event name for clone creation and leave the field blank to catch all emitted clone creation events. Select Next.
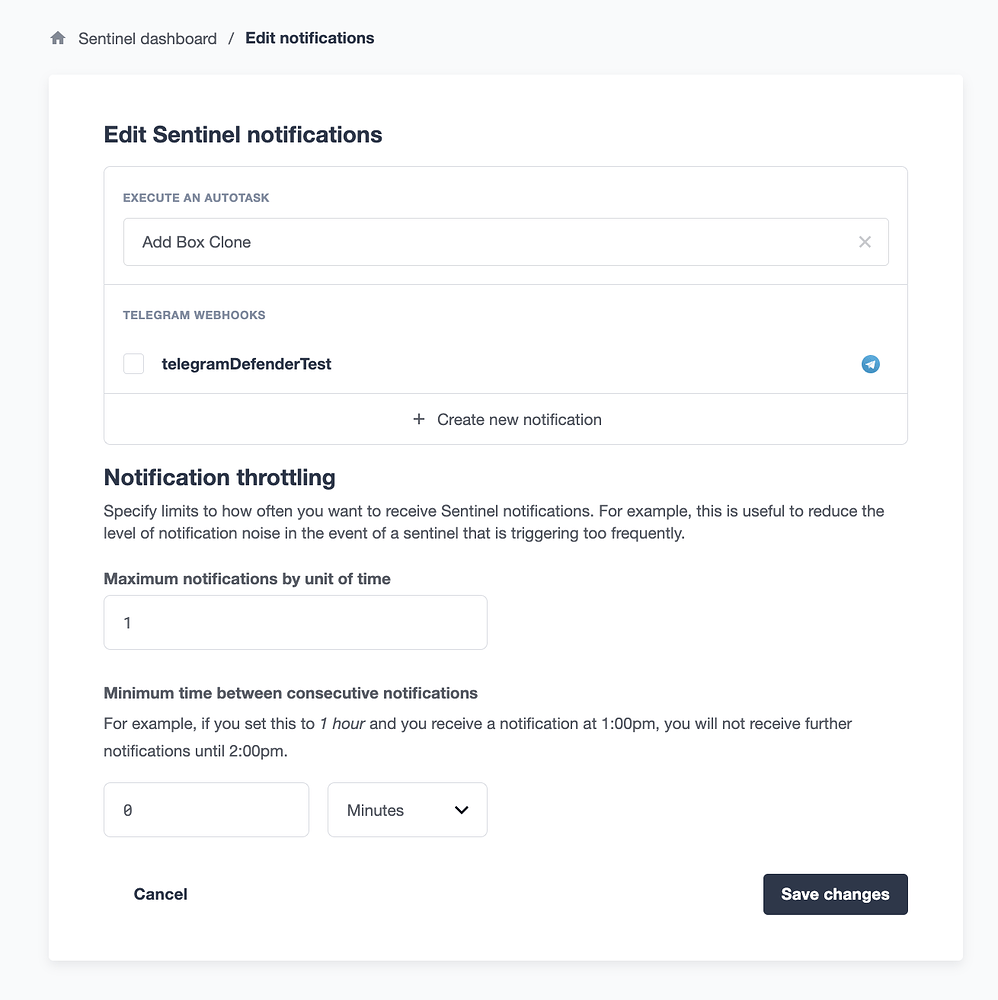
Under Execute an Autotask, Select the Autotask name created in the previous step.
As with any account action, the triggering of this Sentinel will be recorded in the Defender Logging. If you’d like, you can select a way of receiving notification when this Sentinel gets triggered. Simply select your choice from the Create New Notification.
Select Create.
Do A Test Run
To test from the UI, select the factory contract from the Admin dashboard, navigate to New Proposal → Admin action, and select the contract creation function along with an execution strategy that will work based on the contract’s permissions.
Then on the next screen, verify the information and select Approve and Execute and pay the gas.

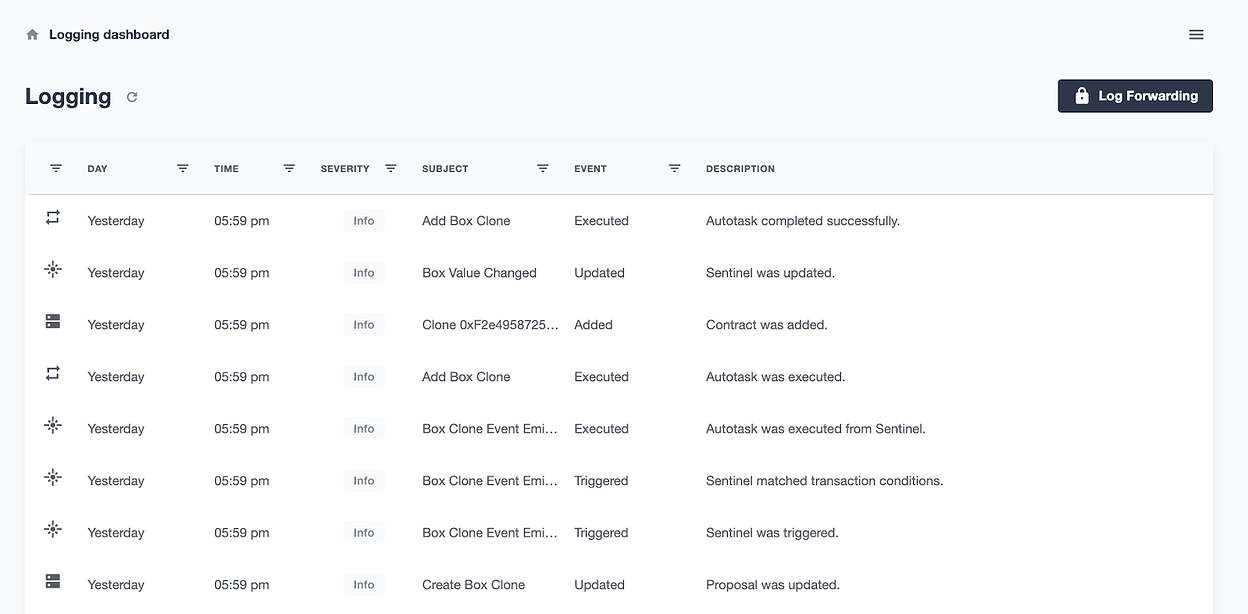
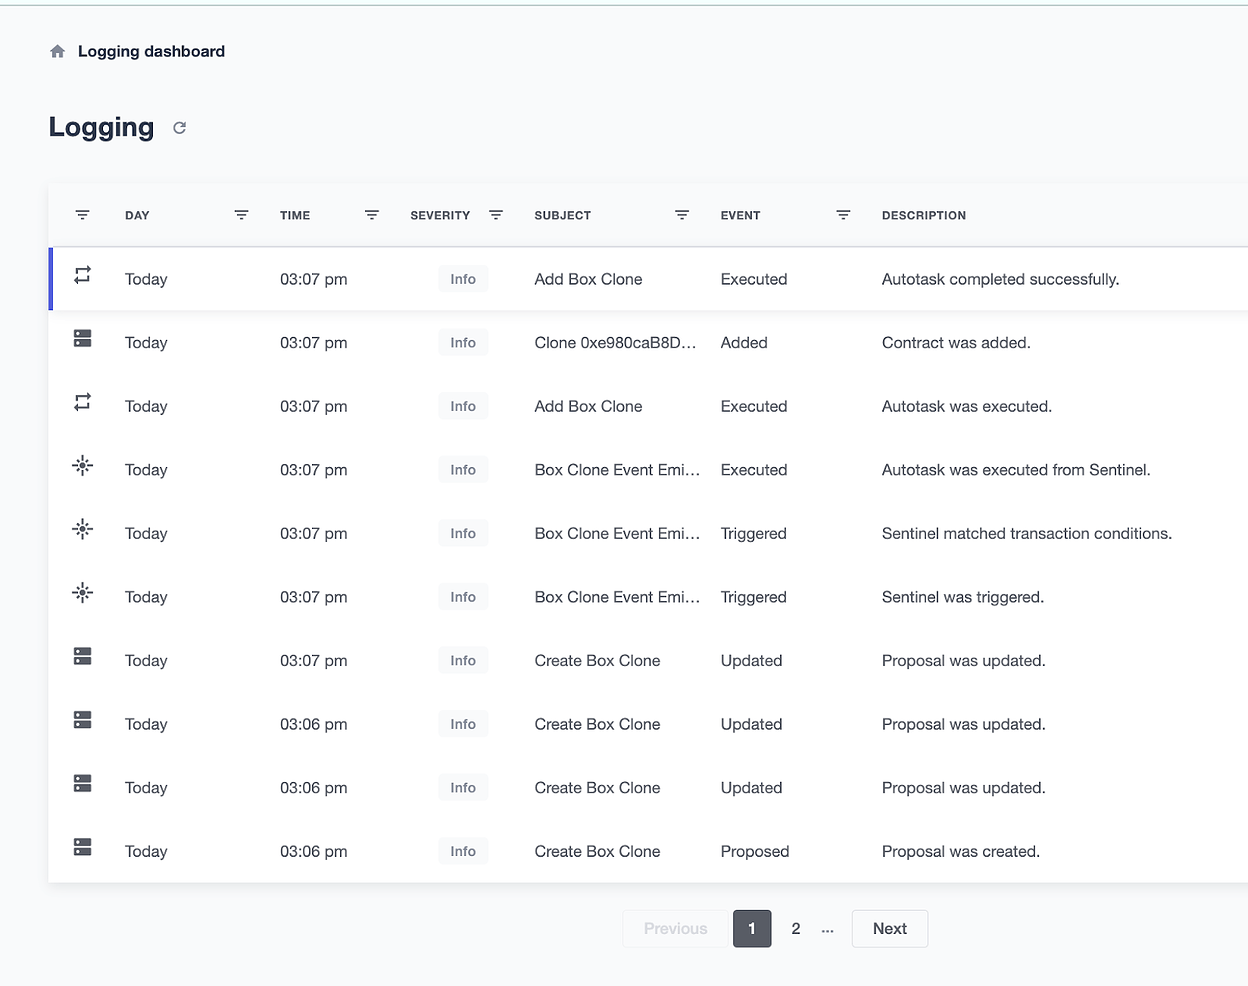
Head over to Logging to verify the status of the Admin proposal, the firing of the Sentinel, the execution of the Autotask, and finally the contract being added to the Admin dashboard.
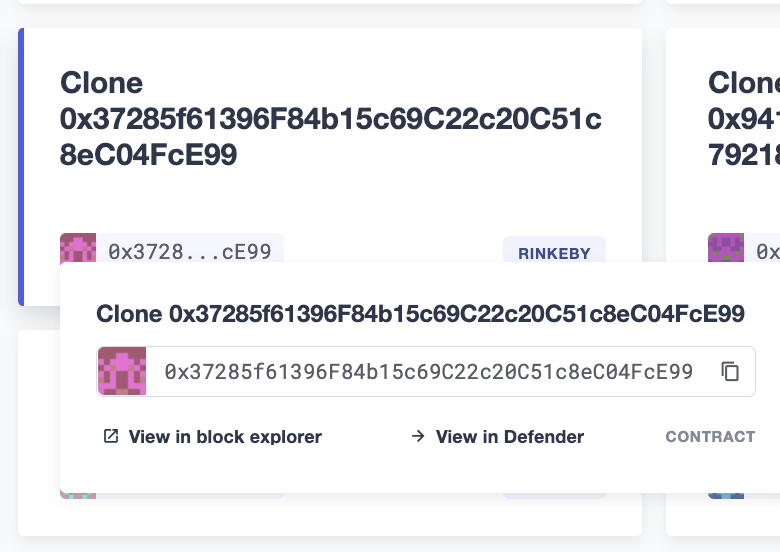
Navigate to Admin to see the new contract along with the others in the dashboard.
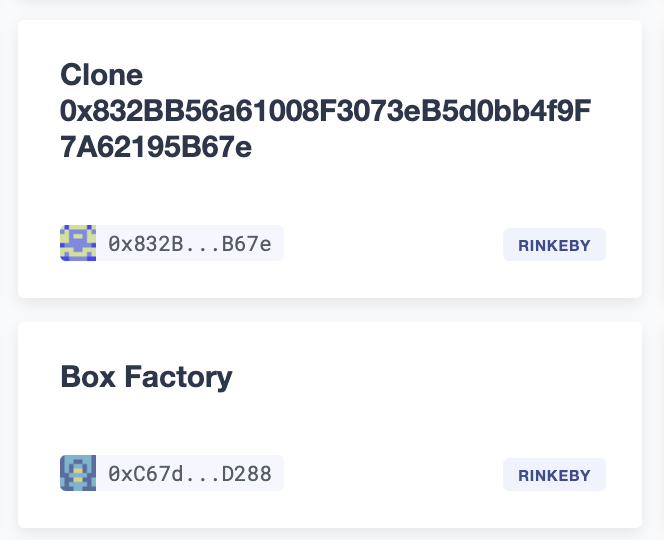
You’ll need the address of a clone contract for the next step. Copy its address from its listing on the dashboard.
Create Sentinel to Monitor Clone Contracts
Now that you have a clone contract to serve as a template for all future clone contracts, it’s time to create a Sentinel.
From the panel on the left, select Sentinel → Create Sentinel.
Name the Sentinel, select the appropriate network, and paste the contract address of the clone.
The ABI of verified contracts will be automatically imported. Otherwise, paste in the contract’s ABI and leave the block verification at 1 unless additional thoroughness is required.
Click Next, then select the parameters you would like to monitor for. For the Box example, we will monitor for a change in stored value.
An Autotask can be used here if fine-grained filtering is needed.
Select Next and then select the desired notification method.
Finally, select Create Sentinel.
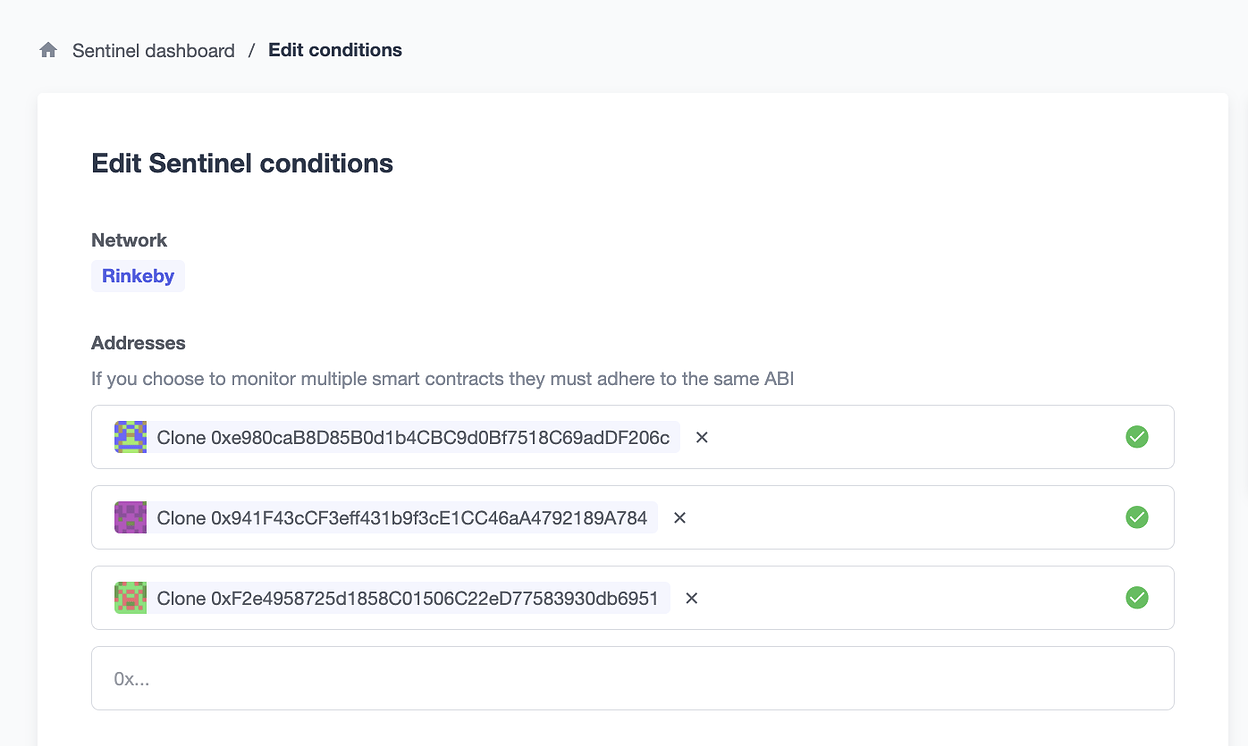
In its current state, the Sentinel monitors a single clone contract for changes in value. However, Contract Sentinels can monitor multiple addresses, provided they adhere to the same ABI.
In the next step, you will add an additional component to the existing Autotask that makes use of the Sentinel API to push additional contract addresses to the array of contracts being monitored by this Sentinel.
Add Sentinel Code to Autotask
Add the following code to the Autotask that was created previously:
const { SentinelClient } = require('@openzeppelin/defender-sentinel-client')The same API key used by @openzeppelin/defender-admin-client can be used, provided the key has the necessary permissions for editing Sentinels.
Note that the subscriberId variable refers to the ID of the Sentinel. You can find this value by:
-
querying the list of created Sentinels with
await client.list(); -
reviewing the Logging (if the Sentinel has been fired)
-
grabbing the last part of the Sentinel’s URL
Inside the handler, add the code listed below.
const sentinelClient = new SentinelClient(credentials)
const subscriberId = '1cf990de-ebb3-4255-8c12-67eec8fbbfa7'
const sentinel = await sentinelClient.get(subscriberId)
const subscribedAddresses = sentinel.addressRules[0].addresses
subscribedAddresses.push(newCloneAddress)
await sentinelClient.update(subscriberId, { addresses: subscribedAddresses })
Hit Save Changes.
Now when the Autotask runs, not only will it add the contract to the Admin dashboard, it will also add the newly created clone contract to the array of addresses being monitored by the Contract Sentinel.
To verify, create an additional Box clone contract from the factory. In Logging you will see the series of steps have been successfully triggered.