Manage
Manage everything related to the configuration of Defender, including Relayers, notification channels, addresses, team members, API keys, and more.
Relayers
Relayers are used to send transactions to the blockchain via Defender automatically. Read more about in the Relayers section.
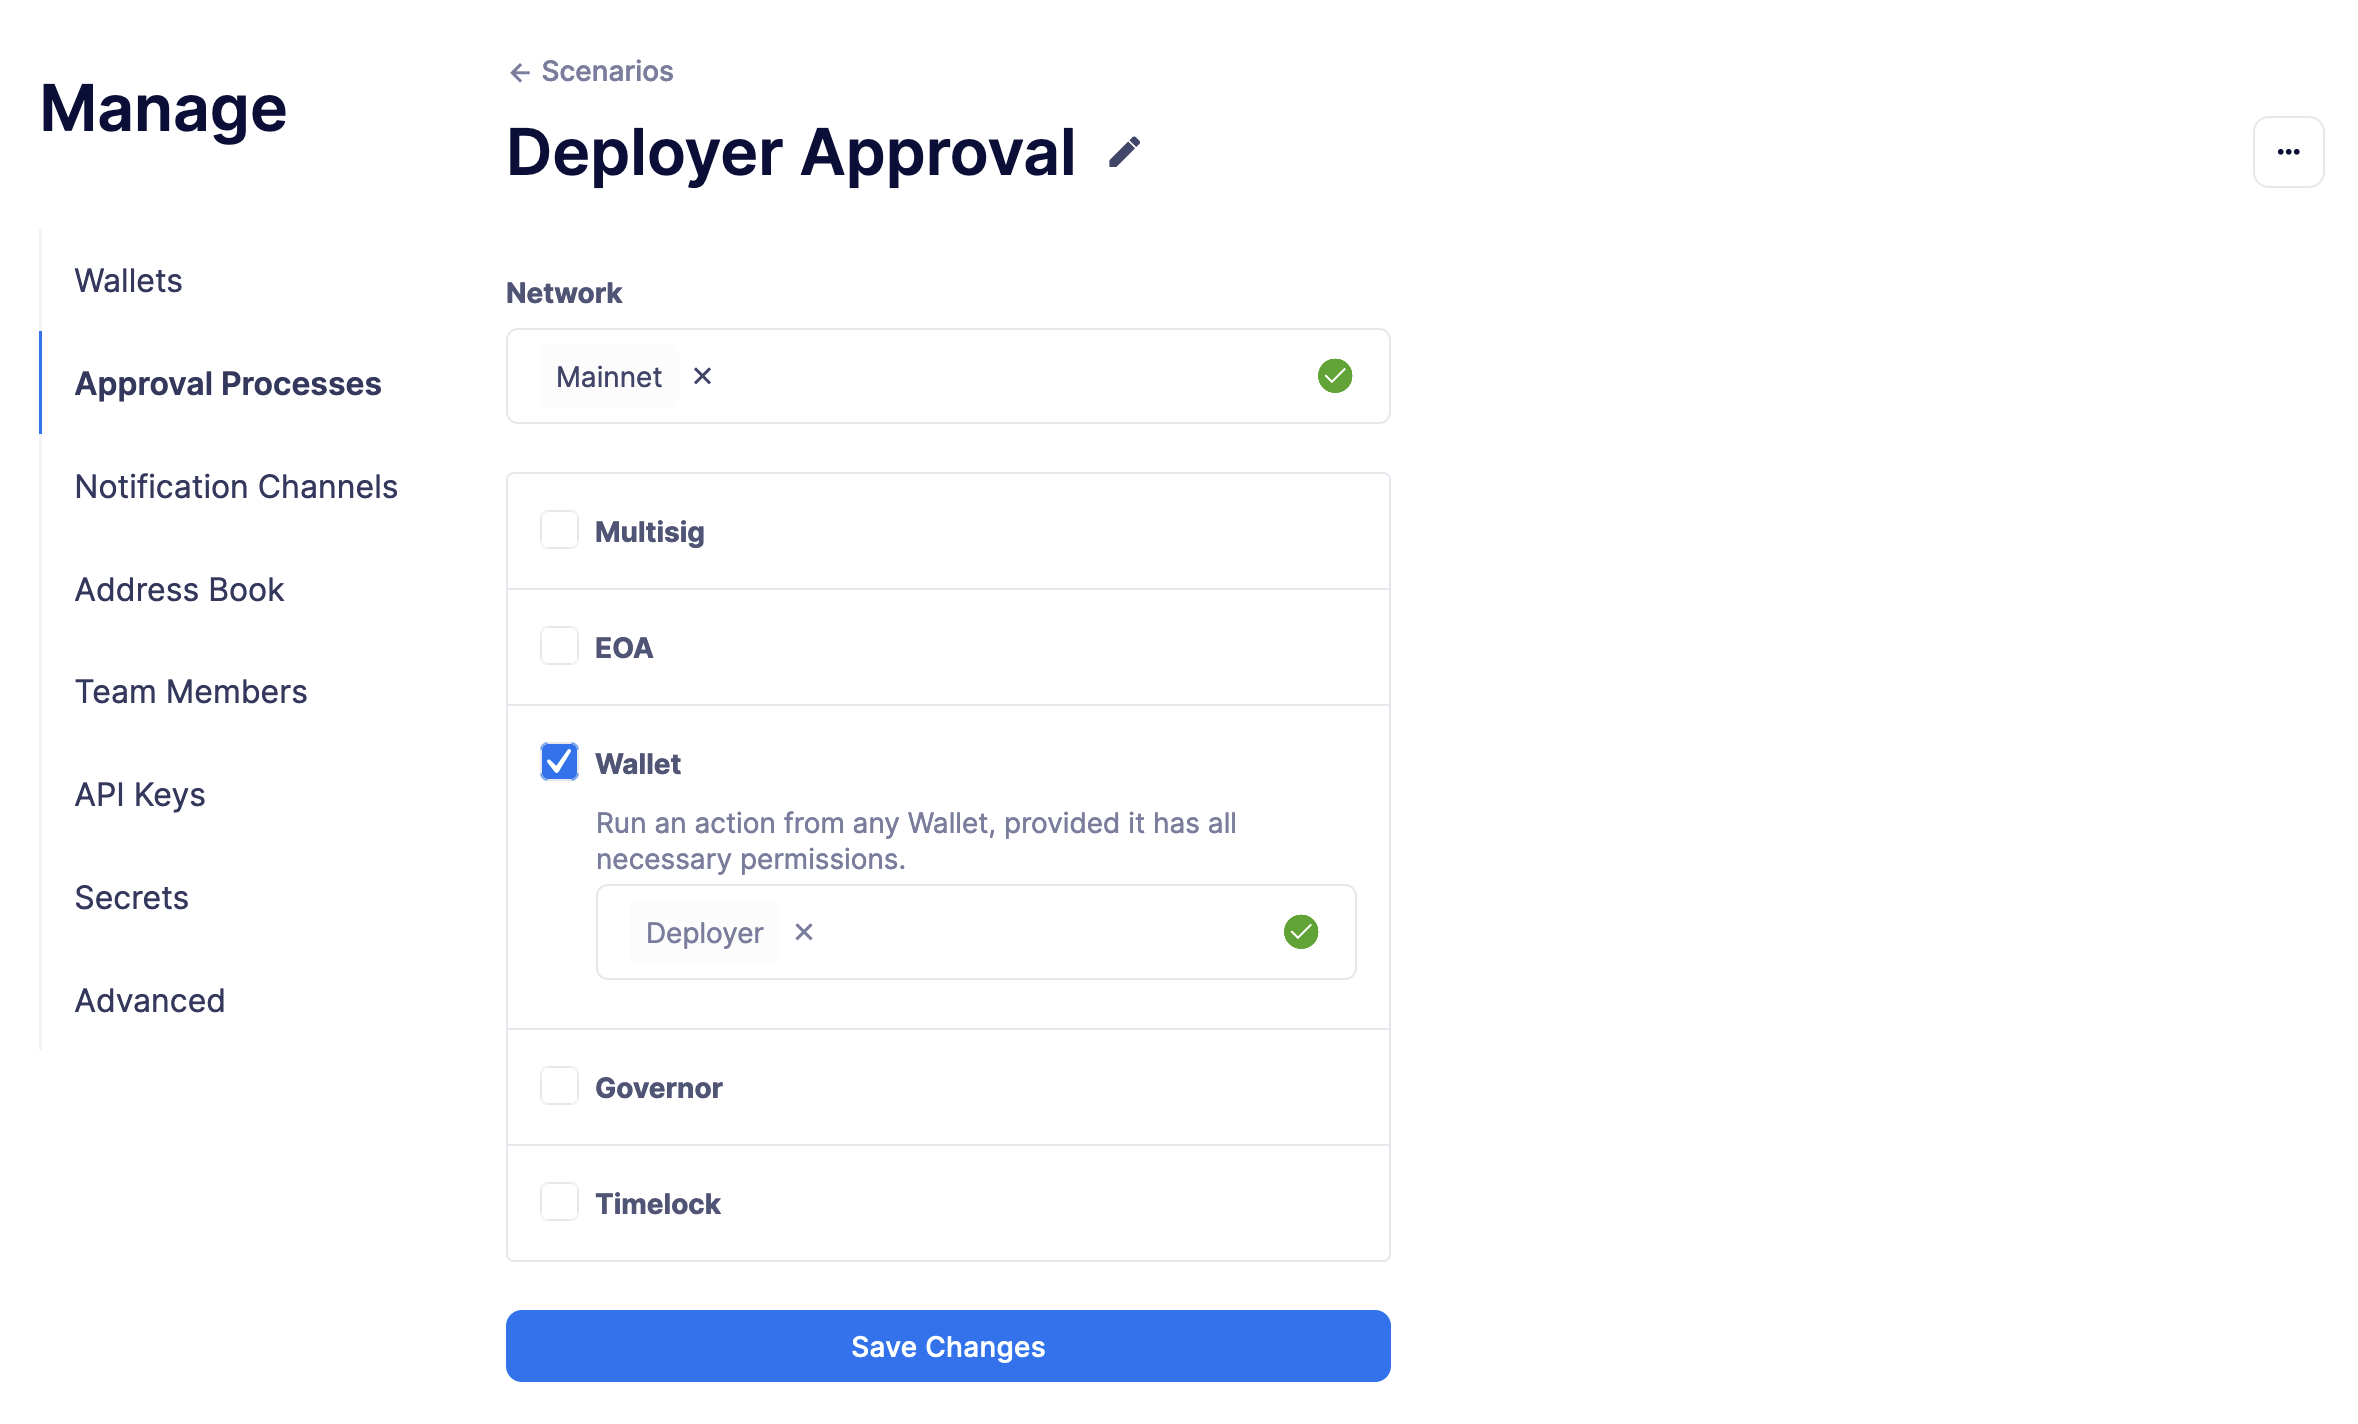
Approval Processes
Approval processes act as a wrapper for transactions to be executed on-chain. They currently wrap the following:
-
Multisigs
-
EOAs (outside Defender)
-
Relayers (inside Defender)
-
Governor contracts
-
Timelock contracts
-
Fireblocks
They are defined per network, and are used throughout Defender to execute transactions, such as in the Deploy wizard, Actions and Workflows.
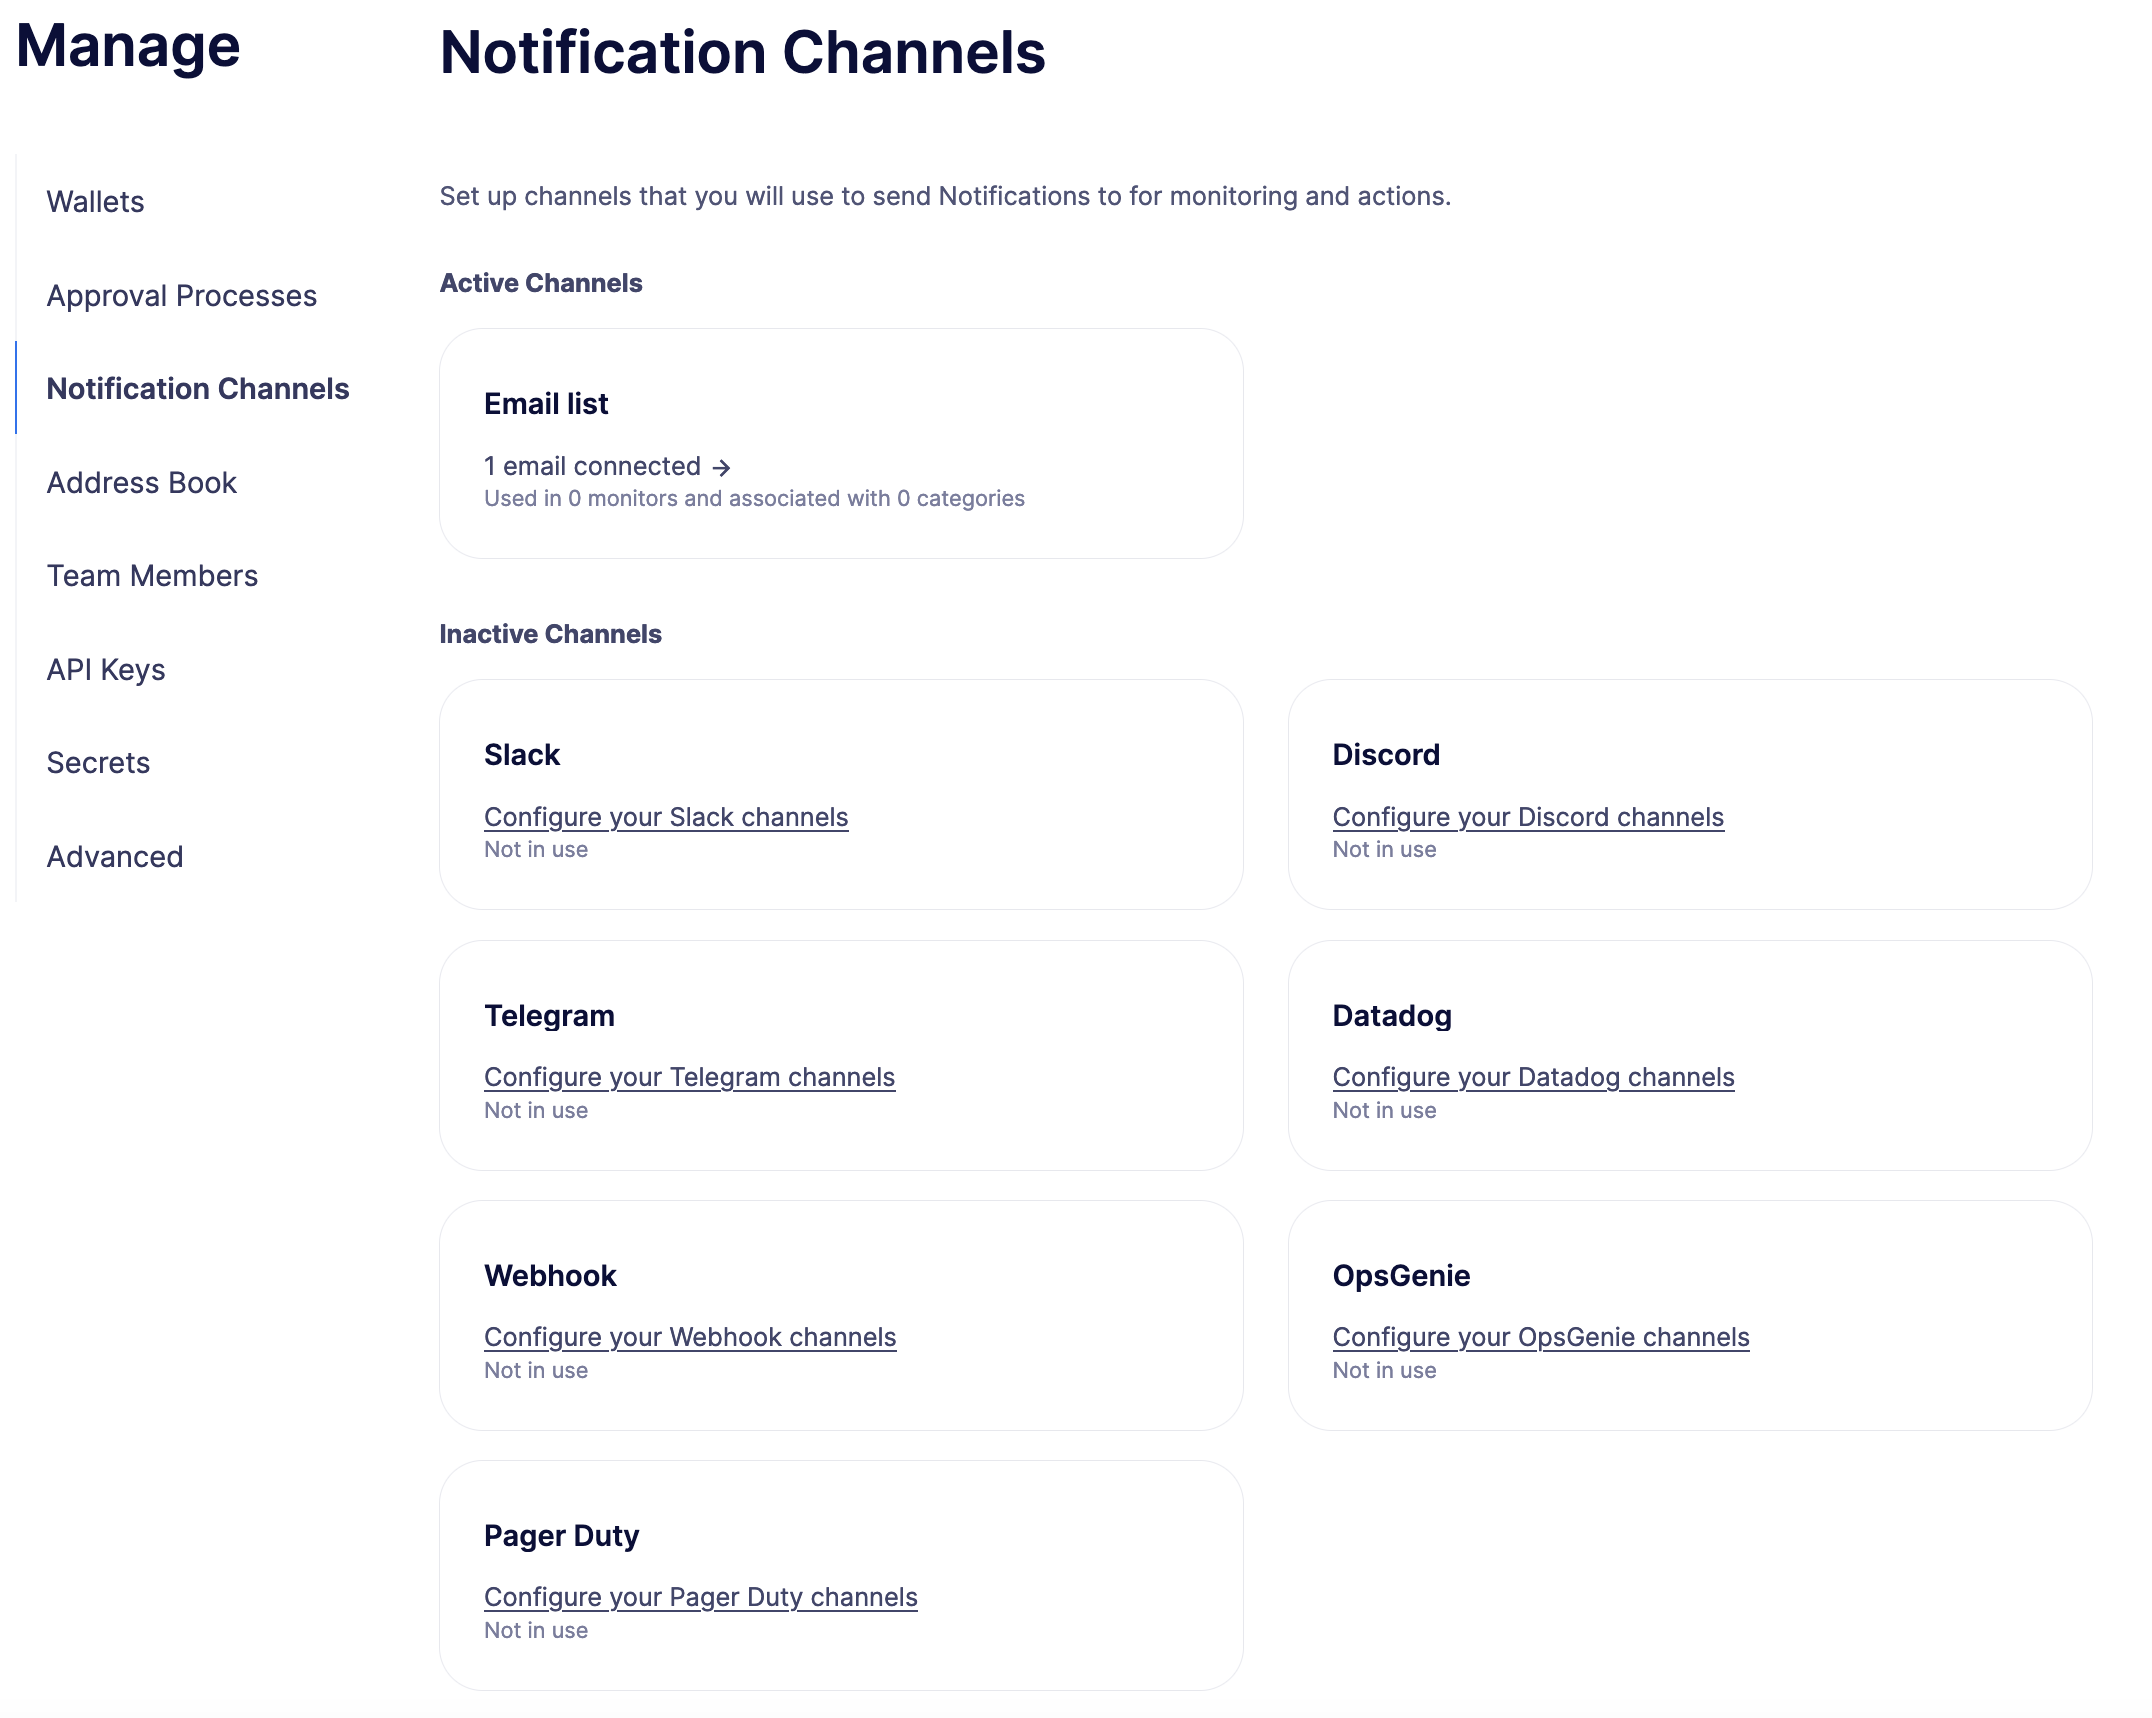
Notification Channels
When triggered, Defender can deliver notifications to one or more configured notification channels which can include any of Slack, email, Telegram, Discord, Datadog, PagerDuty, OpsGenie, or custom webhooks. These notification channels can be used in monitors, actions, and workflows.
Slack Configuration
Please see Slack webhook documentation to configure a Slack webhook. Once Slack is configured, enter the webhook URL in Defender.
-
Alias is the name for this Slack configuration. For instance, you might name it after the name of the channel.
-
Webhook URL is the URL from your Slack management console to use for notification.
Email Configuration
-
Alias is the name for this email list. (e.g., Developers)
-
Emails is the list of emails you wish to notify. These can be comma or semicolon-delimited.
Discord Configuration
Please see Discord webhook documentation to configure a webhook for your Discord channel.
-
Alias is the name for this Discord configuration.
-
Webhook URL is the URL from your Discord channel to use for notification.
Telegram Configuration
Please see Telegram bot documentation to configure a Telegram Bot using the BotFather.
| The Telegram Bot must be added to your channel and have the rights to post messages. |
To find the Chat ID of the channel, execute the following curl (with your bot token value) and extract the id value of the chat. If you do not receive any entries in the response, send a test message to your chat first.
$ curl https://api.telegram.org/bot$BOT_TOKEN/getUpdates
{
  "ok": true,
  "result": [
    {
      "update_id": 98xxxx98,
      "channel_post": {
        "message_id": 26,
        "sender_chat": {
          "id": -100xxxxxx5976,
          "title": "Monitor Test",
          "type": "channel"
        },
        "chat": {
          "id": -100xxxxxx5976, // <--- This is your chat ID
          "title": "Monitor Test",
          "type": "channel"
        },
        "date": 1612809138,
        "text": "test"
      }
    }
  ]
}-
Alias is the name for this Telegram configuration.
-
Chat ID is the ID of the Telegram Chat.
-
Bot Token is the token you receive from the BotFather when creating the Telegram Bot.
Datadog Configuration
Datadog configurations let Defender forward custom metrics to your Datadog account. For more information about custom metrics, please see Datadog metrics documentation
The metric we send is a COUNT metric, which represents the number of transactions that triggered the notification. We do not send zeros, so a lack of data should be expected if there is no trigger. With each metric, we send two tags: network (rinkeby, mainnet,…) and when a monitor has triggered the notification then monitor (name of the monitor)
| It can take several minutes for a new custom metric to show up in the Datadog console |
-
Alias is the name for this Datadog configuration.
-
Api Key is the API key from your Datadog management.
-
Metric Prefix will precede all metric names. For instance, with a prefix of
openzeppelin., monitors will send a metric calledopenzeppelin.monitor.
Webhook Configuration
To configure a custom webhook notification channel, you just need to provide the webhook endpoint URL and an alias for display purposes.
-
Alias is the name for this webhook endpoint.
-
Webhook URL is the URL where notifications will be sent.
To avoid overwhelming the receiving webhook with many concurrent requests under a high number of matches, Defender sends a JSON object with an events containing an array with all the matching events found in a block.
{
  events: [...] // See Event Schema info in Action or Monitor docs
}OpsGenie Configuration
Please see OpsGenie integration documentation to configure an OpsGenie API integration that can create alerts.
-
API Key Integration API key that can be found in the integration settings
-
Instance Location Location where the OpsGenie instance server is located
-
Responders Teams, users, escalations and schedules that the alert will be routed to send notifications. The type field is mandatory for each item, where possible values are team, user, escalation and schedule. If the API Key belongs to a team integration, this field will be overwritten with the owner team. Either id or name of each responder should be provided. You can refer below for example values (50 teams, users, escalations or schedules)
-
Visible To Teams and users that the alert will become visible to without sending any notification. The type field is mandatory for each item, where possible values are team and user. In addition to the type field, either id or name should be given for teams and either id or username should be given for users. Please note: that alert will be visible to the teams that are specified within responders field by default, so there is no need to re-specify them within visibleTo field. You can refer below for example values (50 teams or users in total)
-
Alias Client-defined identifier of the alert, that is also the key element of Alert De-Duplication (512 max characters)
-
Priority Priority level of the alert. Possible values are P1, P2, P3, P4 and P5. Default value is P3
-
Entity Entity field of the alert that is generally used to specify which domain alert is related to (512 max characters)
-
Actions Custom actions that will be available for the alert (10 x 50 max characters)
-
Note Additional note that will be added while creating the alert (25000 max characters)
-
Details Map of key-value pairs to use as custom properties of the alert (8000 max characters)
-
Tags Tags of the alert (20 x 50 max characters)
PagerDuty Configuration
Please see PagerDuty integration documentation to configure an PagerDuty API v2 integration that can create change and alert events.
-
Event Type Event type for PagerDuty categorization (alert or change)
-
Routing Key Integration Key for an integration on a service or on a global ruleset (32 characters)
-
Event Action The action type of event (trigger, acknowledge or resolve)
-
Dedup Key Deduplication key for correlating triggers and resolves (255 max characters)
-
Severity The perceived severity of the status the event is describing with respect to the affected system (critical, error, warning or info)
-
Component Component of the source machine that is responsible for the event
-
Group Logical grouping of components of a service
-
Class The class/type of the event
-
Custom_detail Map of key-value pairs to provide additional details about the event and affected system
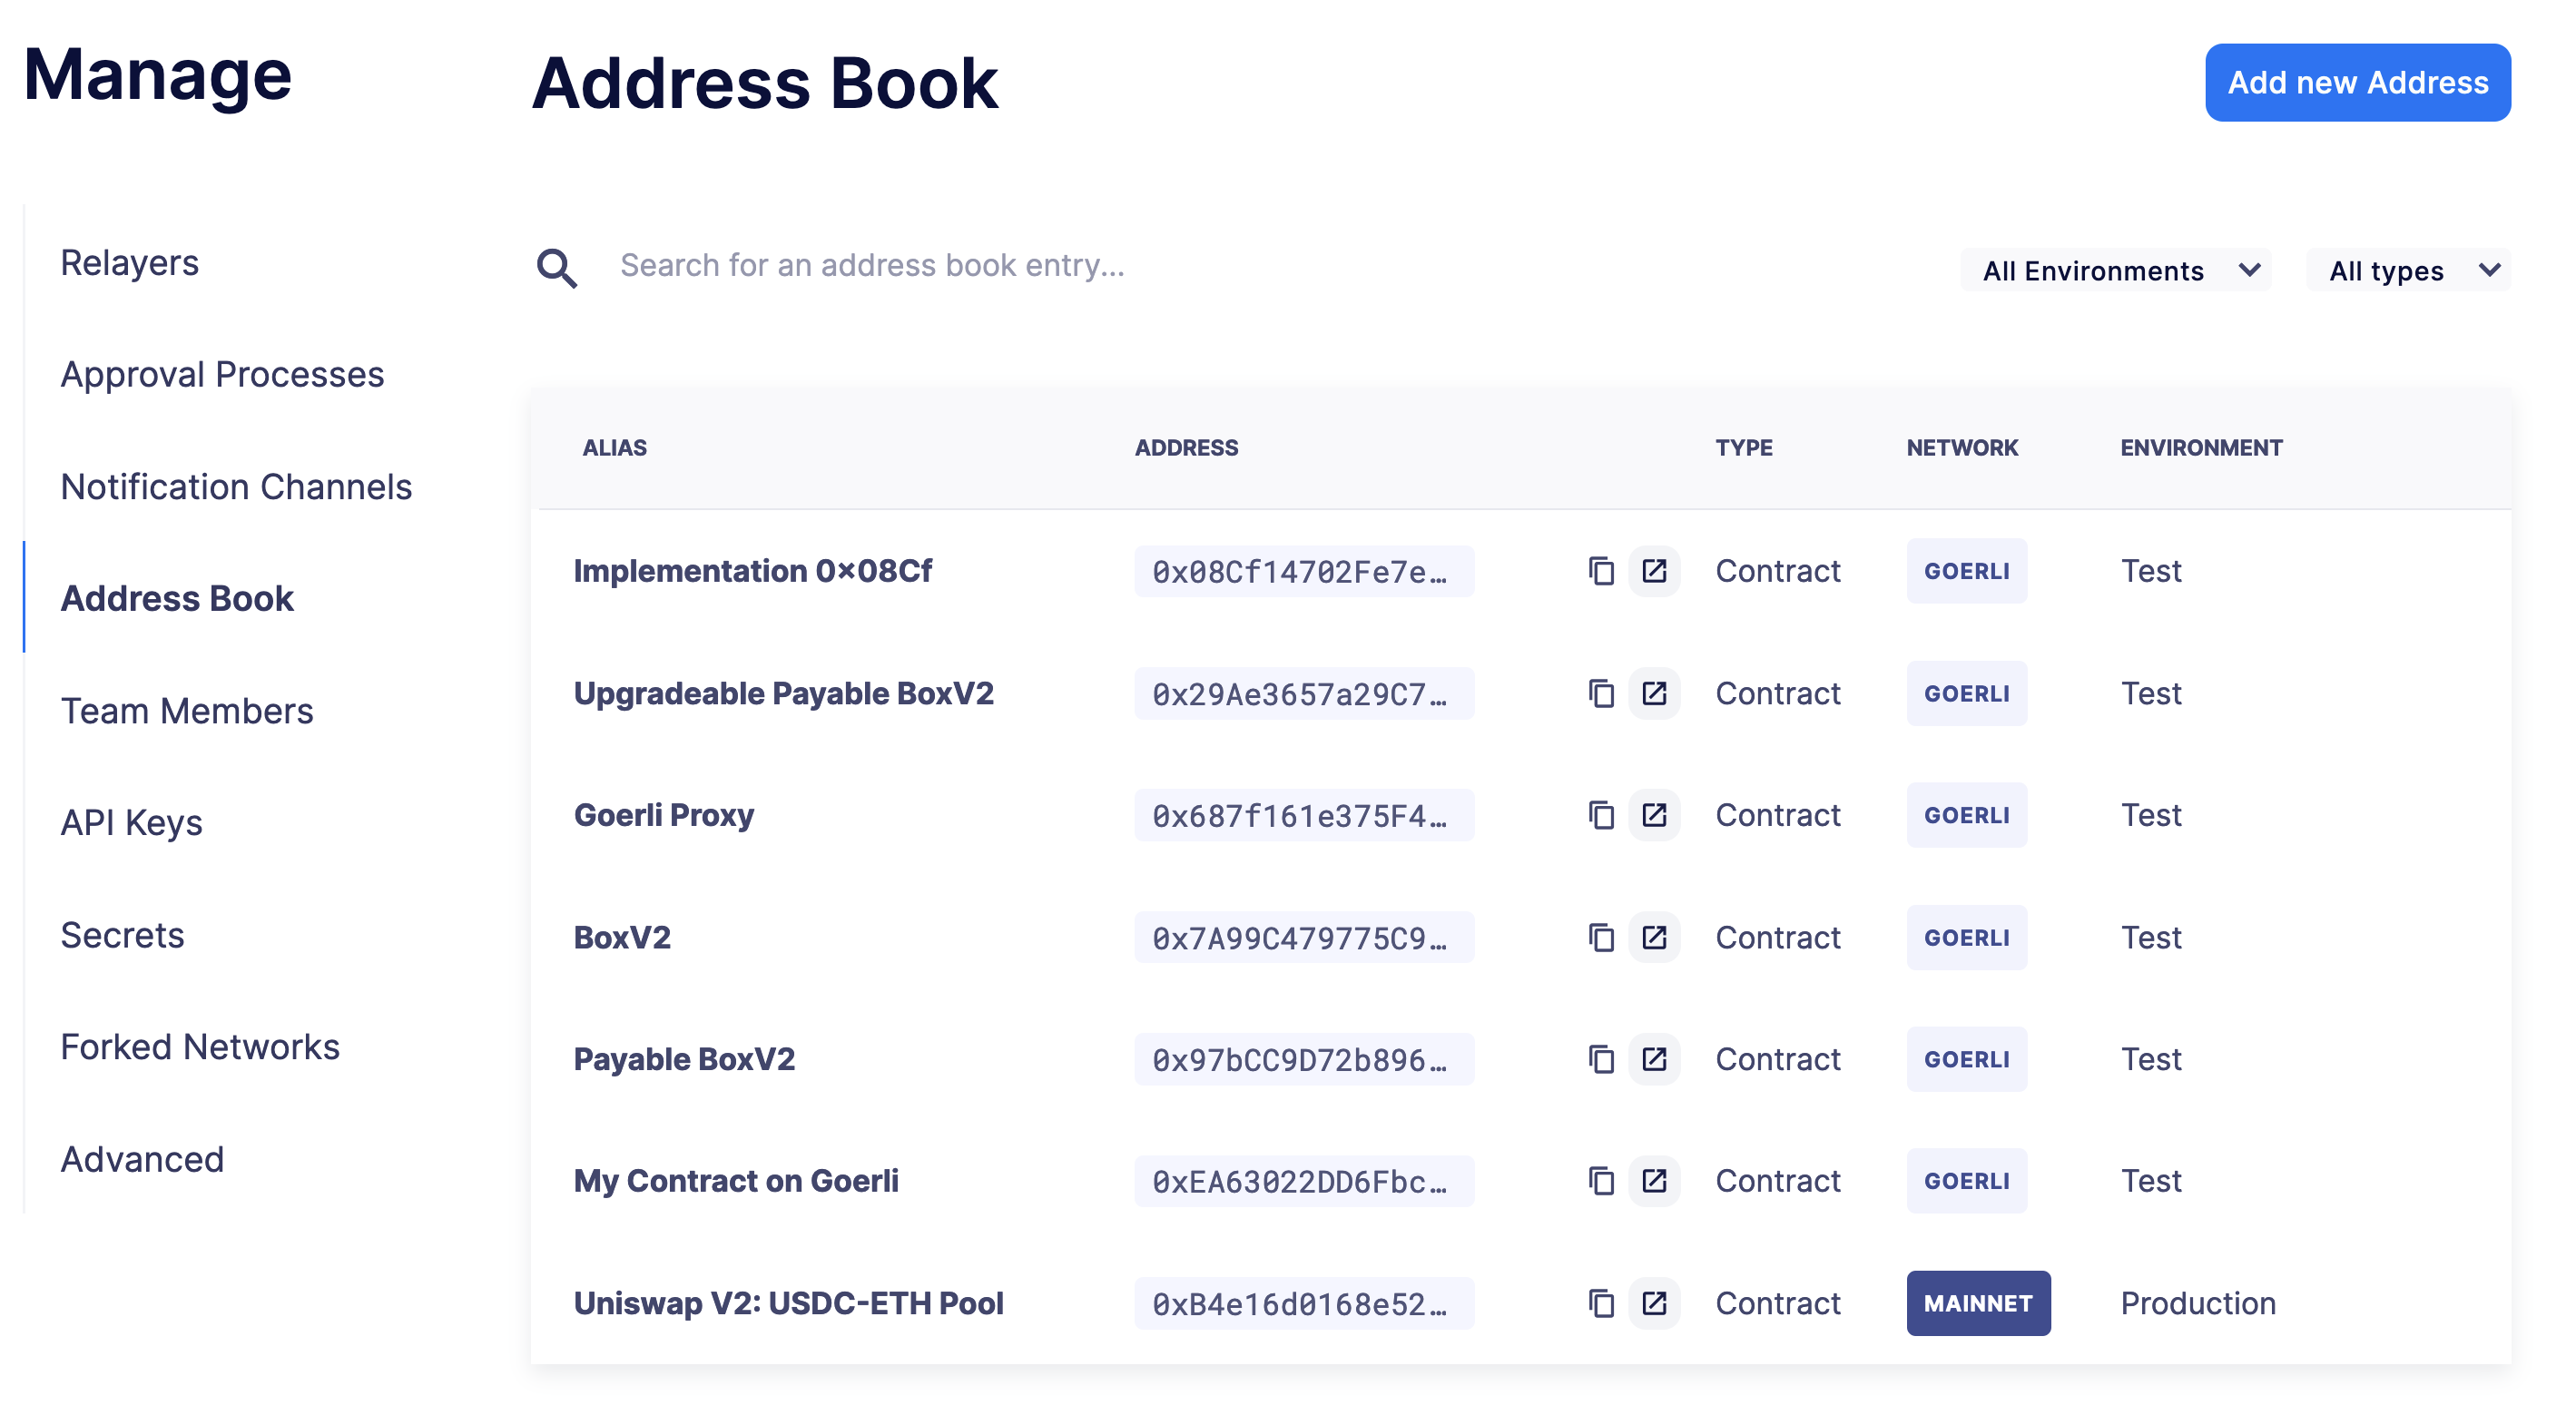
Address book
The address book allows you to create a shared repository of user-friendly names for your accounts or contracts. You can set up these names anywhere you see an address in Defender just by clicking on it, or you can manage your entire address book in the Manage section. Defender automatically creates address book entries for you when you import accounts and contracts in other modules.
When working with products in Defender, account and contract information will be directly sourced from the address book whenever you are required to enter an address, so you can easily fetch addresses from your address book when configuring monitors and actions.
Team Members
You can invite, manage access for, and remove team members from your Defender account under the Team Members section.
| If you want to add a user to your team, make sure to invite them from the Team Members section. If they sign up directly to the application, they will be added to a new team of their own instead. If this happens, consider having your teammate delete their account, so you can re-send the invitation for your team. Alternatively, they can join your team using a different email address. |
Roles
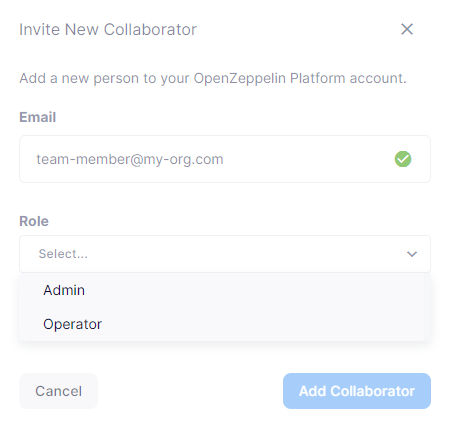
Every team member has an assigned role. You can manage authorization to access, modify and execute across all Defender products through the role-based access control system.
When you invite a new user to your team, you will assign a role to them, determining their access permissions.
To create a new role, click on the Create Role button. You will be asked to enter a role name and description, and to specify the level of access users in that role will get for each product. You can also specify which administrative powers the role will give access to: manage users and roles, manage team API keys, manage Fireblocks API keys, manage address book, and configure log forwarding.
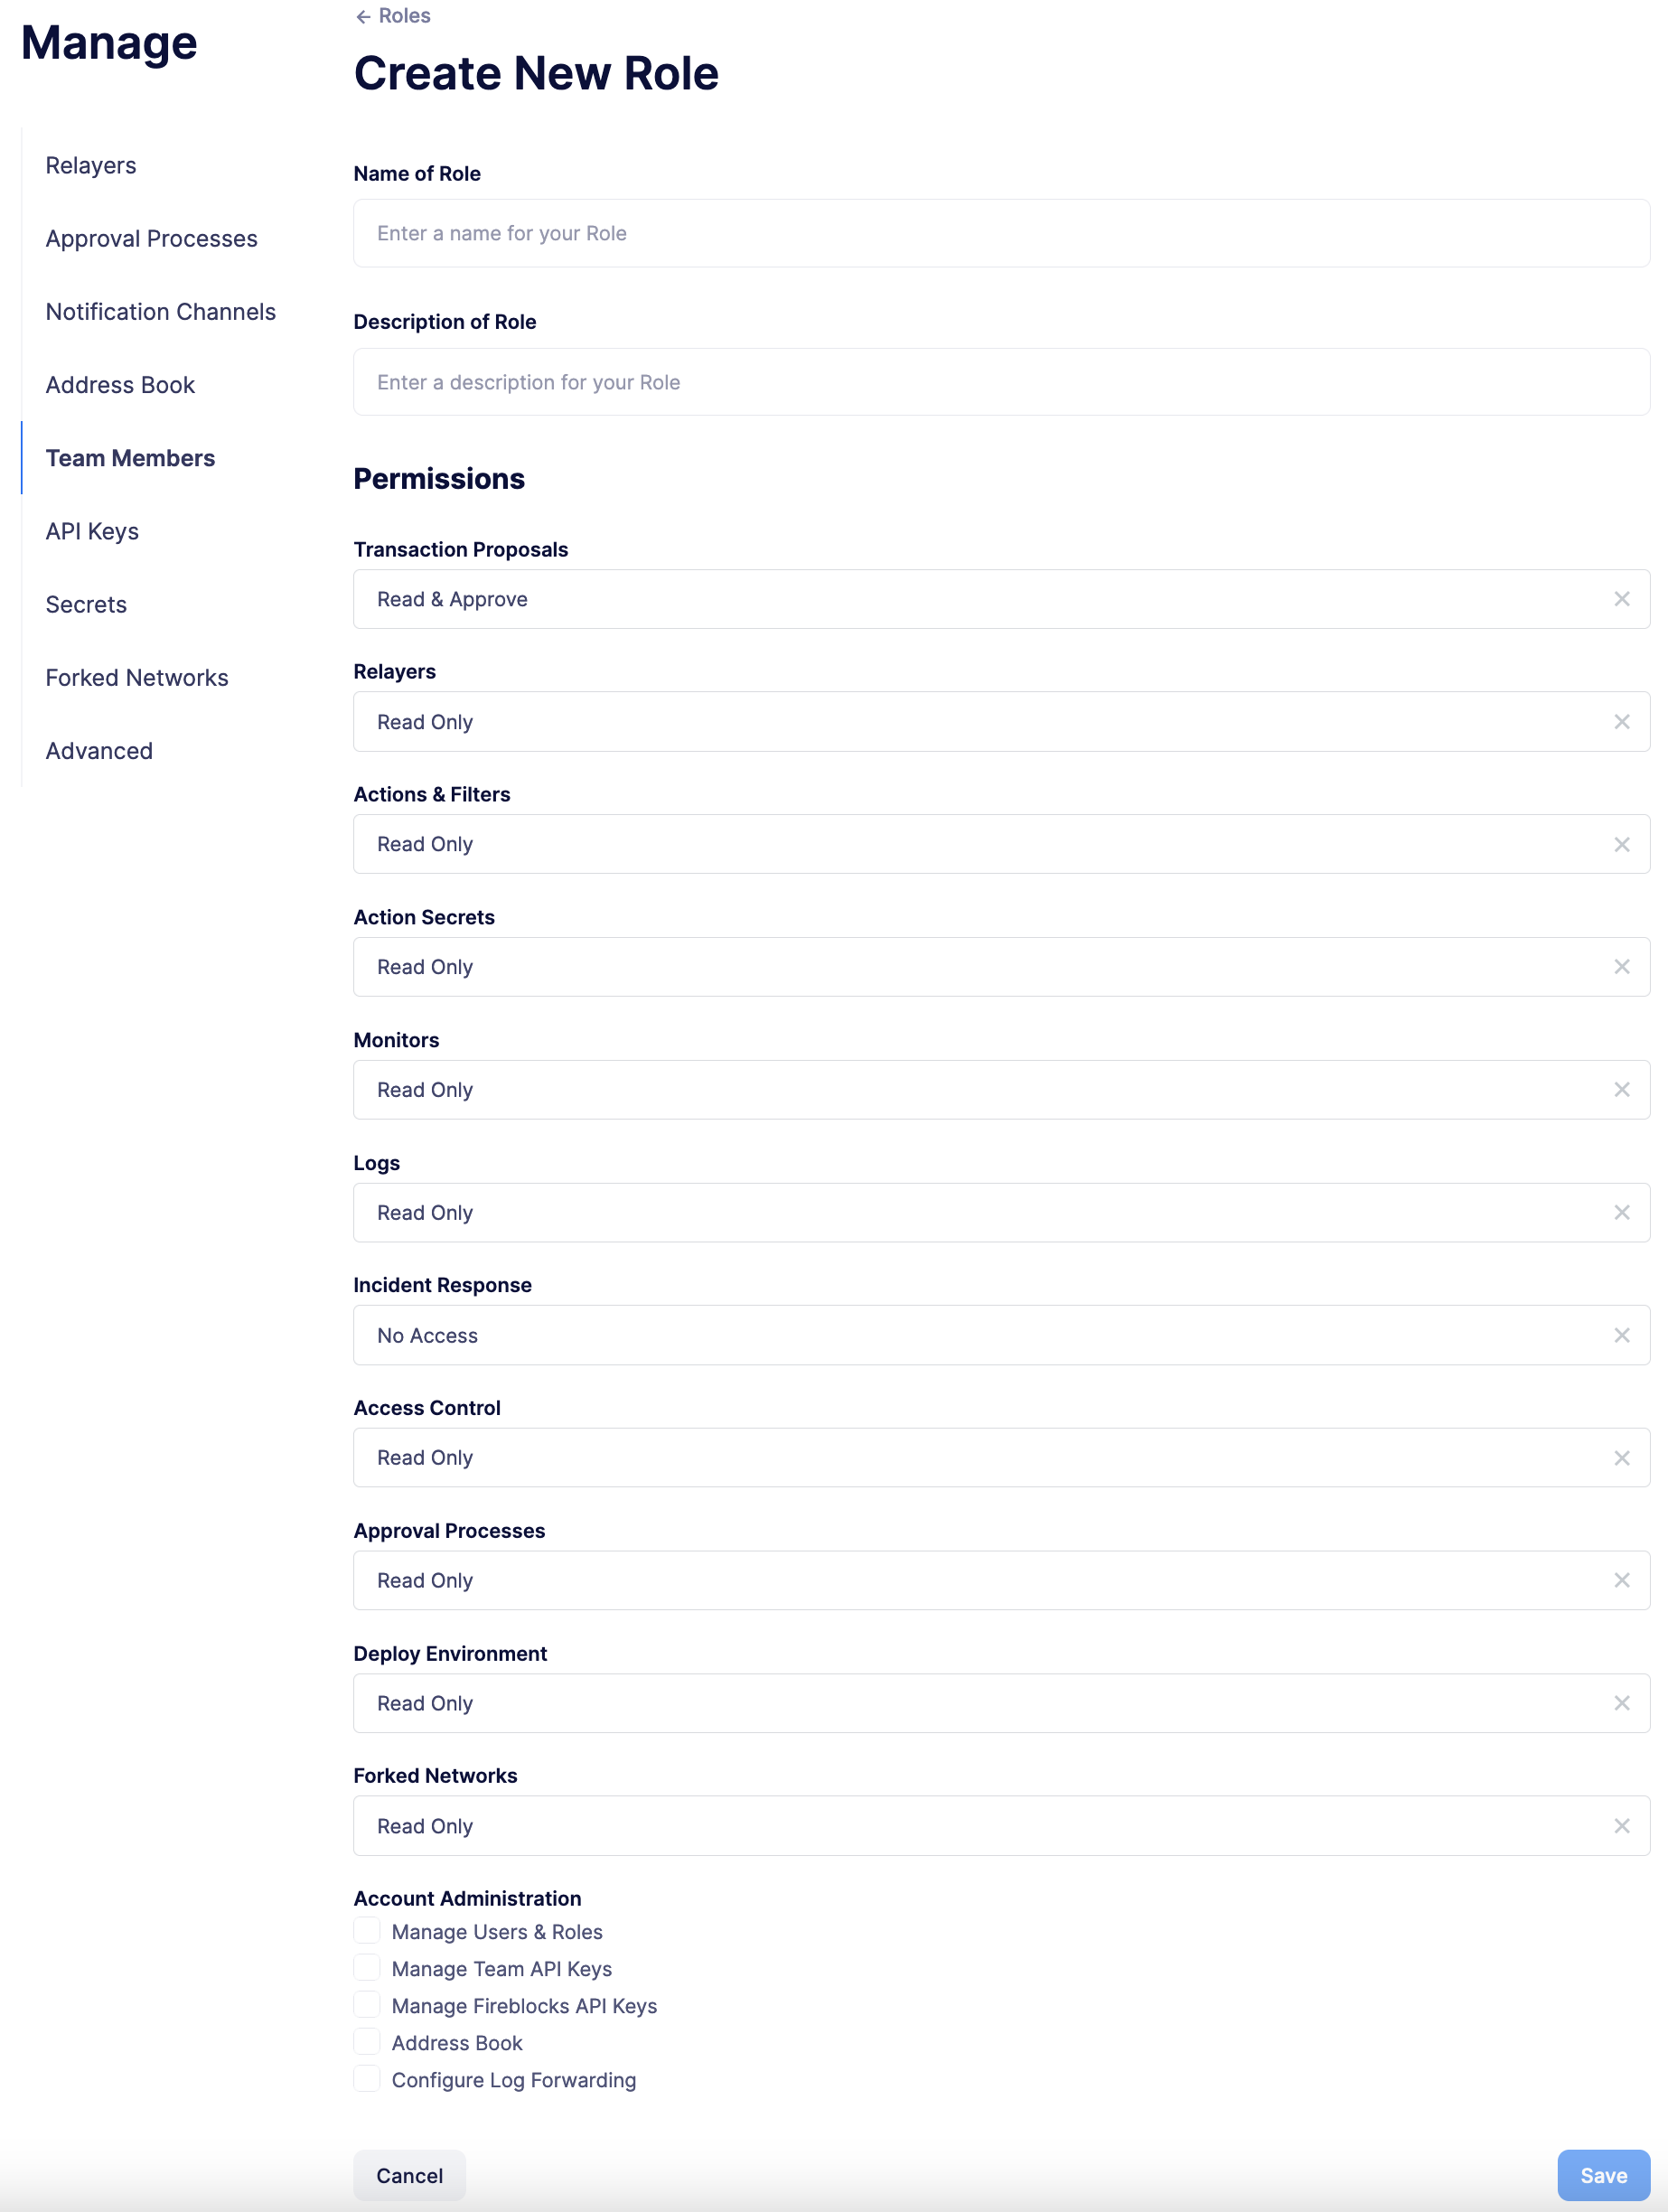
After saving, the new role will be available to assign to new or existing team members. Naturally, if in the future you decide to modify the access level of a given role, all users who have that role will as a consequence see their access level change.
| Be careful when granting administrative permissions. A user with the rights to modify roles but not to access any other component can modify their own role to grant them access to any other parts of the application. |
Two factor authentication (2FA)
We strongly suggest that you enable 2FA to improve your Defender account security. As a second authentication factor, Defender relies on the Time-based One-Time Password standard (TOTP). To enable 2FA on Defender, you need a TOTP compliant application, such as Authy or Google Authenticator. Each user can enable 2FA under their profile, accessible from the top-right user menu. Defender will guide users through the necessary steps.
Enforcing 2FA
As an admin user, you can enforce 2FA for all users in your team. To do so, go to the settings under Team Members section, and click on the Enforce 2FA toggle. This will require all users to setup 2FA before they can access Defender again.
| If you have users that are still accessing Defender 1.0, they will have to setup 2FA as well. |
Password reset
To change your user password for Defender, follow the steps below.
-
If you are logged in, sign out by opening the upper right corner menu and clicking on Sign out. You will be redirected to the landing page.
-
From Defender landing page, click on Sign in. You will be redirected to the sign in page.
-
From Defender sign in page, click on Forgot your password?.
-
Enter your email address and click on Reset my password. You will shortly receive an email with instructions on how to continue with the password reset process.
Secrets
Secrets are key-value case-sensitive pairs of strings, that can be accessed from any Action using the event.secrets object. You can define as many secrets as you need to be used by your Actions. Secrets are shared across all your Actions, and not specific to a single one.
exports.handler = async function(event) {
  const { mySecret, anApiKey } = event.secrets;
}
Secrets are encrypted and stored in a secure vault, only decrypted for injection in your actions runs. Once written, a secret can only be deleted or overwritten from the user interface, but not read.
| An action may log the value of a secret, accidentally leaking it. |

You can use secrets for storing secure keys to access external APIs, or any other secret value that you do not want to expose in the Actions code.
| While you can also use actions secrets to store private keys for signing messages or transactions, we recommend you use Relayers instead. Signing operations for relayers are executed within a secure vault, providing an extra level of security than loading the private key in an action run and signing there. |
API Keys
In API Keys you can manage the keys used by clients to access the Defender API for your account, and also enter integration API keys if you are using Fireblocks for approvals. Note that relayers have their own API keys that are separate from these API keys and are configured directly in Manage Relayers.
To add an API key, click on the Create API Key button.
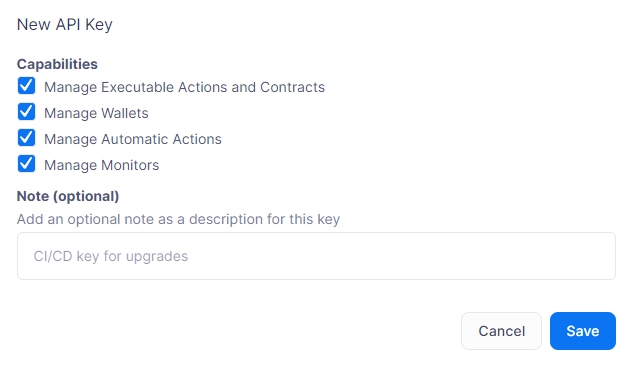
Select the API capabilities that you want associated with the API key:
-
Manage Transaciton Proposals and Contract for creating and issuing actions and managing contracts.
-
Manage Relayers for creating relayers and changing relayer policies.
-
Manage Automatic Actions for creating and modifying automatic actions and their configurations.
-
Manage Monitors for creating and managing monitors and their configurations.
Once the API key is created, Defender will show you the details.
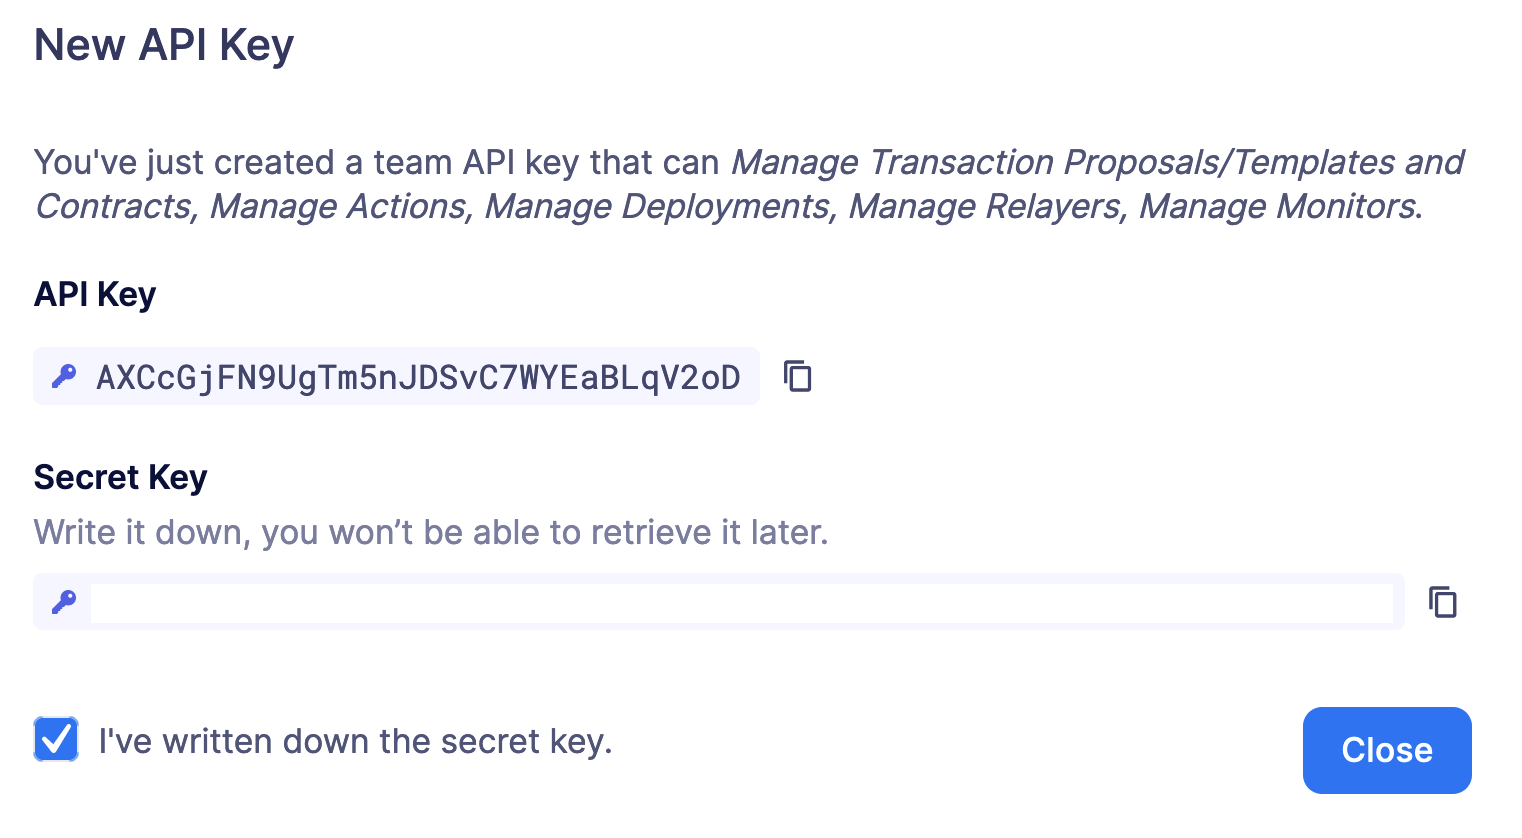
Be sure to copy the secret key, it will be required for access and it will not be accessible again after the form is dismissed.
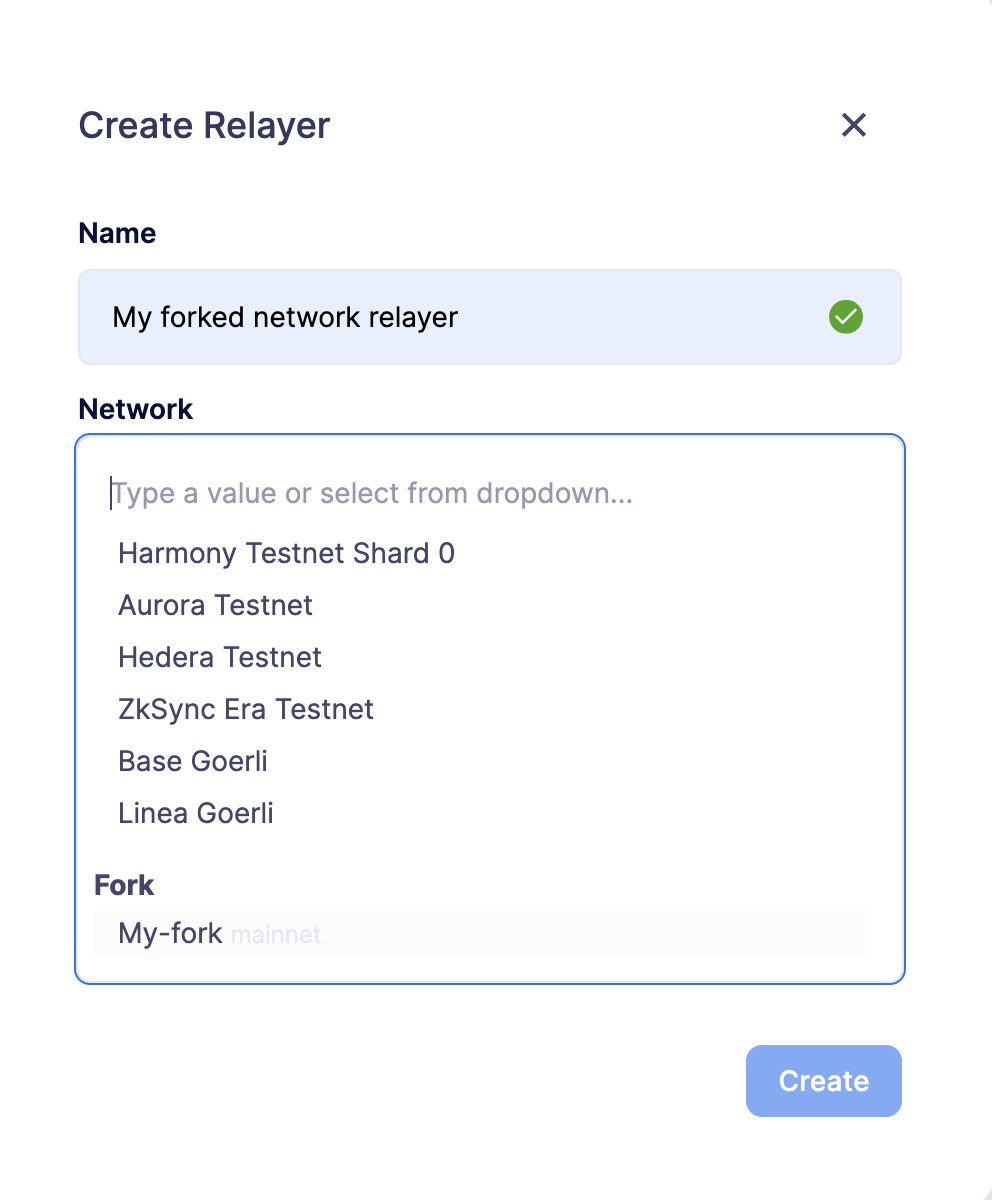
Forked Networks
In the "Forked Networks" section, you can manage and oversee your forked networks. These networks let you test the efficiency of your security setup and offer a vital chance to identify and fix any problems before launching on testnets and mainnets.
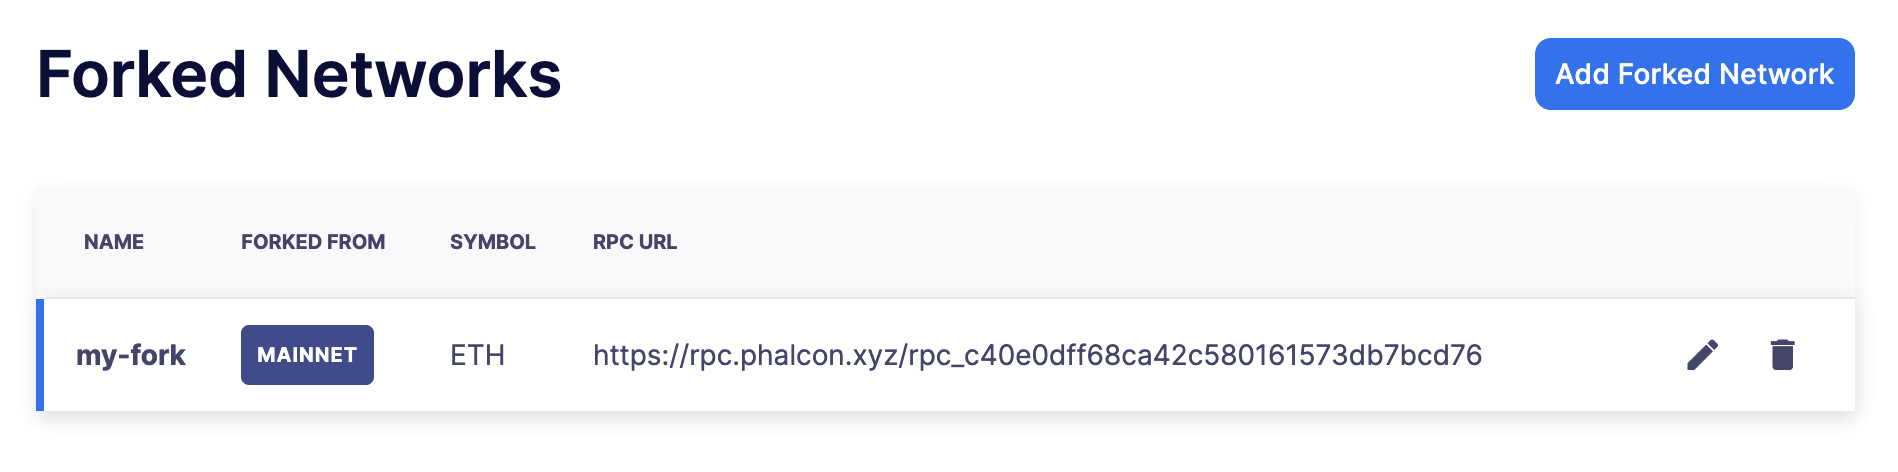
Setting up a forked network is accomplished by clicking the "Create Forked Network" button. This action prompts you to provide a name for the forked network and select the base network you intend to fork from. Your choice of forking can be made from any of the networks supported by Defender. The network’s currency symbol will be automatically populated based on the network you select. Additionally, you will need to input the RPC URL for the forked network and, optionally, an API key if it is required for access.
For an improved user experience, you also have the option to include the block explorer URL.
Once created, the network becomes accessible for utilization in any Defender module that necessitates network selection. This is particularly valuable when engaging in tasks such as establishing an approval process, configuring a relayer, or deploying a contract.
| Once you have created a Forked Network you cannot edit its name or RPC URL. If you need to change these settings you will need to delete and recreate the Forked Network. When a forked network is deleted, all associated resources will also be deleted. This includes approval processes, relayers, contracts, address book entries, etc. |
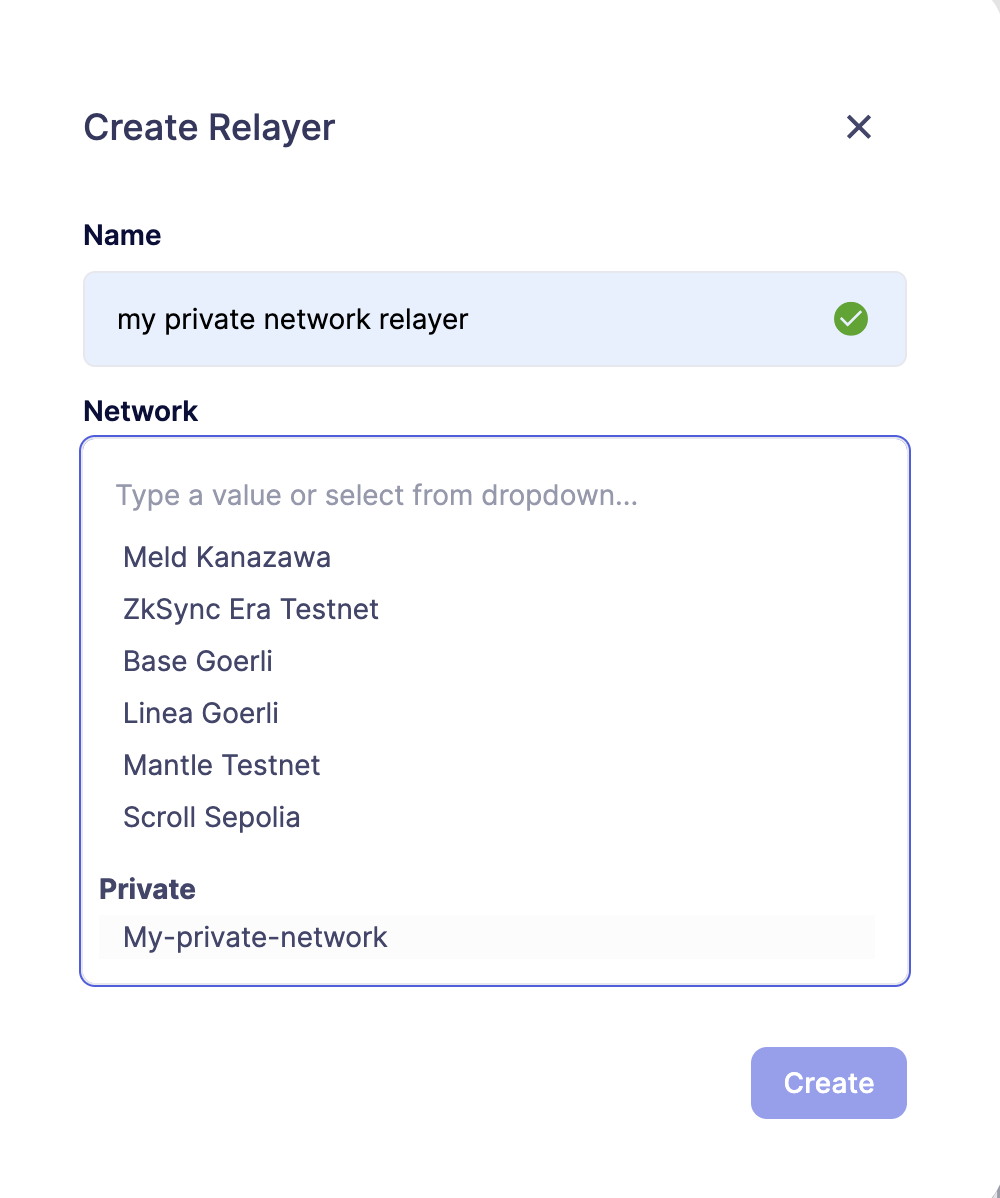
Private Networks
Navigate through the "Private Networks" section to effectively manage and oversee your private networks. These networks establish a restricted and controlled environment tailored for testing and validating network configurations. This controlled space empowers users to identify and resolve potential issues before deploying configurations to production environments, providing a secure venue to evaluate system functionality and security measures in isolation.
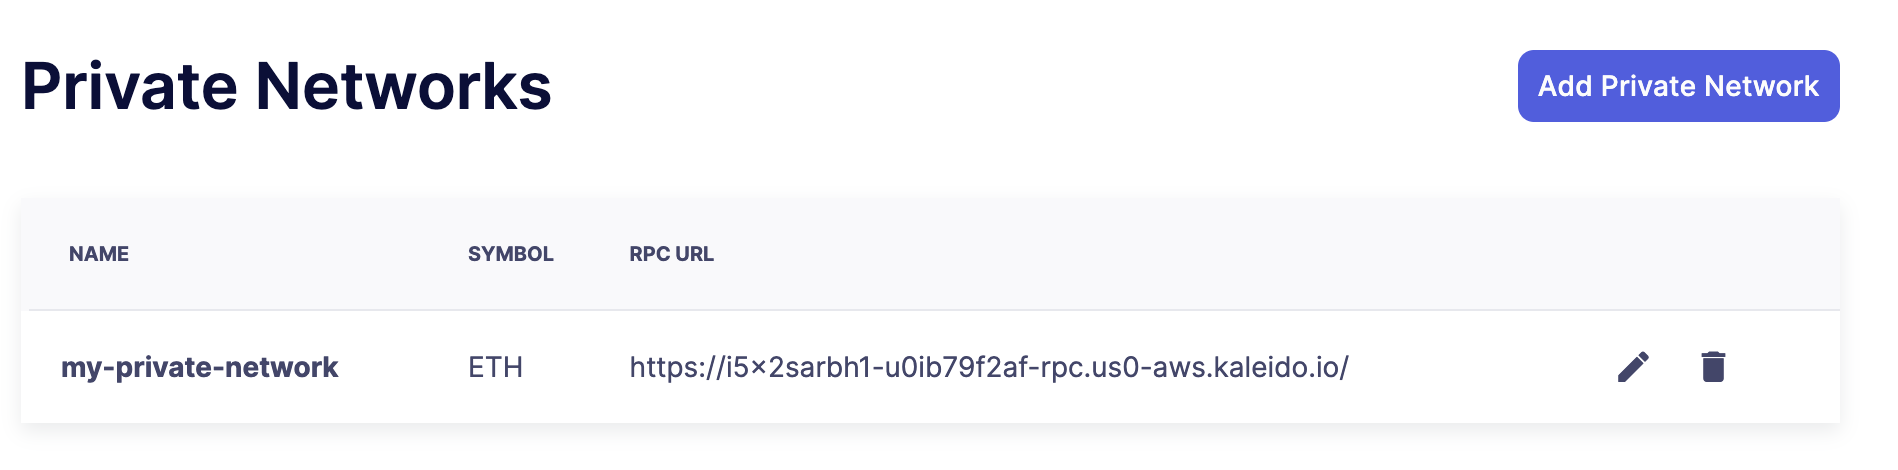
To set up a private network, simply click the "Create Private Network" button. This action prompts you to define a name for the private network and select the currency symbol ("ETH") for your network. Additionally, provide the RPC URL, and optionally, an API key if access requires it.
For an enhanced user experience, customize your setup by including the block explorer URL, Safe contract deployment addresses, and a subgraph URL.
Safe Contracts form a comprehensive collection of smart contracts designed for deploying, managing, and interacting with multi-signature wallets. Defender utilizes the following Safe contract deployments to enrich the user experience:
-
Master: Facilitates a Safe multisignature wallet deployment with support for confirmations using signed messages based on EIP-712.
-
Proxy Factory: Enables a Safe smart contract deployment to create a new proxy contract and execute a message call to the new proxy within a single transaction.
-
Multi Send Call Only: Allows a Safe smart contract deployment to batch multiple transactions into one, specifically for calls.
-
Create Call: Facilitates a Safe smart contract deployment to utilize different create opcodes for deploying a contract.
You can deploy these contracts on your private network, providing the contract addresses in the creation form to leverage them in Defender, especially when deploying using CREATE2.
Defender utilizes Subgraph for GraphQL-based querying of blockchain data, primarily for the Access Control module. Create your own Subgraph, and input the endpoint in the creation form to activate this functionality in Defender. You can find an example configuration for the Access Control subgraph here.
Once created, the network becomes accessible for utilization in any Defender module requiring network selection. This proves invaluable when engaging in tasks such as establishing an approval process, configuring a relayer, or deploying a contract.
| After creating a Private Network, you cannot edit its name, RPC URL, or symbol. To make changes, you must delete and recreate the Private Network. Deleting a private network will also delete all associated resources, including approval processes, relayers, contracts, address book entries, etc. |
Advanced
In the Advanced tab, you can export the serverless configuration file from the current configuration for your Defender account.
This can be used to setup automated resource management for your account with configuration as code. Also, in Advanced, you can delete your Defender account. This action is non-reversible, all Defender configurations will be deleted, and all product functions will be canceled and removed.