Relaying gasless meta-transactions with a web app
Gasless meta-transactions offer users a more seamless experience on the blockchain, potentially eliminating the need to spend money on gas fees for every interaction. This method allows users to sign a transaction for free and have it securely executed by a third party, with that party paying the gas to complete the transaction.
Defender provides a seamless experience and secure way to implement gasless meta-transactions using Relayers. These Relayers handle sending transactions on behalf of users, eliminating the need for users to manage private keys, transaction signing, nonce management, gas estimation, and transaction inclusion.
This demo app showcases how to implement meta-transactions using not just ERC-2771, but also explores other gasless transaction standards:
- ERC-2771: Secure Native Meta Transactions: This demo app implements meta-transactions using ERC2771Forwarder and ERC2771Context to separate
msg.senderfrom the Relayer’s address. All the user needs to do is sign a message using the account they would like to issue the transaction from. The signature is formed for the target contract and the data of the desired transaction, using the user’s private key. This signing happens off-chain and costs no gas. The signature is passed to the Relayer so it can execute the transaction for the user (and pay the gas). - ERC-2612: Permit Function: This standard introduces a method for enabling gasless token approvals in ERC-20 tokens. Users can grant spending permission to a relayer service by signing a message instead of directly paying gas fees for the traditional "approve" function. This allows the relayer to handle token approvals on the user’s behalf.
- ERC-3009: Transfer with Authorization: This standard facilitates gasless token transfers through off-chain authorizations. Users sign messages authorizing specific token transfers, which can then be submitted to the blockchain by anyone, including a relayer service.
A gasless meta-transaction relay can be easily and securely implemented using Defender with Relayers, which allow you to send transactions easily without needing to manage private keys, transaction signing, nonce management, gas estimation, and transaction inclusion.
Pre-requisites
1. ERC-2771: Secure Native Meta Transactions
You can view the live demo app here. It accepts registrations directly if the user has the available funds to pay for the transaction, otherwise the data is sent as a meta-transaction.
In the example code, the functionality of the SimpleRegistry contract is to take a string and store it. The contract’s meta-transaction implementation achieves the same result by decoupling the signer from the sender of the transaction.
When comparing the code, note the meta-transaction’s use of _msgSender() as opposed to the SimpleRegistry’s use of msg.sender. By extending from ERC2771Context and ERC2771Forwarder, the contract becomes meta-transaction capable.
All OpenZeppelin contracts are compatible with the use of _msgSender().
The second fundamental change between the two contracts is the need for the meta-transaction contract (Registry) to specify the address of the trusted forwarder, which in this case is the address of the ERC2771Forwarder contract.
1.1 Configure the project
First, fork the repository and navigate to the directory for this guide. There, install the dependencies with yarn:
$ git clone https://github.com/openzeppelin/workshops.git
$ cd workshops/25-defender-metatx-api/
$ yarn
Create a .env file in the project root and supply an API key and secret from the API keys page. A private key will be used for local testing but the Relayer is used for actual contract deployment.
PRIVATE_KEY="0xabc"
API_KEY="abc"
API_SECRET="abc"
1.2 Create Relayer
Run the Relayer creation script, which will use the Defender API parameters in the .env file:
$ yarn create-relayThe Relayer is created using the defender-sdk package:
// ...
const client = new Defender(creds);

// Create Relayer using Defender SDK client.
const requestParams =
  name: 'MetaTxRelayer',
  network: 'sepolia',
  minBalance: BigInt(1e17).toString(),
;

const relayer = await client.relay.create(requestParams);
// ...
After creating it, the script will fetch the Relayer ID and create an API key and secret set to send transacitons via it. The Relayer ID is automatically stored in the relayer.json file, and its API paramteres in the .env file.
1.3 Compile the Contract Using Hardhat
Within the contracts directory, you can find the both the SimpleRegistry.sol and Registry.sol contracts. The former contract contains the meta-transaction functionality, as you can see here:
// SPDX-License-Identifier: MIT
pragma solidity ^0.8.0;

import "@openzeppelin/contracts/metatx/ERC2771Context.sol";
import "@openzeppelin/contracts/metatx/ERC2771Forwarder.sol";

contract Registry is ERC2771Context
  event Registered(address indexed who, string name);

  mapping(address => string) public names;
  mapping(string => address) public owners;

  constructor(ERC2771Forwarder forwarder) // Initialize trusted forwarder
    ERC2771Context(address(forwarder)) {


  function register(string memory name) external
    require(owners[name] == address(0), "Name taken");
    address owner = _msgSender(); // Changed from msg.sender
    owners[name] = owner;
    names[owner] = name;
    emit Registered(owner, name);

}
Run npx hardhat compile to compile it for deployment.
1.4 Deploy Using Relayer
You can easily deploy a compiled smart contract without handling a private key by using the Relayer client from the defender-sdk package.
The deploy.js script pulls the Relayer’s credentials from the local .env file along with the artifacts for the Registry and ERC2771Forwarder contracts and uses ethers.js to deploy. The relevant addresses of these contracts are saved to the local file deploy.json.
// ...
const creds =
  relayerApiKey: process.env.RELAYER_API_KEY,
  relayerApiSecret: process.env.RELAYER_API_SECRET,
;
const client = new Defender(creds);

const provider = client.relaySigner.getProvider();
const signer = client.relaySigner.getSigner(provider,  speed: 'fast' );

const forwarderFactory = await ethers.getContractFactory('ERC2771Forwarder', signer)
const forwarder = await forwarderFactory.deploy('ERC2771Forwarder')
  .then((f) => f.deployed())

const registryFactory = await ethers.getContractFactory('Registry', signer)
const registry = await registryFactory.deploy(forwarder.address)
  .then((f) => f.deployed())
// ...
Run this script with yarn deploy.
After the contracts are deployed, the Relayer key and secret can be safely deleted; they are not needed unless additional local testing is desired. The contract addresses will be saved in the deploy.json file.
1.5 Create Action via API
The demo app uses an Action to supply the necessary logic for telling the Relayer to send a transaction to the Forwarder contract, supplying the signer’s address. The Action will get triggered by each call to its webhook from the app.
Due to the tight relationship between components, the Relayer credentials are securely available to the Action simply by instantiating a new provider and signer.
The position of the Action here is crucial -- only the Action’s webhook is exposed to the frontend. The Action’s role is to execute the transaction according to the logic assigned to it: if the user has funds, they pay for the transaction. If not, the Relayer pays for the transaction.
It’s important that the Relayer’s API key and secret are insulated from the frontend. If the Relayer keys were exposed, anyone could potentially use the Relayer to send any transaction they wanted.
Here is the code for the Action, found in action/index.js:
const  Defender  = require('@openzeppelin/defender-sdk');
const  ethers  = require('hardhat')

const  ForwarderAbi  = require('../../src/forwarder');
const ForwarderAddress = require('../../deploy.json').ERC2771Forwarder;

async function relay(forwarder, request, signature, whitelist)
  // Decide if we want to relay this request based on a whitelist
  const accepts = !whitelist || whitelist.includes(request.to);
  if (!accepts) throw new Error(`Rejected request to ${request.to`);

  // Validate request on the forwarder contract
  const valid = await forwarder.verify(request, signature);
  if (!valid) throw new Error(`Invalid request`);

  // Send meta-tx through relayer to the forwarder contract
  const gasLimit = (parseInt(request.gas) + 50000).toString();
  return await forwarder.execute(request, signature,  gasLimit );
}

async function handler(event)
  // Parse webhook payload
  if (!event.request || !event.request.body) throw new Error(`Missing payload`);
  const { request, signature  = event.request.body;
  console.log(`Relaying`, request);

  // Initialize Relayer provider and signer, and forwarder contract
  const creds =  ... event ;

  const client = new Defender(creds);

  const provider = client.relaySigner.getProvider();
  const signer = client.relaySigner.getSigner(provider,  speed: 'fast' );
  const forwarder = new ethers.Contract(ForwarderAddress, ForwarderAbi, signer);

  // Relay transaction!
  const tx = await relay(forwarder, request, signature);
  console.log(`Sent meta-tx: $tx.hash`);
  return  txHash: tx.hash ;
}

module.exports =
  handler,
  relay,
Note that the Action code must include an index.js file that exports a handler entrypoint. If the code relies on any external dependencies (such as an imported ABI) it’s necessary to bundle the Action using webpack, rollup, etc. You can create an Action via Defender or with the defender-sdk package.
Run yarn create-action to compile the code and create the Action with the bundled code via the SDK’s action.create() method:
// ...
const  actionId  = await client.action.create(
  name: "Relay MetaTx",
  encodedZippedCode: await client.action.getEncodedZippedCodeFromFolder('./build/action'),
  relayerId: relayerId,
  trigger: {
    type: 'webhook'
  ,
  paused: false
});
// ...
Head to Defender Actions and copy the Actions’s webhook so that you can test functionality and connect the app to the Action for relaying meta-transactions.
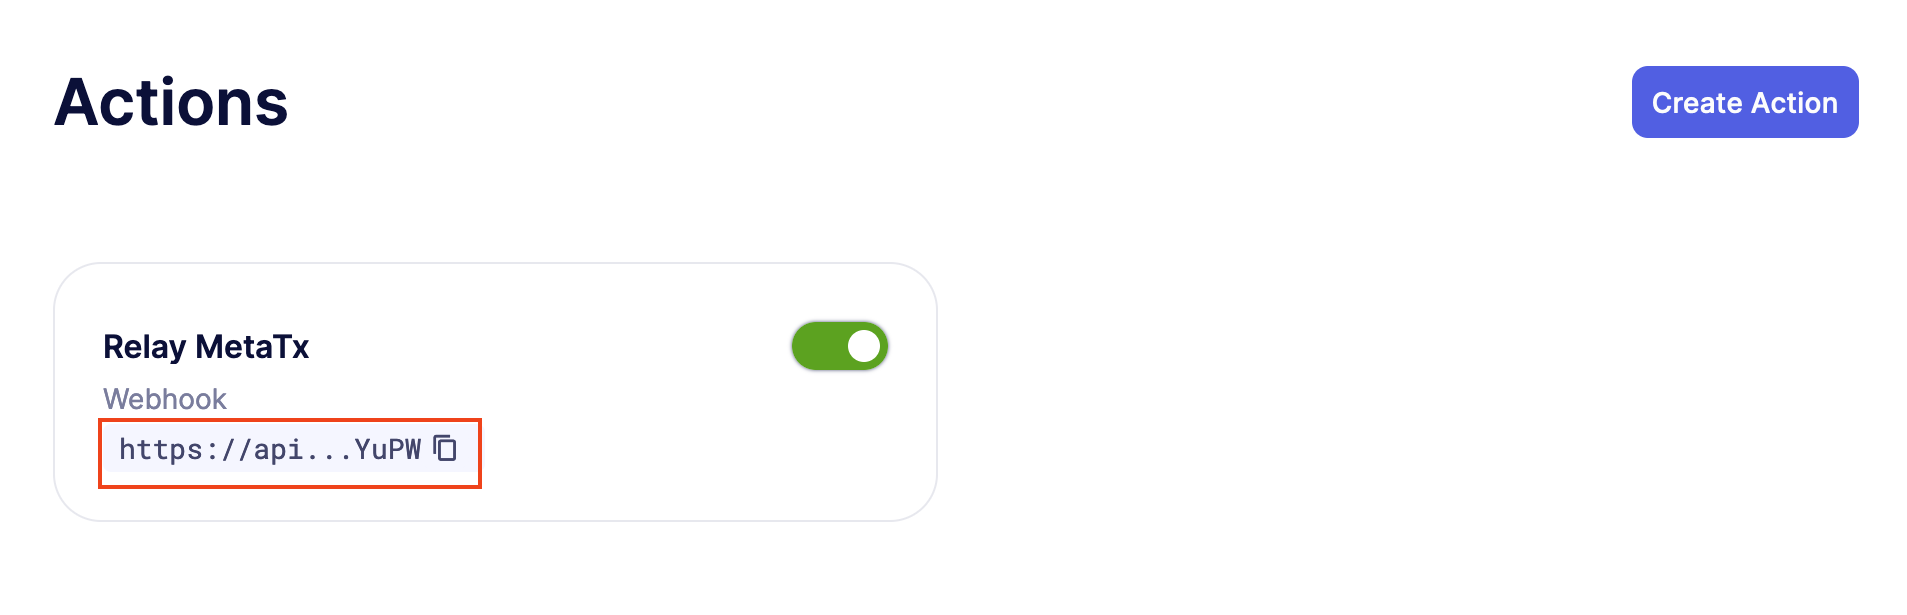
Save the Action webhook in your .env file as WEBHOOK_URL and in the /app .env file as the REACT_APP_WEBHOOK_URL.
Test the meta-transaction’s functionality with yarn sign followed by yarn invoke.
1.6 Create Web App
The key building blocks have been laid, so next it is a matter of crafting a web application that makes use of these components.
You can see the details of this relationship in the register.js file. The user’s transaction request is sent to the Relayer by way of the Action’s webhook, and this executes the Actions’s logic given the parameters supplied by the application. Note that the signer’s nonce is incremented from the transaction.
import  ethers  from 'ethers';
import  createInstance  from './forwarder';
import  signMetaTxRequest  from './signer';

async function sendTx(registry, name)
  console.log(`Sending register tx to set name=${name`);
  return registry.register(name);
}

async function sendMetaTx(registry, provider, signer, name)
  console.log(`Sending register meta-tx to set name=${name`);
  const url = process.env.REACT_APP_WEBHOOK_URL;
  if (!url) throw new Error(`Missing relayer url`);

  const forwarder = createInstance(provider);
  const from = await signer.getAddress();
  const data = registry.interface.encodeFunctionData('register', [name]);
  const to = registry.address;

  const request = await signMetaTxRequest(signer.provider, forwarder,  to, from, data );

  return fetch(url,
    method: 'POST',
    body: JSON.stringify(request),
    headers: { 'Content-Type': 'application/json' ,
  });
}

export async function registerName(registry, provider, name)
  if (!name) throw new Error(`Name cannot be empty`);
  if (!window.ethereum) throw new Error(`User wallet not found`);

  await window.ethereum.enable();
  const userProvider = new ethers.BrowserProvider(window.ethereum);
  const userNetwork = await userProvider.getNetwork();
  console.log(userNetwork)
  if (userNetwork.chainId !== 11155111) throw new Error(`Please switch to Sepolia for signing`);

  const signer = userProvider.getSigner();
  const from = await signer.getAddress();
  const balance = await provider.getBalance(from);

  const canSendTx = balance.gt(1e15);
  if (canSendTx) return sendTx(registry.connect(signer), name);
  else return sendMetaTx(registry, provider, signer, name);
2. ERC-2612: Permit Function
EIP-2612 introduces the permit function, a tool for enabling gasless transactions in ERC-20 tokens. By extending the ERC-20 interface with a method allowing users to modify their allowance via a signed message instead of the approve function, this standard empowers users to approve tokens without directly paying gas fees. This standard enables relayer services to execute transactions on behalf of users by paying gas fees, while the user only needs to sign a message.
function permit(address owner, address spender, uint value, uint deadline, uint8 v, bytes32 r, bytes32 s) externalThis function modifies the allowance of the spender for the owner’s tokens, based on a signed approval. The signature is split into v, r, and s components for verification.
2.1 EIP-712 signing front-end
How it uses EIP-712 for structured data signing: EIP-2612 leverages EIP-712 for creating and signing structured data. This provides a human-readable representation of the data being signed, enhancing security and user experience. Example code:
// ...
 const domain =
    name: name,
    version: '1',
    chainId: chainId,
    verifyingContract: ERC20_ADDRESS,
  ;

  const types =
    Permit: [
      { name: 'owner', type: 'address' ,
       name: 'spender', type: 'address' ,
       name: 'value', type: 'uint256' ,
       name: 'nonce', type: 'uint256' ,
       name: 'deadline', type: 'uint256' ,
    ]
  };

  const value =
    owner: OWNER_ADDRESS,
    spender: SPENDER_ADDRESS,
    value: amount,
    nonce: nonce,
    deadline: deadline,
  ;


  const signature = await wallet.signTypedData(domain, types, value);
  const sig = ethers.Signature.from(signature);
  const recoveredAddress = ethers.verifyTypedData(domain, types, value, signature);

  const request =
    owner: OWNER_ADDRESS,
    spender: SPENDER_ADDRESS,
    amount,
    deadline,
    v: sig.v,
    r: sig.r,
    s: sig.s
  ;

  return fetch(`$url/relayerForwardMessage`,
    method: 'POST',
    body: JSON.stringify(request),
    headers: { 'Content-Type': 'application/json' ,
  });
2.2 Relayer service
Create a back-end service to interact with Defender Relayers. The service will initially require the setup of Defender Relayers. Once configured, it will handle incoming requests from the front-end and forward the signed EIP-712 message to the contract. The service will utilize the Relayers to execute the contract’s permit function, allowing the Relayer to cover gas fees. The service will facilitate token approvals for end-users, enabling subsequent operations with the Relayers, such as transferring tokens to different wallets.
import  ethers, defender  from "hardhat";

// ...
const creds =
  relayerApiKey: process.env.RELAYER_API_KEY,
  relayerApiSecret: process.env.RELAYER_API_SECRET,
;
const client = new Defender(creds);

const provider = client.relaySigner.getProvider();
const signer = client.relaySigner.getSigner(provider,  speed: 'fast' );

const erc20 = await ethers.getContractAt("ERC20Token", CONTRACT_ADDRESS);

// You can now use these values to call the permit function
// permit(address owner, address spender, uint256 value, uint256 deadline, uint8 v, bytes32 r, bytes32 s)
const tx = await erc20.permit(
  request.owner,
  request.spender,
  request.amount,
  request.deadline,
  request.v,
  request.r,
  request.s
);

await tx.wait();
console.log("Permit executed!");

// Example subsequent operation
const transferTx = await erc20.transferFrom(request.owner, to, request.amount);
await transferTx.wait();
// ...
3. ERC-3009: Transfer with Authorization
ERC-3009 introduces a standard for gasless token transfers through off-chain authorizations. This standard allows users to sign messages authorizing token transfers, which can then be submitted to on-chain by anyone, through the Defender Relayers service. Comparison with EIP-2612 (signing differences): While EIP-2612 focuses on approvals, ERC-3009 directly authorizes transfers. The key differences are:
- Purpose: ERC-3009 authorizes specific transfers, while EIP-2612 approves an allowance.
- Flexibility: ERC-3009 doesn’t require EIP-712 for structured data signing, offering more flexibility in message formatting.
- Time Window: ERC-3009 includes validAfter and validBefore parameters, allowing for more precise control over when the authorization can be executed.
The function definition:
function transferWithAuthorization(
    address from,
    address to,
    uint256 value,
    uint256 validAfter,
    uint256 validBefore,
    bytes32 nonce,
    uint8 v,
    bytes32 r,
    bytes32 s
) external
3.1 EIP-712 signing front-end
Similar to ERC-2612, you can use the EIP-712 format to sign messages on the front-end as the end user. While ERC-3009 offers more flexibility for front-end message signing, this example adheres to the EIP-712 standard. Example code:
  //...

  const validAfter = Math.floor(Date.now() / 1000); // Now
  const validBefore = validAfter + 3600; // 1 hour from validAfter
  const value = ethers.parseEther("10"); // Amount to transfer
  const nonce = ethers.randomBytes(32);

  const domain =
    name: name,
    version: '1',
    chainId: chainId,
    verifyingContract: ERC20_ADDRESS,
  ;

  const types =
    TransferWithAuthorization: [
      { name: 'from', type: 'address' ,
       name: 'to', type: 'address' ,
       name: 'value', type: 'uint256' ,
       name: 'validAfter', type: 'uint256' ,
       name: 'validBefore', type: 'uint256' ,
       name: 'nonce', type: 'bytes32' ,
    ]
  };

  const valueToSign =
    from: FROM_ADDRESS,
    to: TO_ADDRESS,
    value: value,
    validAfter: validAfter,
    validBefore: validBefore,
    nonce: nonce,
  ;


  const signature = await wallet.signTypedData(domain, types, valueToSign);
  const sig = ethers.Signature.from(signature);
  const request =
    from: FROM_ADDRESS,
    to: TO_ADDRESS,
    value,
    validAfter,
    validBefore,
    nonce,
    v: sig.v,
    r: sig.r,
    s: sig.s
  ;

  return fetch(`$url/relayerForwardMessage`,
    method: 'POST',
    body: JSON.stringify(request),
    headers: { 'Content-Type': 'application/json' ,
  });
3.2 Relayer service
Create a back-end service to interact with Defender Relayers. The service will initially require the setup of Defender Relayers. Once configured, it will handle incoming requests from the front-end and forward the signed messages to the contract. The service will utilize the Relayers to execute the contract’s transferWithAuthorization function, allowing the Relayer to cover gas fees. The service will facilitate the transfer of tokens for the end-users.
import  ethers, defender  from "hardhat";

// ...
const creds =
  relayerApiKey: process.env.RELAYER_API_KEY,
  relayerApiSecret: process.env.RELAYER_API_SECRET,
;
const client = new Defender(creds);

const provider = client.relaySigner.getProvider();
const signer = client.relaySigner.getSigner(provider,  speed: 'fast' );

const erc20 = await ethers.getContractAt("ERC20Token", CONTRACT_ADDRESS);

const tx = await erc20.transferWithAuthorization(
    request.from,
    request.to,
    request.value,
    request.validAfter,
    request.validBefore,
    request.nonce,
    request.v,
    request.r,
    request.s
);

await tx.wait();
console.log("TransferWithAuthorization executed!");
// ...
Try the app
Install the necessary dependencies and run the app.
$ cd app
$ yarn
$ yarn start- Open app: http://localhost:3000/
- Change to Sepolia network in Metamask
- Enter a name to register and sign the meta-transaction in Metamask
- Your name will be registered, showing the address that created the meta-transaction and the name.
Use the frontend to see it working for yourself! Compare what happens when you sign the registry with an account that has funds, and then try it with an account that has a zero ETH balance.